Last updated: September 2025 | 12 min read
Here’s something most beginner artists don’t realize: erasers aren’t just for fixing mistakes.
Professional artists use erasers as precision drawing tools—creating highlights in eyes, adding texture to fur, pulling out individual hair strands, and building dimension in their work. The right eraser can transform your art from flat to three-dimensional, from amateur to professional.
But walk into any art store, and you’ll face a bewildering wall of options: kneaded, vinyl, electric, gum, sand, pencil-style… How do you know which one you actually need?
After testing dozens of erasers across different mediums and interviewing working artists, I’ve created this comprehensive guide to help you choose the perfect eraser for your specific needs—whether you’re working with graphite, colored pencils, charcoal, or even ink.
In this guide, you’ll discover:
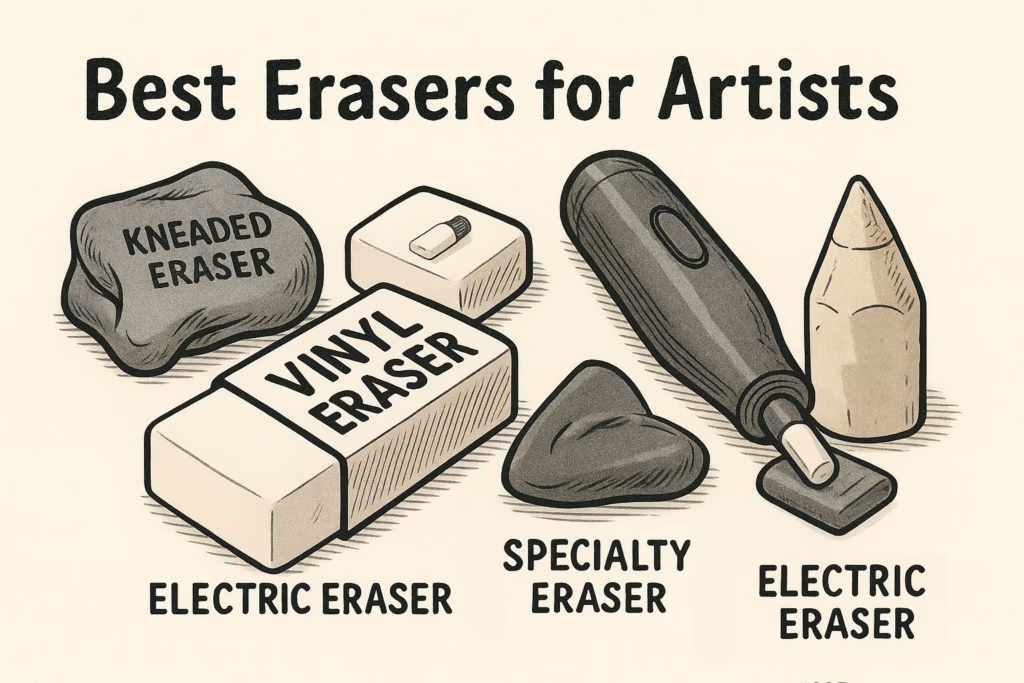
- The 6 essential eraser types and exactly when to use each one
- Why electric erasers are game-changers for detail work (and which ones are worth buying)
- Professional techniques artists use to create effects impossible with pencils alone
- How to avoid the common mistakes that damage your paper and ruin your work
- The complete eraser kit setup for every budget level
Let’s dive in.
Why the Right Eraser Actually Matters for Your Art
Erasers as Drawing Tools, Not Just Error Fixers
Here’s the paradigm shift: erasers are creative tools, not cleanup tools.
Professional graphite and charcoal artists use erasers to:
- Create highlights that can’t be achieved by leaving paper white (eye catchlights, light reflecting off metal, water droplets)
- Add texture by strategically removing medium (individual grass blades, animal fur detail, fabric weave)
- Build dimension through subtractive drawing techniques
- Refine edges with surgical precision
- Lighten values without completely removing marks
One artist I interviewed uses her electric eraser to draw backlit stems, tiny flower stamens, eye highlights, insect wings, leaf textures, grass patterns, and reflections in metal and glass. She depends on her erasers as much as her pencils.
Common Eraser Mistakes That Damage Your Work
Mistake #1: Using the wrong eraser type for your medium
Trying to erase colored pencil with a kneaded eraser? You’ll just smudge it. Using a vinyl eraser on delicate watercolor paper? You’ll tear right through it.
Mistake #2: The aggressive rub
Scrubbing back and forth with too much pressure damages paper fibers, creates shine spots, and embeds graphite deeper into the surface.
Mistake #3: Contaminated erasers
A dirty eraser covered in graphite will smudge your work instead of cleaning it. Regular eraser cleaning is essential but often overlooked.
Mistake #4: Ignoring paper security
Erasing toward an unsecured edge will buckle and damage your paper every single time.
Now that you understand why eraser choice matters, let’s break down exactly which types exist and when to use each one.
The 6 Essential Eraser Types Every Artist Should Know
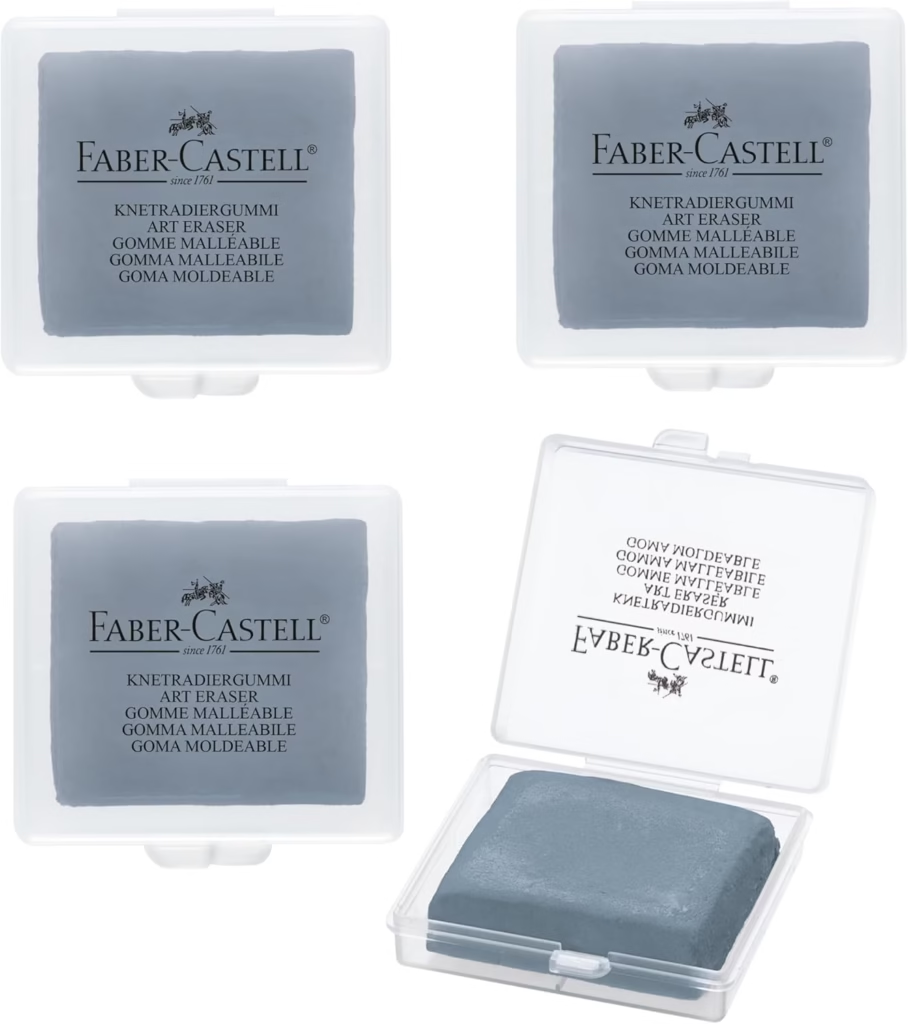
1. Kneaded Erasers: The Artist’s Swiss Army Knife
What They Are:
Soft, gray, putty-like erasers that can be molded into any shape. They work by absorbing and lifting graphite, charcoal, and pastel particles rather than rubbing them away.
Key Characteristics:
- No residue or crumbs
- Extremely gentle on paper
- Can be shaped to fine points
- Reusable through kneading
Best For:
- Graphite and charcoal drawing
- Pastel work
- Lightening areas without complete removal
- Creating subtle highlights and textures
- Working on soft or delicate papers
Top Recommendations:
- Faber-Castell Kneadable Art Eraser 4-Pack ($12-15) – Each eraser comes in its own storage case, staying clean and fresh
- Prismacolor Premier Kneaded Rubber Eraser ($4-6) – Professional favorite, highly moldable
- General’s Kneaded Eraser ($3-5) – Classic choice, slightly sticky but very effective
How to Use:
- For detail work: Pinch off a small piece and roll into a point
- For lightening: Press and lift without rubbing (tapping motion)
- For texture: Roll into a tube shape and dab across surface
- To clean: Stretch and fold repeatedly until graphite disperses
Pro Tips:
- Keep in a sealed container or pill bottle to prevent dust collection
- Replace when it becomes saturated and stops absorbing (it will start leaving marks instead of erasing)
- Warm it in your hands before use for better malleability
Limitations:
- Cannot completely remove heavy graphite
- Becomes less effective with colored pencils (will lighten but not erase)
- Gets lost easily due to sticky nature
2. Vinyl/Plastic Erasers: The Heavy-Duty Workhorses
What They Are:
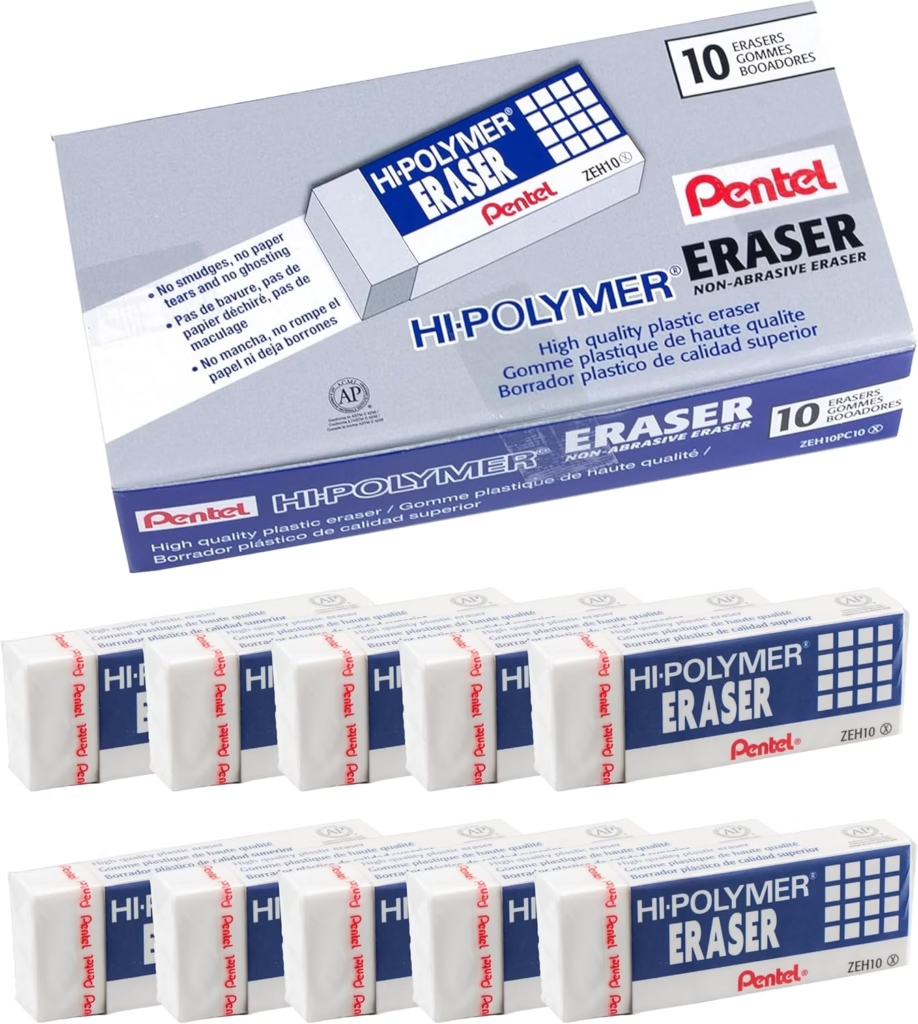
Firm, white erasers made from high-quality plasticized vinyl. They’re more effective than traditional rubber erasers and can achieve complete graphite removal—even lifting ink in some cases.
Key Characteristics:
- Clean, residue-free erasing
- Very little crumbling
- Can remove stubborn marks
- Harder than rubber erasers
Best For:
- Removing pencil sketches after inking
- Drafting and technical drawing
- Complete graphite removal (getting back to pure white)
- Working on heavier paper stocks
Top Recommendations:
- Pentel Hi-Polymer Block Eraser ($1-2 each, $12 for 10-pack) – Industry standard, extremely durable
- Staedtler Mars Plastic ($2-3) – German engineering, premium quality
- Tombow MONO Eraser ($2-3) – Japanese precision, trusted by professionals
The Two-Step Professional Technique: Here’s an insider secret that will save your artwork: Never use a vinyl eraser on heavy graphite as your first step.
The right way:
- First, use a kneaded eraser to press and lift, pulling up as much graphite as possible
- Then use your vinyl eraser to remove the remainder
Why? If you start with a vinyl eraser on dark graphite, you’ll smear it and drive it deeper into the paper fibers. The kneaded eraser lifts most of the pigment first, allowing the vinyl eraser to do clean finishing work.
Pro Tips:
- Cut erasers into custom shapes for precision work (wedges, points, curves)
- Use gentle pressure—let the eraser do the work
- Can damage soft paper, so test on scrap first
- Excellent for general cleanup around drawing edges
3. Electric Erasers: Game-Changers for Precision Work
What They Are:
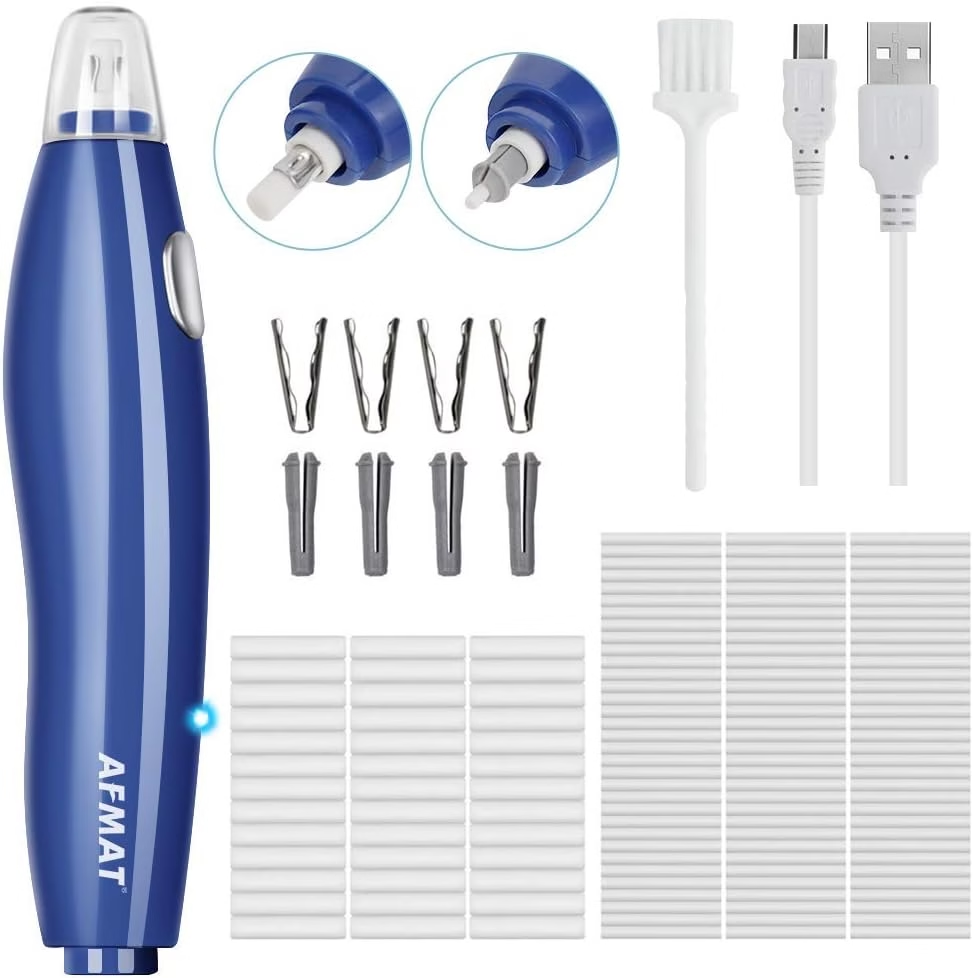
Battery-operated or USB-rechargeable tools with a spinning rubber or vinyl nib. Think of them as power tools for artists—they do in seconds what would take minutes with manual erasers.
Why Artists Are Obsessed:
Electric erasers solve a fundamental problem: How do you create pinpoint-precise highlights and details in finished work without disturbing surrounding areas?
The answer: A tiny spinning eraser tip moving at 10,000+ RPM with surgical precision.
Key Advantages:
- Remove marks faster with less pressure
- Target specific areas without accidentally erasing surrounding work
- Create effects impossible with manual erasers (individual hair strands, tiny catchlights)
- Reduce hand and wrist fatigue during long sessions
- Get back to pure white paper more easily
- Perfect for artists with arthritis or hand mobility issues
Real-World Applications:
- Portrait work: Crisp catchlights in eyes, fine hair flyaways, skin pore details
- Architectural drawing: Clean, precise line corrections
- Colored pencil: Small highlights that white pencil can’t achieve
- Comic/manga art: Speed lines, reflections on metal, glass effects
- Realistic drawing: Backlit edges, light through translucent objects
Top Recommendations:
Best Overall: Tombow MONO ZE12 ($35-40)
The gold standard. Spins at 10,000+ RPM with virtually no wobble. Includes rechargeable battery and multiple eraser tips. Professional artists swear by this one.
Runner-Up: Derwent Battery-Operated Eraser ($9-16)
Exceptional performance at half the price. Uses AAA batteries, handles charcoal and colored pencils beautifully. Perfect balance of affordability and quality.
Budget Champion: AFMAT Electric Eraser ($14-18)
USB rechargeable, comes with two tip sizes (5mm and 2.3mm), includes generous supply of refills. Incredible value for money.
Precision Specialist: Afmat Detailer ($16-20)
Ultra-slim body, minimal vibration, perfect for meticulous detail work. Strong motor for clean lifts.
Battery vs. Rechargeable:
- USB rechargeable: No battery purchases, more environmentally friendly, always ready after charging
- Battery-powered: No waiting for charge, easy to replace power source, slightly more portable
How to Use Like a Pro:
- Use light pressure – The motor does the work, not your hand
- Keep the tip clean – Wipe frequently on scrap paper to avoid smudging
- Use short pulses – Don’t hold in one spot; quick touches prevent paper damage
- Sharpen the nib – Spin at an angle over fine sandpaper to create a point for insanely fine lines
- Practice control – Test on scrap paper first to get comfortable with the speed
Advanced Technique: Drawing with Your Eraser
Here’s where it gets exciting. Professional artists use electric erasers to actually draw, not just erase:
- For hair: Create individual strand highlights by drawing through shaded areas
- For grass: Pull upward strokes to create backlit blades
- For fabric texture: Make tiny dots and dashes for weave patterns
- For metal reflections: Draw precise light streaks
- For eyes: Create multi-layered catchlights with different sizes
Limitations:
- Not suitable for lightening large value areas (too powerful)
- Makes buzzing noise (about as loud as electric toothbrush)
- Initial cost investment
- Can lift delicate inks and washes
Pro Tips:
- Buy extra refill tips—they’re inexpensive and you’ll go through them quickly at first
- Some artists prefer battery models for plein air work (no need to remember to charge)
- Clean motor housing periodically to prevent eraser dust buildup
4. Rubber Erasers: The Classic Pink Pearls
What They Are:
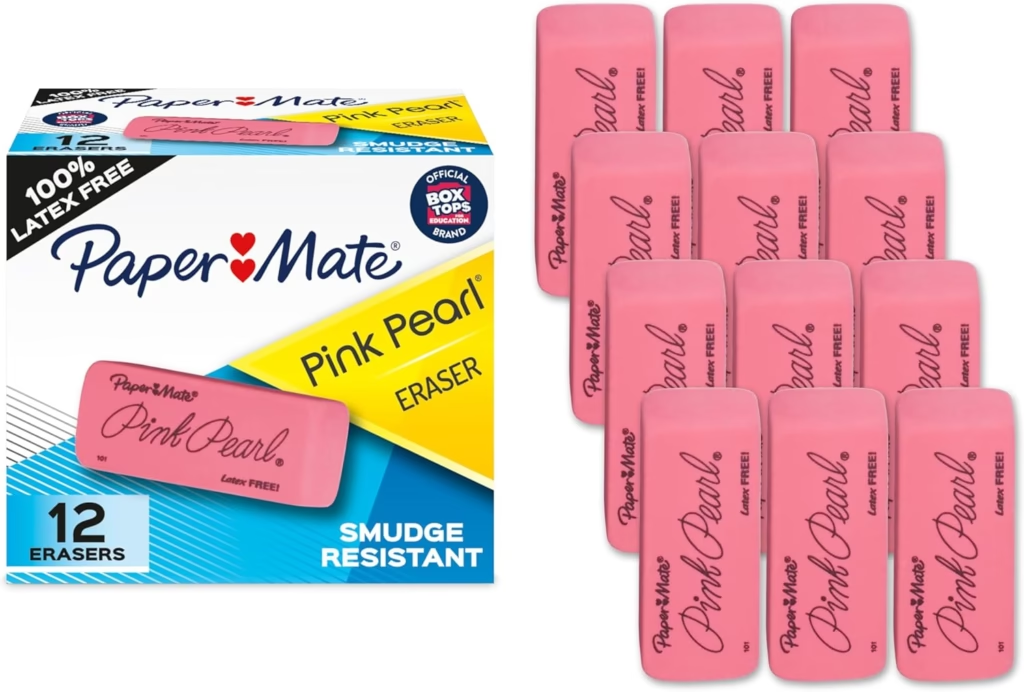
Traditional pink erasers found on the end of every #2 pencil. In art, the Paper Mate Pink Pearl in wedge form is the iconic example.
Key Characteristics:
- Firm texture
- Removes graphite by shedding itself
- Creates residue/crumbs
- Available everywhere
Best For:
- General-purpose graphite erasing
- Budget-conscious artists
- Quick sketches and studies
- Classroom and office work
Price Range: $0.25-$0.75 per eraser
Top Pick: Paper Mate Pink Pearl 12-Pack ($8-10) – Classic design, reliable performance, excellent value
Advantages:
- Extremely affordable
- Widely available
- Effective on standard graphite
- Good wedge shape for both broad and edge erasing
Limitations:
- Can tear paper with aggressive use
- Less precise than vinyl or kneaded options
- Leaves more residue than modern erasers
- Contains latex (concern for some users)
When to Use: For general sketching and preliminary work where precision isn’t critical. Also great as backup erasers to keep in every bag, car, and drawer.
5. Gum/Art Gum Erasers: Gentle Giants
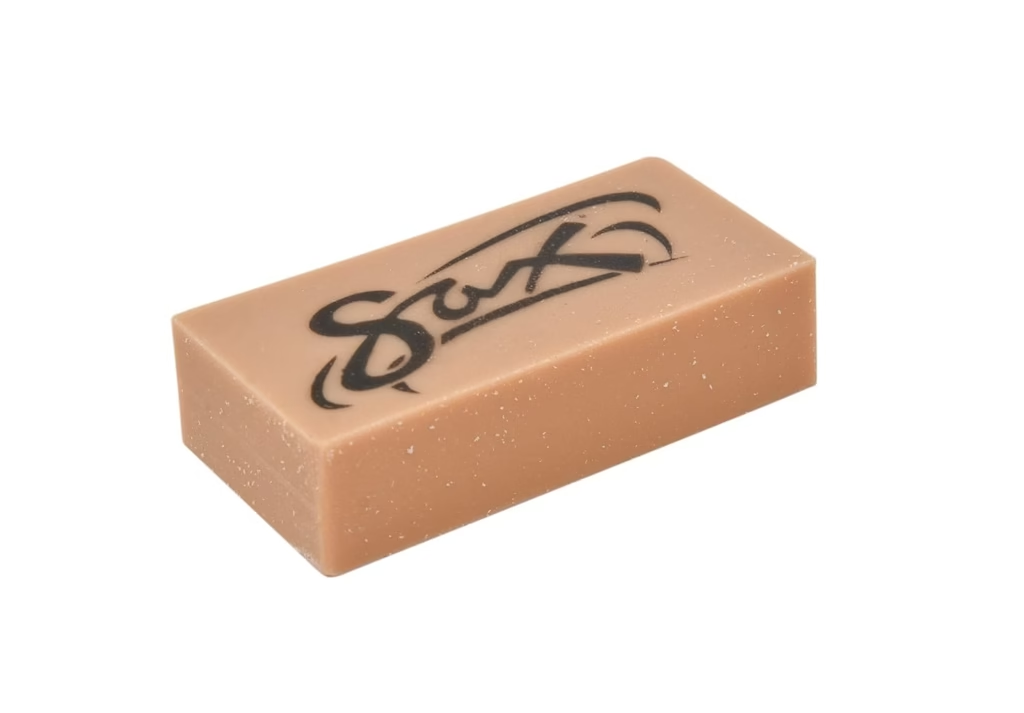
What They Are:
Soft, crumbly rubber erasers that are much gentler than standard rubber. Usually brown or tan in color, sometimes semi-transparent.
Key Characteristics:
- Very soft and pliable
- Crumbles as it erases (this is intentional)
- Extremely gentle on paper
- Absorbs graphite into crumbs
Best For:
- Delicate or soft papers that tear easily
- Large area lightening
- General cleanup of graphite dust
- Situations where paper integrity is paramount
Price Range: $0.50-$2
Top Recommendations:
- Sax Gum Art Erasers ($8 for 12) – Erases deeper than most art gums
- Prismacolor Design Art Gum ($2-3) – Dual-purpose, acts as both eraser and cleaner
Advantages:
- Will never tear paper, even with aggressive rubbing
- Good for removing light graphite layers
- Can break off pieces for small area work
- Inexpensive
Limitations:
- Creates lots of messy crumbs
- Not precise
- Shorter lifespan due to crumbling nature
- Tends to smudge charcoal and pastel rather than erase
- Cannot achieve complete graphite removal
Pro Tip: Use as a “sweeper” eraser to clean up graphite dust and light marks around your finished drawing without risking damage to the paper.
6. Specialty Erasers: For Specific Challenges
Sand/Ink Erasers
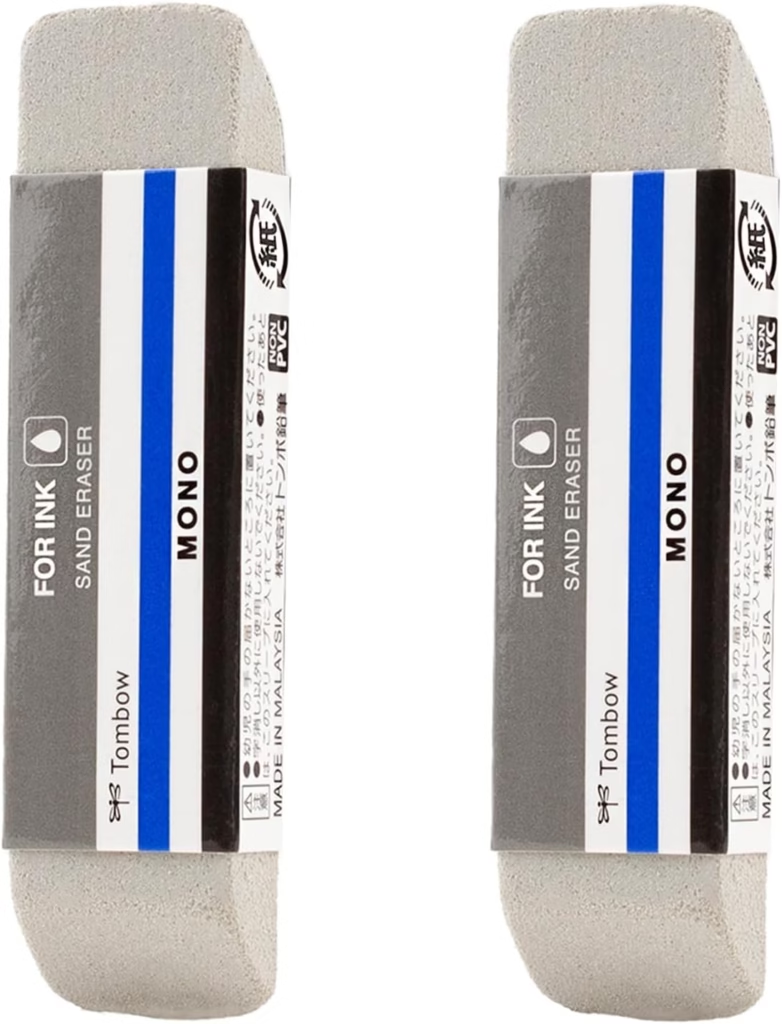
What They Are: Combination of rubber and fine sand or silica particles, creating an abrasive erasing surface.
Best For:
- Colored pencil marks (the most stubborn medium to erase)
- Ink corrections
- Pastel and heavy graphite
Top Pick: Tombow MONO Sand Eraser 2-Pack ($4-6)
Key Features:
- Extremely effective on materials other erasers can’t touch
- No smudging or smearing
- Leaves minimal residue
Critical Warning: These are very abrasive. Only use on thick, rough paper or you’ll damage the surface. Test on scrap first.
Pro Use Case: Colored pencil artists use sand erasers to create highlights in finished work by carefully removing pigment from small areas—something nearly impossible with other erasers.
Eraser Pencils
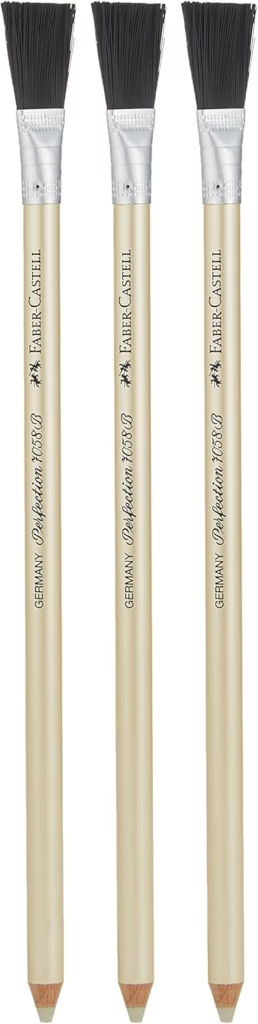
What They Are: Vinyl erasers shaped like pencils that can be sharpened to ultra-fine points.
Best For:
- Tiny details and highlights
- Architectural precision work
- Adding fine texture elements
Top Recommendations:
- Faber-Castell Perfection 7058 ($3-4) – White tip erases liquid, water-based, and ballpoint inks
- Faber-Castell Perfection 7056 ($3-4) – Red soft tip for graphite precision erasing
- Tombow MONO Zero ($4-5) – Ultra-fine 2.3mm or 2.5mm tip, pen-shaped design
Usage Tips:
- Sharpen frequently for best results
- Wipe tip often to prevent smudging
- Use extremely light pressure due to vinyl firmness
- Comes with brush attachment on some models to sweep away residue
Advanced Technique: Some artists sharpen to needle points for drawing individual highlight lines through dark areas—think single whiskers on animals or fine wire details.
Glass Eraser Pencils
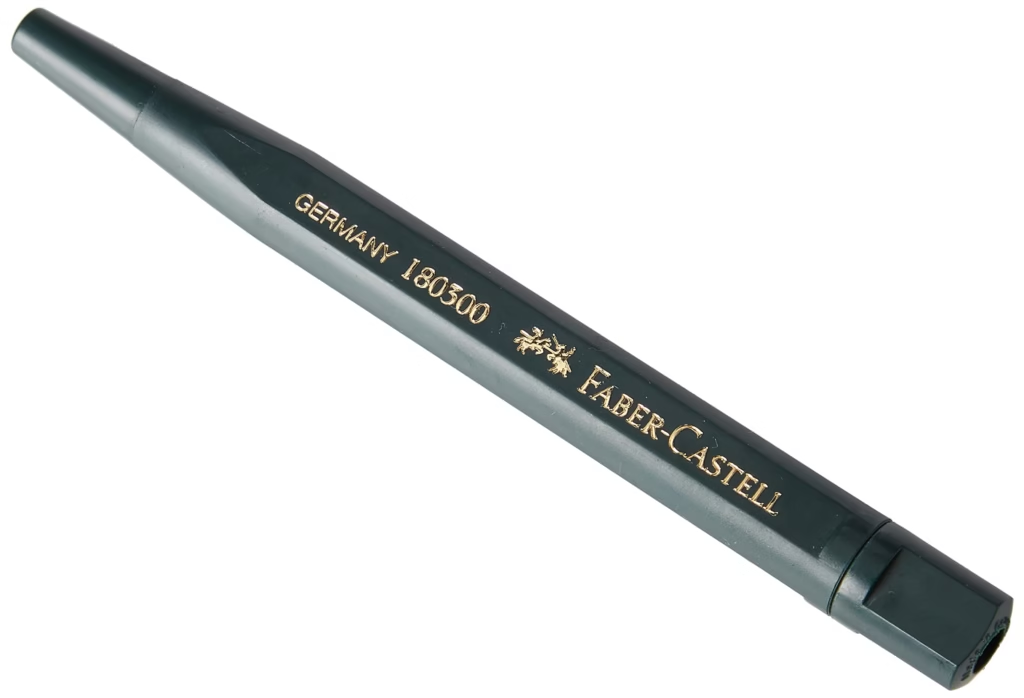
What They Are: Specialist tools with fiberglass nibs designed for technical work.
Primary Use: Erasing India ink from transparent paper and drafting film
Who Needs Them: Architects, technical illustrators, specialized fine artists working with ink on film
Note: Very niche product—most general artists won’t need these.
Dual-Purpose Erasers
Staedtler Mars Plastic Combi: One end erases pencil (white), other end erases ink (blue). Latex-free, also removes overhead projector marks.
Price: $3-5
Ideal For: Artists who work in multiple mediums and want one versatile tool.
Quick Reference: Eraser Type Comparison Chart
| Eraser Type | Best For | Price | Pros | Cons | Skill Level |
|---|---|---|---|---|---|
| Kneaded | Graphite, charcoal, pastels | $3-8 | No residue, moldable, gentle on paper | Gets saturated, sticky | All |
| Vinyl/Plastic | Complete graphite removal, drafting | $1-5 | Clean erasing, precise, durable | Can damage soft paper | Intermediate+ |
| Electric | Precision highlights, details | $9-40 | Fast, precise, reduces fatigue | Cost, requires power | Intermediate+ |
| Rubber (Pink) | General graphite sketching | $0.25-0.75 | Cheap, available everywhere | Tears paper, imprecise | Beginner |
| Gum/Art Gum | Large areas, delicate paper | $0.50-2 | Ultra-gentle, won’t tear | Messy crumbs, not precise | Beginner |
| Sand/Ink | Colored pencil, ink | $3-6 | Removes stubborn marks | Very abrasive | Advanced |
| Eraser Pencils | Fine details, highlights | $2-5 | Ultra-precise control | Easy to damage paper | Intermediate+ |
How to Choose the Right Eraser for Your Medium
For Graphite Drawing
Primary workhorse: Kneaded eraser for general work, lightening, and texture
Heavy lifting: Vinyl eraser for complete removal (use two-step method)
Precision highlights: Electric eraser for eye catchlights, hair strands, fine details
Large area cleanup: Gum eraser for general surface cleaning
Complete graphite kit: Kneaded + Vinyl + Electric = Everything covered
For Colored Pencil Art
The challenge: Colored pencils are notoriously difficult to erase due to wax or oil binders.
Reality check: Most colored pencils won’t erase completely but will lighten when worked.
Best approach: Sand eraser for removing pigment (gentle pressure on thick paper only)
For highlights: Electric eraser with light touch to pull out small bright spots
For blending/lightening: Kneaded eraser to gently lift and blend colors
Pro tip: Many colored pencil artists prefer to leave paper white for highlights rather than erase. Plan ahead when possible.
For Charcoal Work
Essential tool: Kneaded eraser is non-negotiable for charcoal. It absorbs particles without smearing.
Primary techniques:
- Press and lift to lighten areas
- Shape to point for highlight details
- Roll across surface for texture
- Use for final corrections and refinement
Secondary tool: Soft block eraser for large area removal
What NOT to use: Vinyl erasers (too aggressive, will smear charcoal), Gum erasers (tend to smudge rather than lift)
For Ink Correction
Important: Most inks are permanent by design. Erasing is difficult and may damage paper.
Best options:
- Faber-Castell Perfection 7058 Eraser Pencil (white tip) for water-based, liquid, and ballpoint inks
- Sand erasers for careful removal
- Ink eradicator pens for specific blue fountain pen inks
Critical notes:
- Ink erasers are abrasive and will scrape paper surface
- Only use on small mistakes
- Test on scrap paper first
- Consider correction tape or fluid for large errors
Pro alternative: Many professional artists prefer to work around ink mistakes or incorporate them into the design rather than risk paper damage.
For Pastel Art
Primary: Kneaded eraser (doesn’t smudge, lifts particles cleanly)
For large areas: Gum eraser to lighten (use very gentle pressure)
Avoid: Vinyl erasers (too aggressive for soft pastel)
Technique tip: Many pastel artists use kneaded erasers as drawing tools, creating subtle value variations and soft edge effects.
Professional Erasing Techniques Artists Use
The Lifting Technique (Kneaded Eraser)
Instead of rubbing, professional artists press and lift:
- Shape eraser to appropriate form (point, edge, or flat)
- Press gently onto area you want to lighten
- Lift straight up without sliding
- Repeat until desired lightness achieved
- Knead eraser to clean and redistribute graphite
Why it works: Removes graphite without disturbing paper fibers or smudging surrounding work.
Perfect for: Subtle value adjustments, creating soft highlights, lightening shadows
The Two-Step Deep Erase
This technique prevents the #1 erasing mistake: smearing dark graphite.
Step 1: Use kneaded eraser
- Press and lift repeatedly to absorb as much graphite as possible
- Don’t rub or slide
- Continue until graphite stops lifting
Step 2: Use vinyl eraser
- Now erase normally with gentle pressure
- The remaining graphite is light enough that vinyl eraser won’t smudge it
- Achieve complete removal back to white paper
Why it matters: If you skip step 1 and go straight to vinyl on heavy graphite, you’ll drive the graphite deeper into paper fibers and create a permanent gray smudge. Ask me how I learned this lesson.
Creating Highlights with Electric Erasers
Electric erasers open up a world of effects impossible with manual tools.
The Drawing Technique:
Instead of thinking “erase,” think “draw with white”:
- Hair highlights: Use sharpened nib to draw individual light strands through dark areas
- Backlit effects: Pull upward strokes along edges to create rim lighting
- Grass texture: Quick flicks upward for individual illuminated blades
- Fabric weave: Tiny dots and dashes create textile texture
- Water reflections: Horizontal strokes with varying pressure
- Metal shine: Precise straight lines following form
- Eye details: Layer multiple catchlight sizes for depth
Control tips:
- Light touch (barely contact paper)
- Move quickly (don’t dwell in one spot)
- Clean tip constantly
- Practice on scrap paper first
Edge Protection: The Artist’s Golden Rule
The rule: Always erase AWAY from secured edges, never toward them.
The technique:
- Place non-dominant hand firmly on one edge/corner of paper
- Make all erasing strokes away from that secured point
- Never erase toward secured edge (will buckle paper)
- Only erase back-and-forth if paper is secured on all sides
Why it’s crucial: Unsecured paper will lift and buckle when you push an eraser toward it, creating permanent waviness.
Eraser Maintenance: Keep Your Tools Clean
Dirty erasers smudge instead of erase. Here’s proper care:
For vinyl and rubber erasers:
- Wipe on scrap paper after use
- Rub on fine sandpaper to remove embedded graphite
- Wipe with dry cloth to remove surface contamination
For kneaded erasers:
- Stretch and fold repeatedly (kneading motion)
- Continue until graphite distributes and eraser lightens
- Replace when it no longer lightens (fully saturated)
For electric erasers:
- Wipe tip on scrap paper frequently during use
- Replace nibs when they become rounded or contaminated
- Clean motor housing monthly to prevent dust buildup
Critical habit: Clean hands before erasing. Skin oils transfer to erasers and then to paper, causing permanent spots.
Residue Removal: Don’t Blow!
Wrong way: Blowing crumbs off your drawing
Why it’s wrong: You’ll inevitably spit on your work. Even tiny moisture droplets can damage graphite drawings.
Right way:
- Use soft brush (large makeup brush works perfectly)
- Sweep gently from top to bottom
- Let gravity do the work
- Don’t swipe with hand (oils will smudge)
Common Eraser Problems & Solutions
Problem: “My eraser is smudging everything!”
Possible causes:
- Eraser is dirty/contaminated with graphite
- Using wrong eraser type for your medium (kneaded on ink, vinyl on charcoal)
- Hands have oils that transferred to eraser
- Trying to erase heavy graphite without the two-step method
Solutions:
- Clean eraser surface immediately
- Switch to appropriate eraser type for your medium
- Wash and dry hands thoroughly
- Use kneaded eraser first to lift heavy graphite, then finish with vinyl
Problem: “The paper keeps tearing!”
Possible causes:
- Too much pressure
- Eraser too hard for paper type
- Paper not secured properly
- Erasing toward unsecured edge
Solutions:
- Use lighter pressure—let eraser do the work
- Switch to softer gum eraser for delicate papers
- Secure paper on all sides before erasing
- Always erase away from secured edges
- Test eraser on scrap of same paper first
Problem: “My kneaded eraser won’t pick up anything anymore”
Cause: Eraser is fully saturated with graphite and can no longer absorb.
Telltale signs:
- Leaves gray marks instead of erasing
- Won’t lighten when kneaded
- Feels greasy or slick
- Has become very dark throughout
Solution: Replace it. Kneaded erasers aren’t permanent—they have a lifespan. Good news: they’re inexpensive.
Prevention: Keep multiple kneaded erasers and rotate them to extend individual lifespan.
Problem: “Electric eraser is too aggressive”
Cause: Applying too much pressure or holding in one spot too long.
Solutions:
- Barely touch paper—let spinning motion do the work
- Use quick pulses instead of sustained contact
- Practice control on scrap paper
- Consider getting smaller tip size for more delicate work
Problem: “Eraser leaves shiny spots on paper”
Cause: Over-erasing damages paper fibers and compresses surface.
Prevention:
- Use lighter pressure
- Don’t make more than 3-4 passes over same area
- Use softer eraser type
- Consider if complete removal is necessary (lightening might be enough)
Damage control: Once paper is burnished shiny, it’s permanent. Future graphite won’t adhere properly to that area.
Where to Buy Artist Erasers: Pricing & Availability
Online Retailers (Best Selection)
Amazon
- Widest selection across all price ranges
- Quick shipping with Prime
- User reviews helpful for quality assessment
- Competitive pricing, especially on multi-packs
Blick Art Materials (dickblick.com)
- Professional artist focus
- Bulk discounts (often 20-40% off for multi-packs)
- Knowledgeable customer service
- Free shipping over $35
JetPens (jetpens.com)
- Specialty Japanese erasers
- Excellent product descriptions and comparisons
- Unique items not found elsewhere
- Higher prices but premium quality
Manufacturer Direct:
- Faber-Castell USA
- Prismacolor
- Tombow
- Sometimes run sales or promotions
Physical Stores
Specialty Art Supply Stores:
- Utrecht Art Supplies
- Jerry’s Artarama
- Local independent art stores
- Advantage: Test products, immediate availability, expert staff
Chain Craft Stores:
- Michaels
- Hobby Lobby
- Advantage: Frequent 40-50% off coupons, convenient locations
- Limitation: Smaller selection, more beginner-focused
Office Supply Stores:
- Staples, Office Depot
- Limited to: Basic pink and white erasers
- Skip for: Specialty art erasers
Smart Buying Strategies
Multi-packs save money:
- Paper Mate Pink Pearl: $0.67/ea in 12-pack vs $1.25 single
- Pentel Hi-Polymer: $1.20/ea in 10-pack vs $2.50 single
- Kneaded erasers: Often come in 4-6 packs with storage containers
When to buy singles:
- Testing new eraser types
- Expensive electric erasers
- Specialty items you’ll rarely use
Bulk buying for studios:
- Art teachers and professional studios can get wholesale pricing
- Alibaba offers bulk pricing (warning: quality varies significantly)
Building Your Complete Eraser Kit
Starter Kit: Essential 3 (Under $15)
What you need right now:
- Kneaded Eraser ($3-5)
Pick: Faber-Castell or Prismacolor
Your primary tool for 80% of erasing tasks - Vinyl Block Eraser ($1-3)
Pick: Pentel Hi-Polymer
For complete graphite removal and final cleanup - Pink Pearl ($0.50-1)
Pick: Paper Mate
Backup for quick sketches and studies
Total investment: $8-12
Covers: All basic graphite drawing needs
Intermediate Kit: Serious Artist ($35-50)
Starter kit items PLUS:
- Electric Eraser ($14-25)
Pick: Derwent Battery-Operated or AFMAT
Game-changer for highlights and details - Sand Eraser ($4-6)
Pick: Tombow MONO Sand
For colored pencil work and stubborn marks - Eraser Pencil ($3-4)
Pick: Faber-Castell Perfection 7056
Ultra-fine detail work
Total investment: $35-50
Covers: Multiple mediums, professional techniques
Professional Kit: Complete Arsenal ($70-100)
Intermediate kit items PLUS:
- Premium Electric Eraser ($35-40)
Pick: Tombow MONO ZE12
Upgrade to professional-grade precision - Multiple Kneaded Erasers (various sizes)
Keep several in rotation to extend lifespan - Specialty Items:
- Staedtler Mars Plastic Combi (dual-purpose)
- Extra electric eraser refills
- Eraser shield (metal template for masking)
- Cleaning brush
Total investment: $70-100
Covers: Every possible erasing need across all mediums
The Budget-Conscious Artist’s Strategy
Start with just TWO essentials:
- One kneaded eraser ($3)
- One vinyl eraser ($1)
Total: $4
This minimal kit handles 95% of graphite drawing needs. Add specialty erasers only when you actually need them for specific projects.
FAQ: Artist Eraser Questions Answered
Q: Can I use a regular pink eraser for art?
A: Yes for basic sketching, but you’ll get better results with a kneaded eraser (more control, gentler) or vinyl eraser (cleaner removal). Pink erasers work but aren’t optimal.
Q: Are electric erasers worth the money?
A: Absolutely, especially if you do detailed realistic work. They save time, reduce hand fatigue, and create effects impossible with manual erasers. Start with a budget model ($9-16) to test, upgrade later if you love it.
Q: How do I clean a kneaded eraser?
A: Stretch it like taffy, then fold it over on itself. Repeat this kneading motion 10-15 times. The graphite will distribute throughout the eraser and it will lighten in color. When it no longer lightens, replace it.
Q: What’s the best eraser for colored pencils?
A: Sand erasers are most effective due to their abrasive particles. However, they can damage paper, so use gentle pressure on thick stock only. Electric erasers also work well for small highlights. Remember: colored pencils rarely erase completely—they lighten.
Q: Can erasers remove pen ink?
A: Some inks, yes. The Faber-Castell Perfection 7058 erases water-based, liquid, and ballpoint inks. Sand erasers can remove some inks too. However, all ink erasers are abrasive and will damage paper surface. Permanent inks (India ink, most markers) cannot be erased—use correction tape or fluid instead.
Q: Why does my eraser leave marks instead of erasing?
A: Kneaded erasers leave marks when fully saturated with graphite—time to replace. Other erasers leave marks when contaminated—clean the surface by wiping on scrap paper or rubbing on fine sandpaper.
Q: Do I need different erasers for different papers?
A: Yes! Use softer erasers (gum, kneaded) on delicate papers like watercolor or newsprint. Vinyl erasers work well on heavier drawing paper and Bristol board. Always test on a scrap of your specific paper first.
Q: How long do erasers last?
A: Depends on type and usage. Vinyl erasers can last months or years. Kneaded erasers last until saturated (typically 10-30 hours of active use). Gum erasers crumble quickly (shortest lifespan). Electric eraser nibs need replacement every 5-15 hours depending on pressure and medium.
Q: My eraser is too hard and won’t erase well. Help?
A: Erasers can dry out or get cold. Warm it in your hands for 30-60 seconds before use. If it’s old and hardened permanently, replace it. Store erasers in airtight containers to prevent drying.
Q: What’s better: battery or rechargeable electric erasers?
A: Personal preference. Rechargeable is more convenient (no battery purchases) and eco-friendly. Battery-powered offers instant replacement (swap batteries vs. waiting for charge) and slightly more portable for travel. Both work equally well.
Final Verdict: The Ultimate Eraser Recommendations
After extensive testing and research, here are the definitive top picks:
Best Overall Kneaded Eraser
Winner: Faber-Castell Kneadable Art Eraser 4-Pack ($12-15)
Why: Each eraser stays fresh in its own storage case, perfect consistency, highly moldable, professional favorite for decades.
Best Vinyl Eraser
Winner: Pentel Hi-Polymer Block Eraser ($1.20/ea in 10-pack)
Why: Industry standard durability, clean erasing, excellent value, trusted by professionals and students alike.
Best Electric Eraser
Winner: Tombow MONO ZE12 ($35-40)
Why: Spins at 10,000+ RPM with no wobble, rechargeable, professional-grade precision, lifetime investment for serious artists.
Best Budget Electric Eraser
Winner: Derwent Battery-Operated Eraser ($9-16)
Why: Exceptional performance at entry-level price, handles multiple mediums, perfect introduction to electric erasers.
Best Specialty Eraser
Winner: Tombow MONO Sand Eraser ($4-6 for 2-pack)
Why: Most effective for colored pencil and stubborn marks, well-designed shape, reliable performance.
Best Value Overall
Winner: Paper Mate Pink Pearl 12-Pack ($8-10)
Why: Classic reliability, $0.67 per eraser, perfect for bulk use, lasts forever.
The Bottom Line: Stop Overthinking, Start Creating
Here’s the truth: You don’t need every eraser type to create great art.
You need the right 2-3 erasers for YOUR specific medium and working style, plus the knowledge of how to use them properly.
The essential principle: Choose quality tools from trusted brands, learn proper technique, and focus on making art rather than accumulating supplies.
My recommended starting point for most artists:
- One good kneaded eraser ($3-5)
- One vinyl block eraser ($1-3)
- Add an electric eraser when budget allows ($14-40)
This trio covers 95% of all erasing needs across graphite, charcoal, and light colored pencil work.
The game-changer insight: Remember that erasers are drawing tools, not just mistake-fixers. The moment you start using them to create highlights, add texture, and build dimension rather than simply remove errors, your art will level up dramatically.
Take Action: Your Next Steps
Immediate actions:
- Assess your current eraser collection
- Identify which essential type you’re missing
- Order 1-2 quality erasers rather than cheap variety packs
- Practice the two-step erasing technique on scrap paper
- Experiment with using erasers as drawing tools, not just cleanup tools
This week’s challenge:
Create a simple graphite drawing and use ONLY your eraser to add all the highlights. No white pencil, no leaving paper blank—pure subtractive drawing technique. You’ll be amazed at what’s possible.
Long-term investment:
Budget for an electric eraser within the next 3-6 months if you do any detailed realistic work. The time savings and precision improvement will pay for itself in frustration avoided and better finished pieces.
Last updated: September 2025
Erasers work hand in hand with your graphite pencils and a good sharpener. New to drawing? Start with our essential art supplies for beginners.