Choosing the wrong paper for pastels can make even expensive professional-grade pastels feel frustrating to use — smudging where you want precision, refusing to hold layers, or showing distracting texture through your work. The right paper transforms your experience, making pastels glide smoothly while gripping pigment exactly where you place it.
This guide will help you find the perfect paper for your specific pastel technique and skill level, whether you’re just starting with a $15 pad or ready to invest in premium surfaces for professional work. Based on analysis of 10+ popular pastel papers across all price points, you’ll get specific recommendations for beginners, intermediate artists, and professionals working with both soft and oil pastels.
Table of Contents
Quick Reference: Pastel Paper Comparison Table
| Paper Name | Best For | Pastel Type | Weight (GSM) | Tooth Level | Layers | Price Range | Format |
|---|---|---|---|---|---|---|---|
| Canson Mi-Teintes | Beginners | Soft | 160 | Medium | 2-3 | $ | Pads, Sheets |
| Strathmore 400 | Beginners | Soft | 146 | Medium | 2-3 | $ | Pads |
| Canson XL Sand Grain | Practice Only | Soft | 115 | Medium-Low | 1-2 | $ | Pads |
| Canson Mi-Teintes Touch | Intermediate | Soft | 350 | Medium-High | 5-7 | $$ | Pads, Sheets |
| Daler Rowney Murano | Intermediate | Soft | 160 | Medium | 3-4 | $$ | Sheets, Pads |
| Clairefontaine Ingres | Intermediate | Soft | 100-130 | Low-Medium | 2-3 | $$ | Sheets |
| Clairefontaine Pastelmat | Professional | Soft/Pencil | 360 | High | 10+ | $$$ | Sheets, Pads, Boards |
| Art Spectrum Colourfix | Professional | Soft | 300 | High | 10+ | $$$ | Sheets |
| UART Sanded Paper | Professional | Soft | Varies | Very High | 10+ | $$$ | Sheets, Boards |
| Sennelier La Carte | Professional | Soft | 360 | High | 10+ | $$$$ | Sheets, Pads |
| Ampersand Pastelbord | Professional | Soft/Oil | N/A (Board) | High | 10+ | $$$ | Rigid Panels |
| Canson Mixed Media | Oil Pastels | Oil | 140 | Low-Medium | 3-5 | $ | Pads |
| Hahnemuhle Velour | Specialty | Soft | 250 | Very High | 5-7 | $$$ | Sheets |
Price Key: $ = Under $20 for pad or under $2 per sheet | $$ = $20-40 for pad or $2-4 per sheet | $$$ = $40-75 for pad or $4-8 per sheet | $$$$ = $75+ or $8+ per sheet
Understanding Tooth and Texture: The Foundation of Paper Selection
Before you can choose the right pastel paper, you need to understand two fundamental concepts that determine whether your pastels will grip the paper or slide off: tooth and texture. These aren’t just fancy art terms — they’re the key to successful pastel work.
What is “Tooth” in Paper?
Tooth refers to the microscopic hills and valleys on the paper’s surface that catch and hold pastel pigment. Think of it like velcro — the tiny hooks (tooth) grab onto the pastel particles and keep them in place.
When you drag a pastel stick across paper, you’re essentially shaving off powder from the stick. Without sufficient tooth, this powder has nothing to grip and will either slide off or smudge at the slightest touch. With good tooth, the powder nestles into those microscopic valleys and stays put.
More tooth means:
- More layers of pastel possible (10+ layers on high-tooth papers)
- Better pigment adhesion with less smudging
- Ability to work with heavy applications
- Paper feels slightly rough or gritty to the touch
Less tooth means:
- Fewer layers possible (typically 2-3 maximum)
- Easier blending with fingers or tools
- Paper fills up quickly, becoming slick
- Better for sketches and light applications
The amount of tooth directly determines how many layers you can apply before the paper becomes “saturated” — the point where the valleys are completely filled and can’t accept more pigment.
Understanding Texture vs. Tooth
While tooth and texture are related, they’re not the same thing. This distinction matters when choosing paper.
Tooth is about function — the holding power of the paper. It’s what you feel when you touch the paper and what determines layering capability.
Texture is about appearance — the visible pattern you see and the tactile quality you feel. It’s what shows through in your finished work.
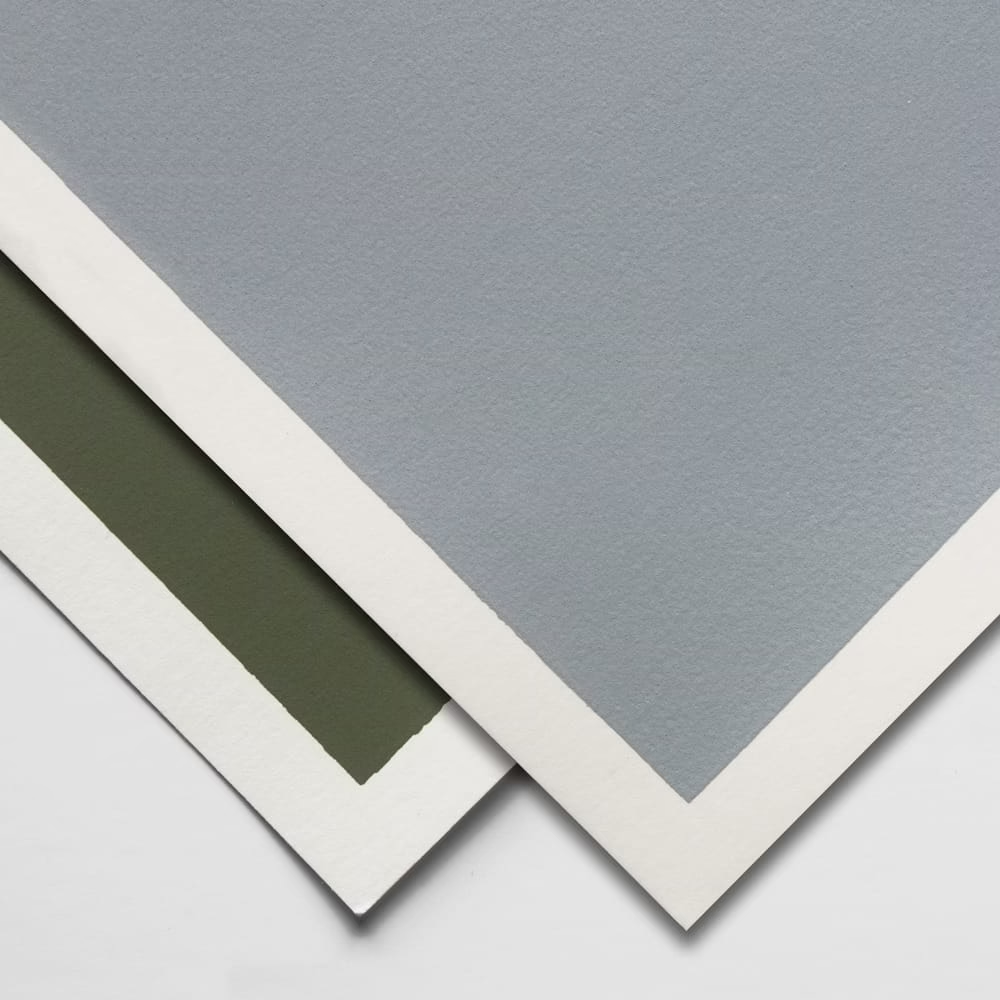
For example, Canson Mi-Teintes has a distinctive honeycomb texture pattern you can see and feel. This texture becomes visible in your artwork when you apply pastels lightly. Meanwhile, the paper’s tooth (separate from the pattern) determines how many layers it can hold.
Different texture types include:
- Laid lines: Regular horizontal lines like you see in Ingres paper — creates a traditional, classical look
- Honeycomb: Distinctive crisscross pattern (Mi-Teintes) — shows through unless heavily covered
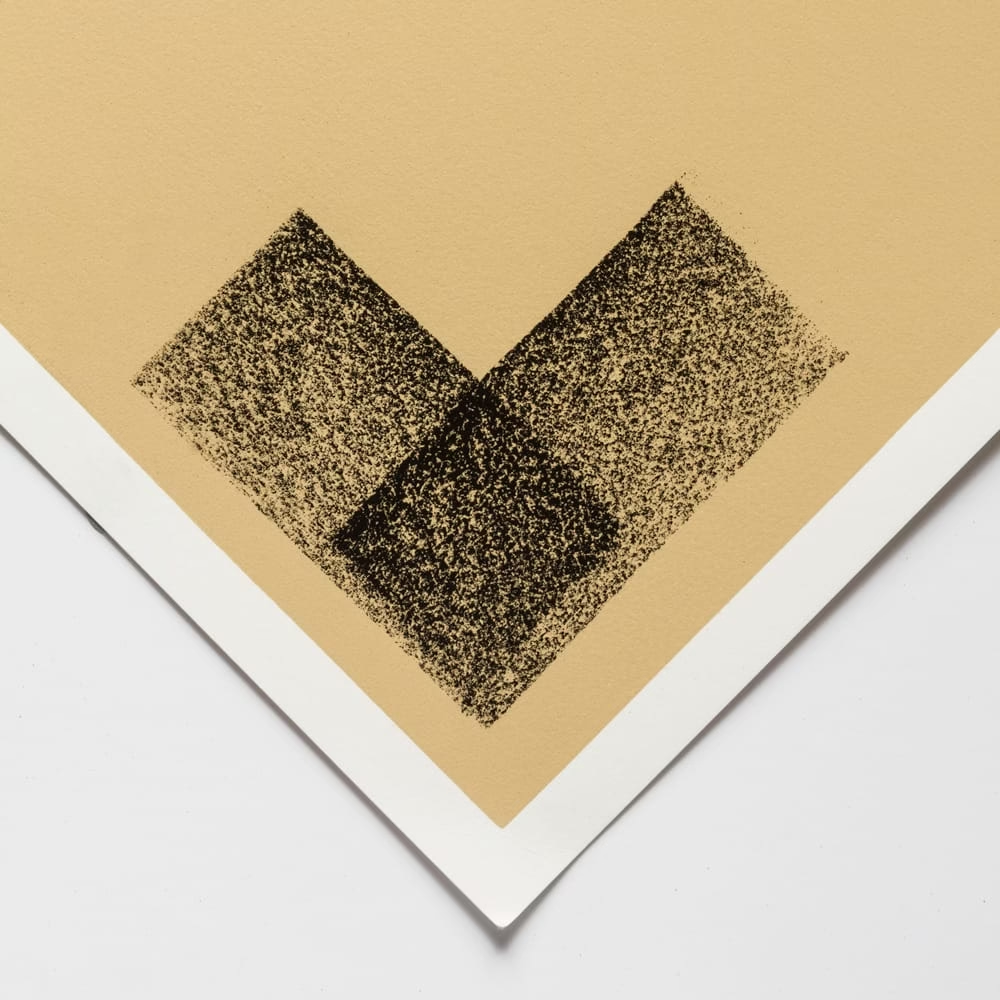
- Sanded: Fine grit feeling like very fine sandpaper (UART, Colourfix) — can show subtle grain in finished work
- Velvet/suede: Smooth, fuzzy feel (Pastelmat, velour) — creates soft, atmospheric effects
- Random grain: No specific pattern, just overall roughness (watercolor paper)
When choosing paper, consider whether you want the texture to be visible in your finished work or whether you prefer a smoother appearance where only your pastel marks show.
Why Regular Drawing Paper Doesn’t Work
Many beginners try using regular sketch or drawing paper for pastels and quickly become frustrated. Here’s why it doesn’t work:
Insufficient tooth: Drawing paper is designed for pencils and pens that create marks through pressure and friction. Pastels need texture to grip onto. On smooth drawing paper, pastel just sits on the surface and smudges easily.
Wrong surface treatment: Drawing paper often has a sizing that makes it slightly slick — great for pencil gliding, terrible for pastel adhesion.
Too lightweight: Most drawing paper is 60-90 GSM, too thin to handle the rubbing and blending techniques used with pastels. It buckles, tears, or wears through.
Not archival: Even if you could get pastels to work on cheap drawing paper, the paper would yellow and deteriorate over time, ruining your artwork.
For successful pastel work, you need paper specifically designed for the medium — and that starts with understanding what tooth and texture you need for your particular technique.
Best Paper for Beginners: Getting Started Without Breaking the Bank
When you’re just starting with pastels, you don’t need to invest $50+ in premium paper. In fact, expensive paper can add unnecessary pressure while you’re learning basic techniques. What you need is affordable paper that still provides quality results and lets you experiment freely.
Canson Mi-Teintes (Best Overall Beginner Paper)
Rating: ★★★★☆ (4.5/5 for beginners)
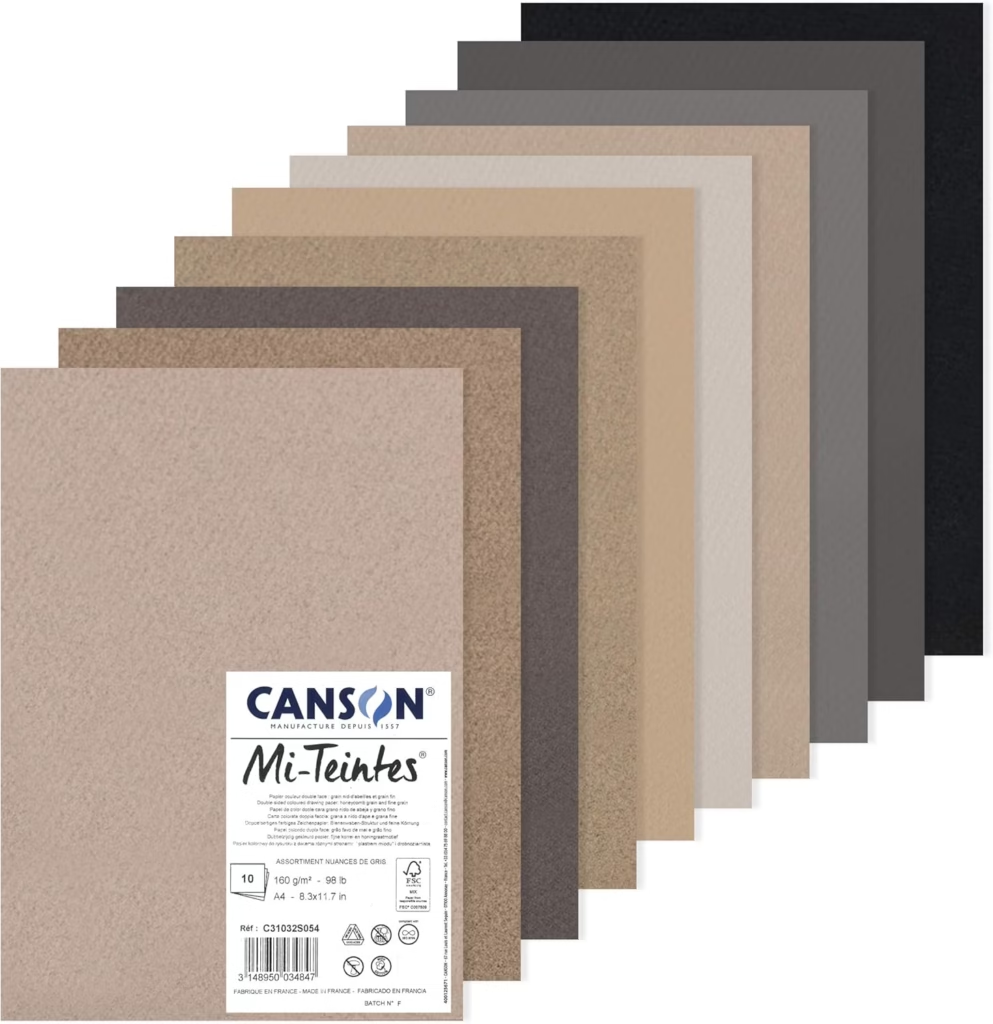
Canson Mi-Teintes is the gold standard for beginner pastel paper, and for good reason. It’s been around for decades, is widely available, affordable, and provides a genuine pastel paper experience.
Specifications:
- Weight: 160 GSM
- Texture: Honeycomb pattern one side, fine grain other side (reversible)
- Colors: Available in 50+ colors including earth tones, cool grays, warm tones
- Formats: Pads (9×12″, 12×16″, 18×24″), individual sheets (19×25″)
Price: $15-22 for a 12-sheet pad, $1.50-2.50 per individual sheet
Pros:
- Affordable enough for practice and experimentation
- Available at virtually every art supply store
- Reversible (two different textures to try)
- Wide color selection
- Can handle 2-3 layers with proper technique
- Good for learning basic pastel techniques
- Works with soft pastels, hard pastels, and pastel pencils
Cons:
- Honeycomb texture can be pronounced and visible in finished work
- Limited layering compared to premium papers (maxes out at 3-4 layers)
- Can show wear if you blend too vigorously
- Not ideal for highly detailed, heavily layered professional work
Best for: Soft pastel sketches, learning blending techniques, practice work, beginners exploring the medium, finished pieces with light to medium pastel application
Pro Tip: Start with the fine grain side (flip the pad over). The honeycomb side can be distracting for beginners. Once you’re comfortable, experiment with the honeycomb side for different effects.
Recommended Purchase: Start with a 12-sheet pad in assorted colors or a single neutral color pack (grays or earth tones). This gives you variety to experiment without committing to large quantities.
Strathmore 400 Series Pastel Paper
Rating: ★★★★☆ (4/5 for beginners)
Strathmore’s 400 series offers a reliable, budget-friendly option that’s particularly popular in the United States.
Specifications:
- Weight: 146 GSM (approximately 64 lb)
- Texture: Medium-grain textured surface
- Colors: Available in assorted color pads (typically 12 sheets with various tones)
- Formats: Pads ranging from 9×12″ to 18×24″
Price: $12-18 for a 12-sheet pad
Pros:
- Very affordable
- Widely available at major retailers (Michaels, Hobby Lobby, Amazon)
- Less pronounced texture than Mi-Teintes honeycomb
- Good for developing basic techniques
- Works well for pastel pencil drawings
Cons:
- Slightly thinner than Mi-Teintes (may buckle with heavy application)
- Limited color selection compared to other brands
- Maximum 2-3 pastel layers before saturation
- Paper quality is good but not exceptional
Best for: Absolute beginners on a tight budget, pastel pencil work, light pastel sketches, students
When to choose this over Mi-Teintes: If you’re on a very tight budget or if you prefer a less pronounced texture. The Strathmore 400 series is slightly cheaper and has a more subtle surface pattern.
Canson XL Sand Grain (Budget Practice Option)
Rating: ★★★☆☆ (3/5 — practice only)
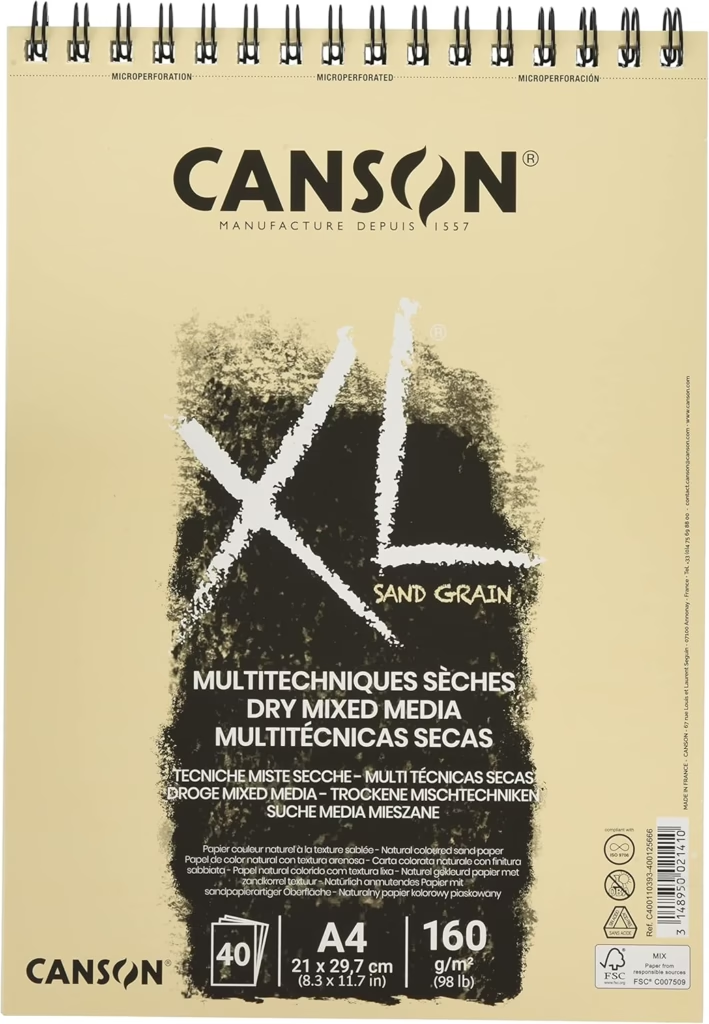
This is the paper you buy when you want to practice techniques without any financial pressure. It’s not suitable for finished work, but it’s perfect for learning.
Specifications:
- Weight: 115 GSM (lightweight)
- Texture: Fine sand grain texture
- Colors: Typically gray or assorted earth tones
- Formats: Large pads (18×24″ with 24 sheets)
Price: $10-15 for a large pad (excellent value per sheet)
Pros:
- Extremely affordable (under $1 per sheet)
- Large sheets let you work bigger
- Enough tooth to practice pastel techniques
- Mid-tone colors show both light and dark pastels well
- Great for experimenting without waste anxiety
Cons:
- Too thin for finished work (buckles easily)
- Limited layering (1-2 layers maximum)
- Not archival quality (will yellow over time)
- Cannot handle vigorous blending
Best for: Pure practice, developing muscle memory, testing color combinations, sketching ideas before committing to good paper
How to use it effectively: Use this paper to practice specific techniques like blending, mark-making, and layering. Once you’re happy with your approach, recreate the piece on better paper. Think of it as your “rough draft” paper.
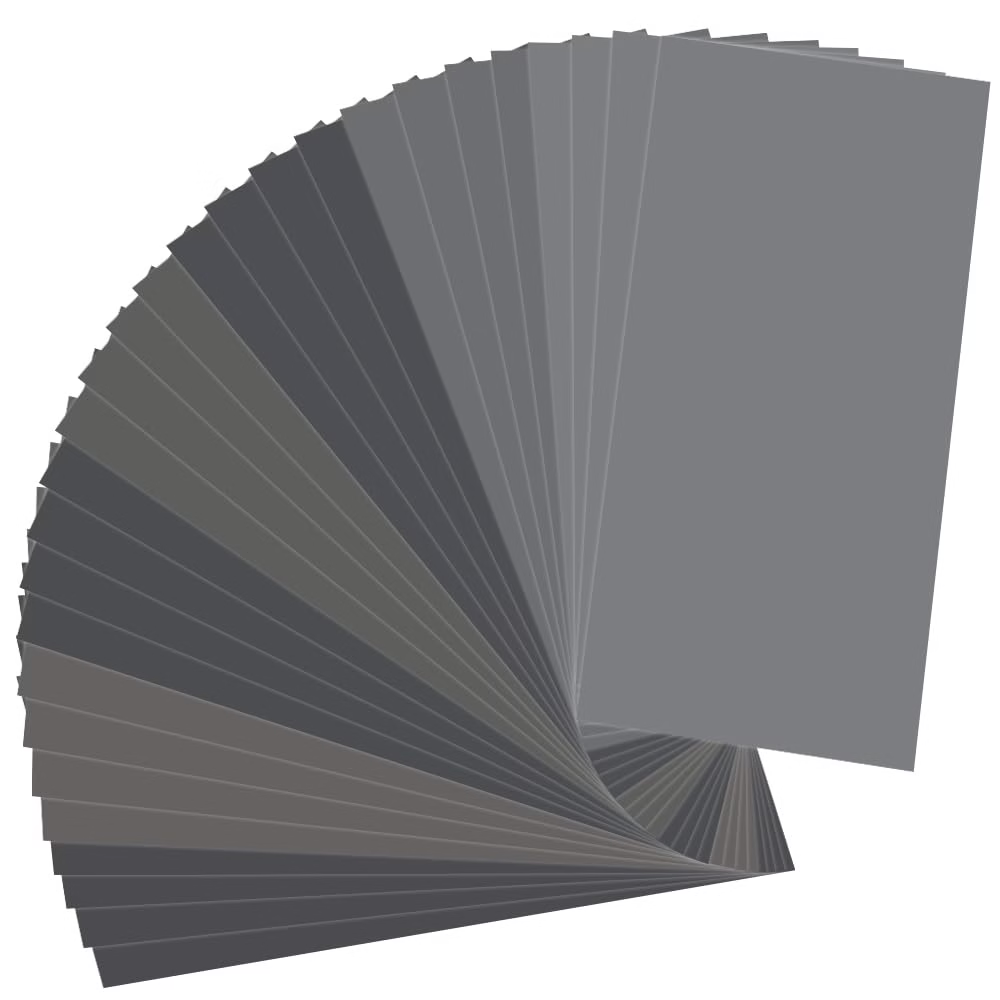
Sample Paper Packs: Test Before You Invest
One of the smartest investments a beginner can make is a sample pack of different pastel papers. These packs let you test multiple surfaces without buying full pads or sheets of each.
What you get: Typically 8-12 different pastel paper types in small sizes (often 6×9″ or 8×10″)
Price: $25-40 for a comprehensive sample pack
Why it’s valuable:
- Test expensive papers before committing
- Discover which texture and tooth you prefer
- Compare how different papers handle layering
- Learn which papers suit your technique
- Save money by avoiding full purchases of papers you don’t like
Where to find them: Jackson’s Art supplies offers excellent sample packs that include papers like Pastelmat, UART, Colourfix, Mi-Teintes Touch, and more.
How to use them: Create the same small subject (like a simple sphere or gradient study) on each paper. This direct comparison reveals which paper suits your style. Keep notes on each paper’s performance.
Beginner Budget Recommendations
Minimalist Start ($15-20):
- One Canson Mi-Teintes pad in assorted colors or neutral gray
Smart Start ($30-40):
- One Canson Mi-Teintes pad
- One sample paper pack
- OR: Mi-Teintes pad + 3-5 individual sheets of Mi-Teintes Touch for finished pieces
Enthusiast Start ($50-60):
- Canson Mi-Teintes pad for practice
- Sample paper pack for exploration
- 5-10 individual sheets of better paper (Mi-Teintes Touch or Pastelmat) for finished work
The key principle: Have abundant cheap paper for practice and limited good paper for finished pieces. This removes anxiety about “wasting” expensive paper while learning.
Best Intermediate Papers: Level Up Your Pastel Work
Once you’ve mastered basic techniques on beginner papers and want to create more detailed, finished work, intermediate papers offer significantly better layering and detail capability without the premium pricing of professional surfaces.
Canson Mi-Teintes Touch (The Sweet Spot)
Rating: ★★★★★ (5/5 for intermediate artists)
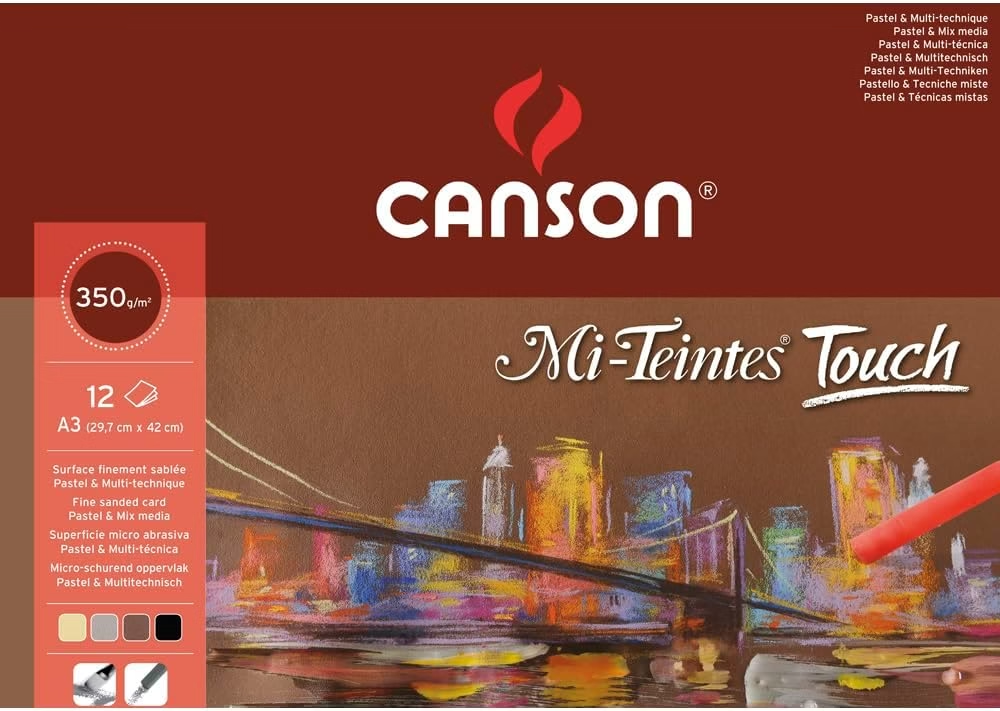
Mi-Teintes Touch is a game-changer for intermediate artists. It provides near-professional results at a much more accessible price point than Pastelmat or Colourfix.
Specifications:
- Weight: 350 GSM (heavy cardstock)
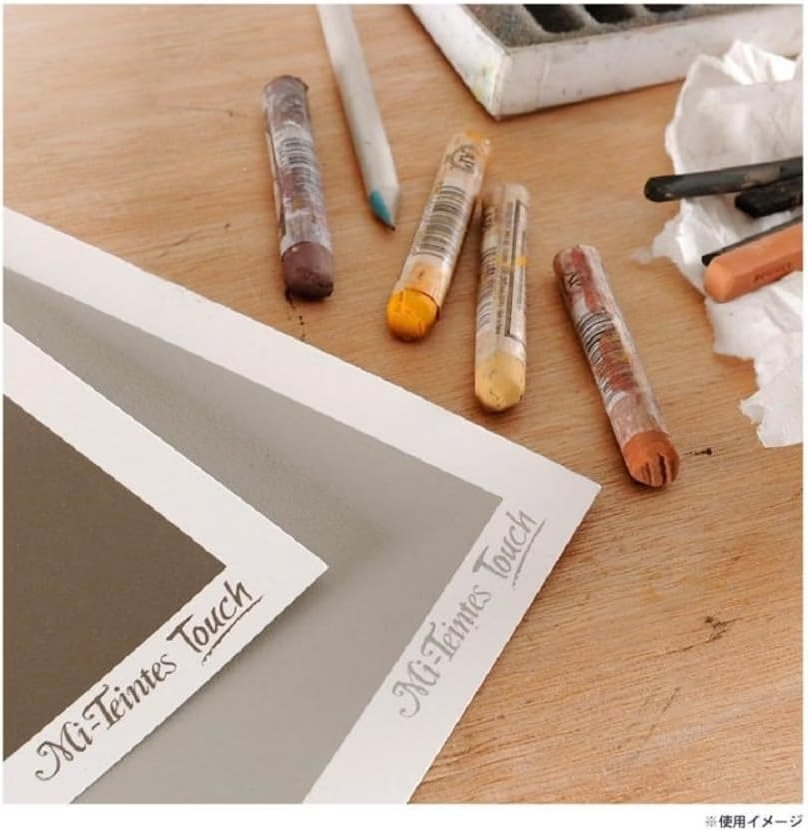
- Texture: Suede-like, micro-sanded surface (feels smooth but has excellent tooth)
- Colors: 34 colors available
- Formats: Pads (9×12″ with 12 sheets), individual sheets (19×25″)
Price: $25-35 for a pad, $2.50-4 per individual sheet
Pros:
- Excellent layering capability (5-7 layers comfortably)
- Smooth surface allows for fine detail work
- Heavier weight feels substantial and professional
- Suitable for pastel pencils, soft pastels, and hard pastels
- Crystal paper between sheets in pads protects work
- Can handle light wet media (watercolor underpainting)
- Much more affordable than Pastelmat while delivering similar performance
- Less texture showing through than Mi-Teintes
Cons:
- More expensive than basic Mi-Teintes (but worth it for finished work)
- Not quite as many layers as Pastelmat or sanded papers
- Limited to pad sizes or large sheets (harder to find custom sizes)
Best for: Detailed pastel work, portraiture, wildlife art, intermediate to advanced artists, finished pieces for display, pastel pencil drawings requiring precision
Why it’s the “sweet spot”: Mi-Teintes Touch delivers 80% of Pastelmat’s performance at about 40% of the cost. For intermediate artists creating finished work but not yet doing professional commissions, this represents exceptional value.
Professional artist perspective: Many professional artists actually prefer Mi-Teintes Touch for certain subjects. The slightly smoother finish (compared to Pastelmat’s velvet feel) works beautifully for shiny subjects like flower petals or smooth skin textures.
Recommended purchase: Buy a pad in a neutral color (gray or beige) for your first try. If you love it, invest in individual sheets in your preferred colors for larger work.
Daler Rowney Murano
Rating: ★★★★☆ (4/5 for intermediate artists)
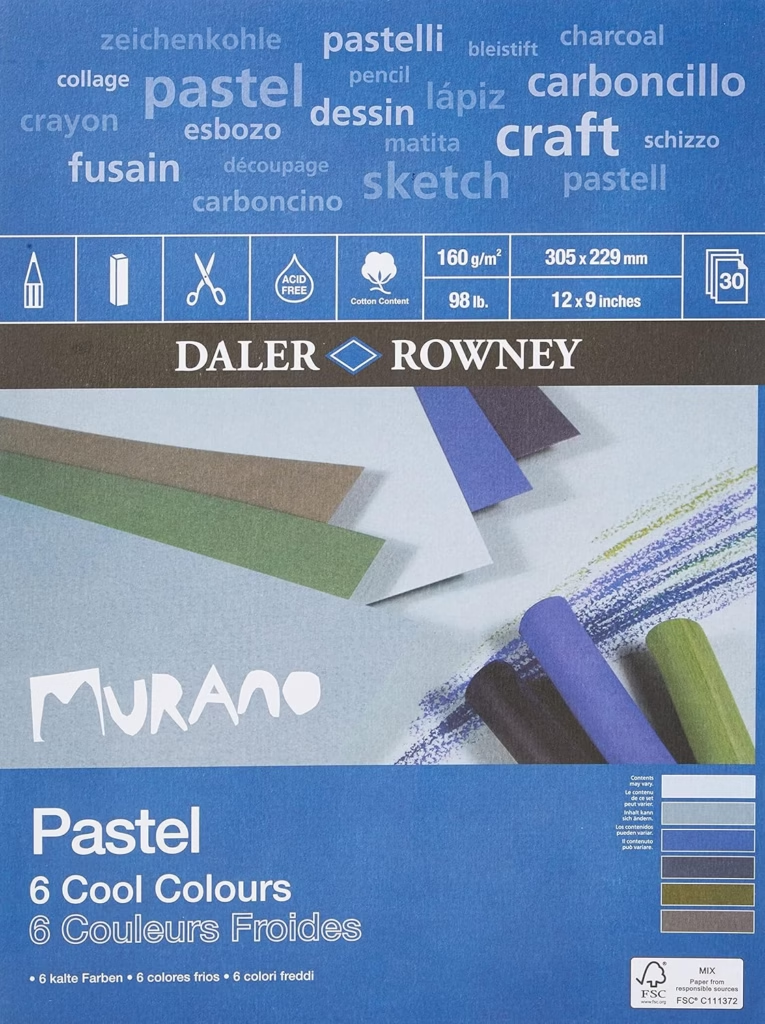
Murano paper offers a good middle ground between beginner and professional options, with a distinctive texture that some artists love.
Specifications:
- Weight: 160 GSM
- Texture: Dimpled, mottled surface (more subtle than Mi-Teintes honeycomb)
- Colors: 40+ colors including warm and cool palettes
- Formats: Large sheets (50×65 cm), multi-color pads
Price: $20-30 for a pad, $2-3 per individual sheet
Pros:
- Affordable for regular use
- Distinctive texture that can add character to work
- Available in attractive color ranges
- Can handle moderate layering (3-4 layers)
- Large sheet size available
- Works with pastel pencils and soft pastels
Cons:
- Thinner than Mi-Teintes Touch (160 GSM vs 350 GSM)
- Texture can be visible in finished work (not ideal for smooth subjects)
- Limited layering compared to sanded papers
- Not suitable for wet media
Best for: Intermediate artists who like textured effects, landscape work where texture adds interest, pastel drawings rather than paintings, work where the paper shows through intentionally
When to choose Murano: If you appreciate visible paper texture as part of your aesthetic and want an affordable option for regular finished work. The mottled texture works particularly well for atmospheric landscapes and loose, expressive work.
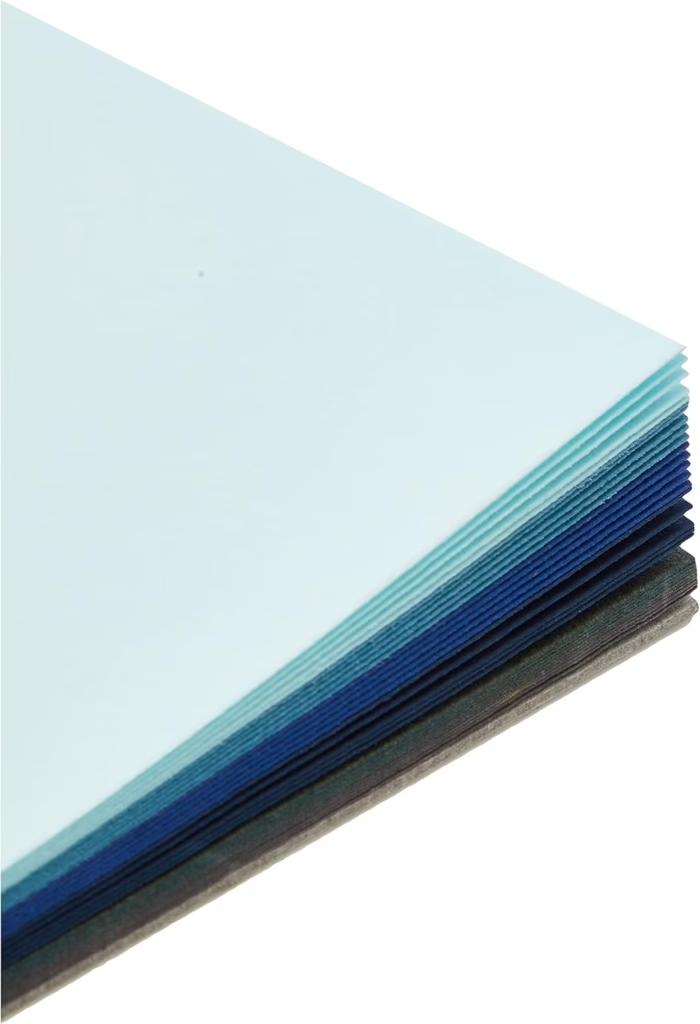
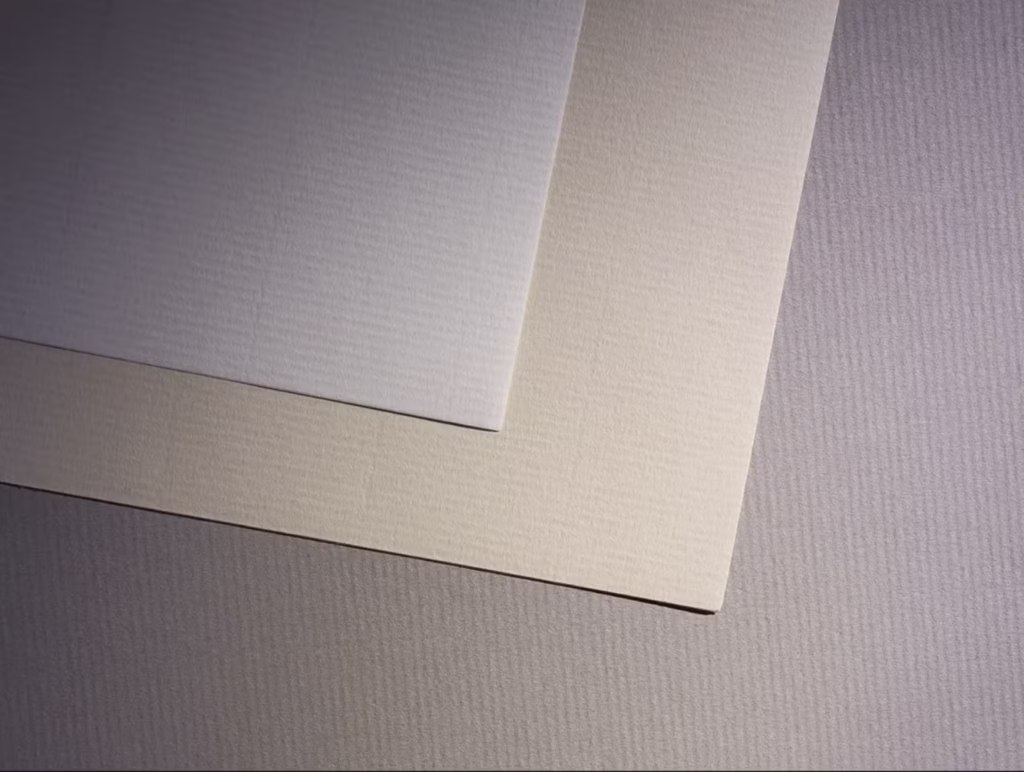
Clairefontaine/Hahnemuhle Ingres
Rating: ★★★★☆ (4/5 for specific techniques)
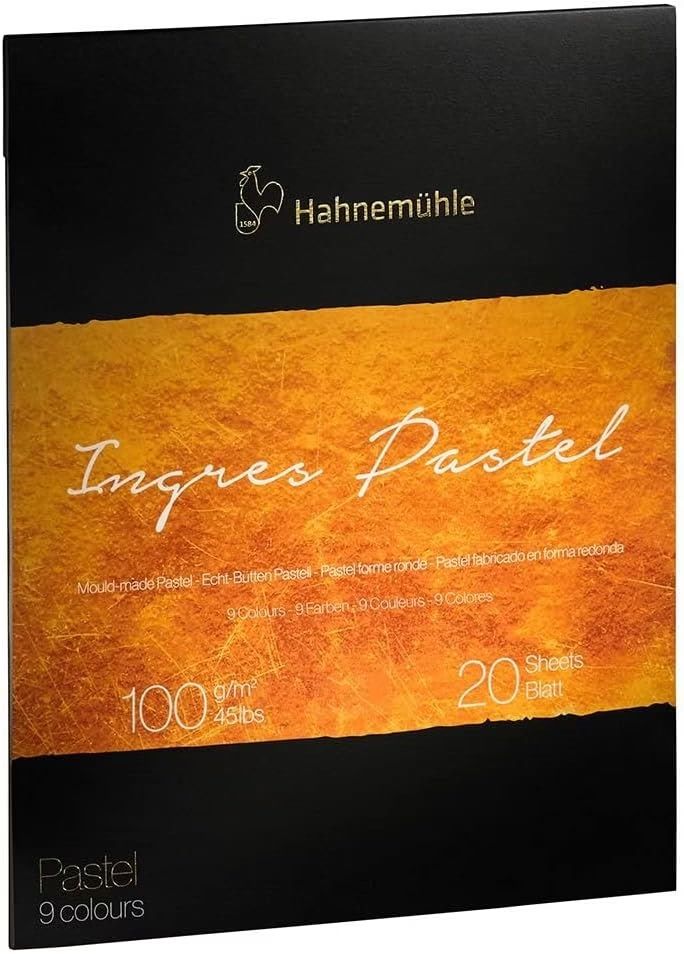
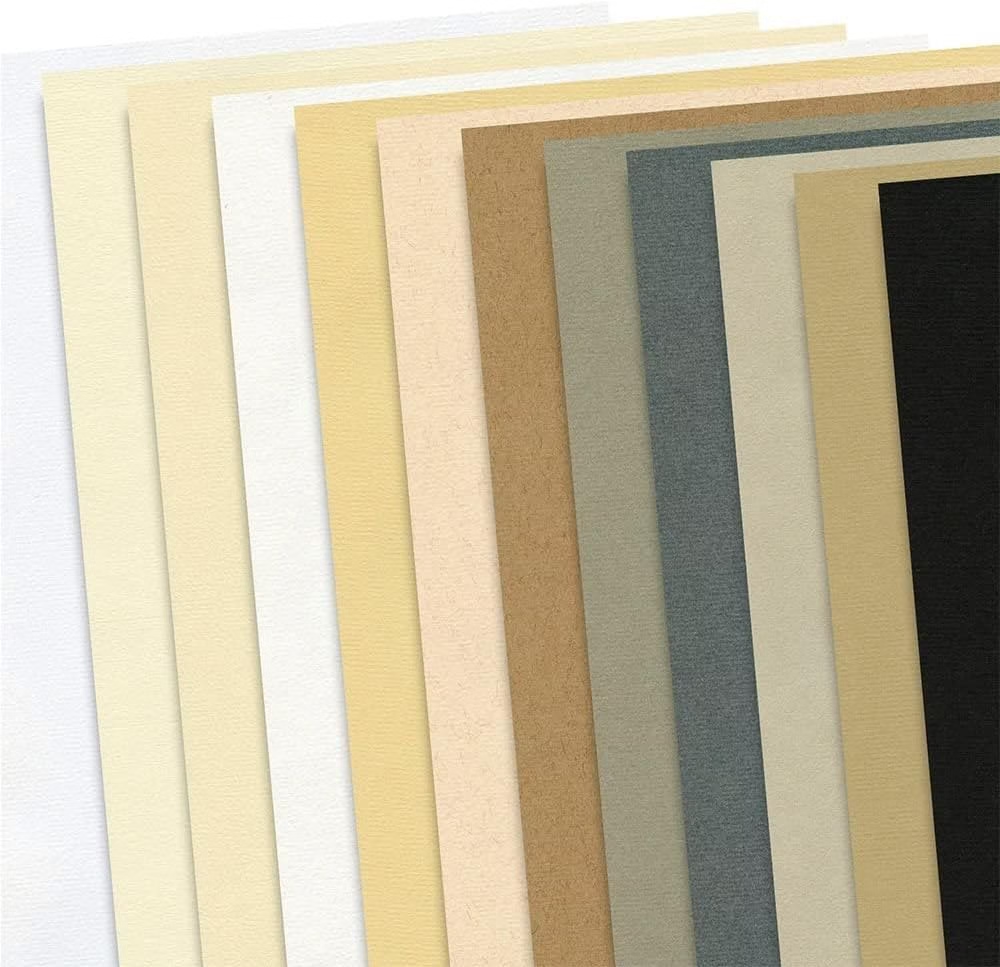
Ingres paper represents a traditional approach to pastel work with its characteristic laid lines and fine texture.
Specifications:
- Weight: 100-130 GSM (depending on brand)
- Texture: Laid paper with regular horizontal lines (chain lines less frequent)
- Colors: 20-30 colors available
- Formats: Individual sheets, some pads available
Price: $18-28 for a pad, $1.50-2.50 per sheet
Pros:
- Beautiful traditional appearance with visible laid lines
- Affordable option for finished work
- Soft enough for finger blending
- Easy to erase and rework
- Light applications of watercolor or wet media possible
- Perfect for classical pastel drawing aesthetic
Cons:
- Limited layering (2-3 layers maximum before saturation)
- Laid lines visible in finished work (can be distracting)
- Thinner than modern pastel papers
- Not suitable for heavy pastel application
Best for: Pastel sketches and drawings (not paintings), work where you want traditional laid paper appearance, light touch techniques, artists who appreciate classical materials, quick portraits or figure studies
Important consideration: Ingres paper shows its texture prominently. If you want smooth, photorealistic work where texture disappears, choose Mi-Teintes Touch or Pastelmat instead. If you appreciate the visible texture as part of the artistic effect, Ingres offers beautiful results.
Historical note: Ingres paper is named after French painter Jean-Auguste-Dominique Ingres (1780-1867). It’s been used by pastel artists for centuries and provides an authentic traditional experience.
Intermediate Budget Recommendations
Focused Approach ($40-60):
- Canson Mi-Teintes for practice/sketches
- 10-15 sheets of Mi-Teintes Touch for finished work
Exploration Approach ($60-80):
- Mi-Teintes Touch pad
- 5 sheets each of Murano and Ingres to test
- Keep Mi-Teintes for quick studies
Serious Intermediate ($80-100):
- Mi-Teintes Touch for regular finished work
- Sample pack including professional papers (Pastelmat, UART, Colourfix)
- Mi-Teintes for practice
- Begin testing professional papers for future upgrade
Strategic principle: At the intermediate level, invest in good paper for finished work while maintaining cheaper options for experimentation. This is also the stage where testing professional papers makes sense — you have the skills to appreciate the difference.
Best Professional Papers: Premium Surfaces for Serious Work
Professional pastel papers represent the pinnacle of surface technology, offering exceptional layering, archival quality, and performance that justifies their premium pricing for serious work, commissions, and exhibition pieces.
Clairefontaine Pastelmat (The Gold Standard)
Rating: ★★★★★ (5/5 for professionals)
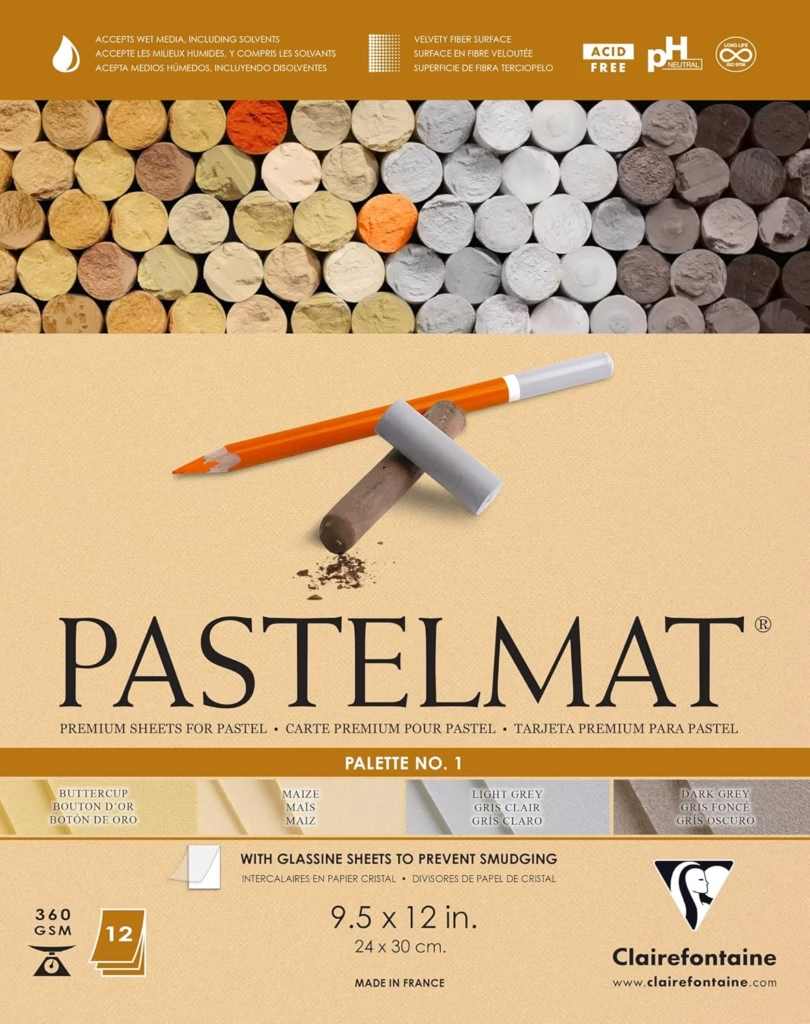
Pastelmat is the most frequently recommended paper by professional pastel artists worldwide. It delivers performance that genuinely justifies its premium price.
Specifications:
- Weight: 360 GSM (paper), 400+ GSM (boards)
- Texture: Velvet/suede surface with extremely fine, even tooth
- Colors: 25+ colors (mostly cool grays, earth tones, some brights)
- Formats: Individual sheets (50×70 cm), pads (24×30 cm, 12 sheets), mounted boards (3mm thick)
Price: $4-8 per sheet, $40-60 for 12-sheet pad, $15-30 for boards (size dependent)
Pros:
- Virtually unlimited layering capability (10+ layers easily)
- Velvety smooth feel that’s pleasant to work on
- Excellent for fine detail with pastel pencils
- No fixative needed (paper holds pigment securely)
- Colors stay vibrant (no darkening from fixative)
- Suitable for wet media as well (watercolor, acrylics)
- Archival quality for permanent artwork
- Available in both paper and rigid board formats
- Smooth finish in final work (texture doesn’t show through)
Cons:
- Expensive ($4-8 per sheet adds up quickly)
- Limited availability in some regions
- Mostly cool-toned colors (fewer warm options)
- White Pastelmat can be challenging (some artists report issues)
- Smooth surface less forgiving of technique errors (every mark shows)
Best for: Detailed portraits, wildlife art, botanical illustrations, professional commissions, exhibition work, hyperrealistic pastel work, pastel pencil drawings requiring precision
Paper vs. Board: Pastelmat comes in two forms. The paper (360 GSM) is excellent for most work and easier to get a smooth finish. The boards (3mm thick with more tooth) allow even more layering and are preferred for very detailed animal portraits where you need maximum tooth for fur details.
Color recommendations: Most professional artists prefer the gray tones (Light Gray, White, and various neutrals) as they work well with a wide range of subjects. The colored papers are beautiful but more specific in application.
Professional perspective: Many professional pastel artists use Pastelmat exclusively for commissioned work. The surface quality reduces frustration and allows them to work efficiently, which matters when time equals money.
Fixative note: One of Pastelmat’s greatest advantages is that you don’t need fixative. This preserves color vibrancy (fixative typically darkens colors by 10-20%) and saves time. The fine tooth grips pigment securely without chemical help.
Art Spectrum Colourfix (Maximum Layering)
Rating: ★★★★★ (5/5 for heavy layering)

Colourfix is the choice for artists who want maximum layering capability and multi-media options. It’s a coated sanded paper that can handle almost anything you throw at it.
Specifications:
- Weight: 300 GSM
- Texture: Coated sanded surface (feels slightly gritty but not rough)
- Colors: 40+ colors including unique options
- Formats: Individual sheets (50×70 cm), pads available, primer available in jars for coating your own surfaces
Price: $5-8 per sheet, $45-65 for pads
Pros:
- Endless layering (you genuinely cannot fill the tooth)
- Takes wet and dry media (watercolor, acrylics, gouache, inks, pastels)
- Multi-media work possible
- Very durable (hard to damage the surface)
- Wide color range including unique tones
- Can buy primer to coat any surface
- Excellent for plein air (outdoor) painting (durable)
- No fixative needed
Cons:
- Expensive (similar to Pastelmat pricing)
- Slightly gritty feel not everyone loves
- Wears down pastels faster than smooth papers
- Can show subtle grain in finished work
- Heavier than Pastelmat for shipping/transport
Best for: Heavily layered pastel paintings, multi-media work combining pastels with wet media, plein air painting, artists who work through many layers, experimental techniques
Why choose Colourfix over Pastelmat: If you work with both wet and dry media, need extreme layering (beyond even Pastelmat), or prefer a slightly more textured feel, Colourfix delivers. Some artists find Pastelmat’s smoothness too slick and prefer Colourfix’s more responsive grip.
The primer option: Colourfix sells their coating in jars, allowing you to create your own surfaces. This is popular with artists who want to work on canvas, wood panels, or custom sizes. Mix with water, apply with brush or roller, and you have a Colourfix surface on any substrate.
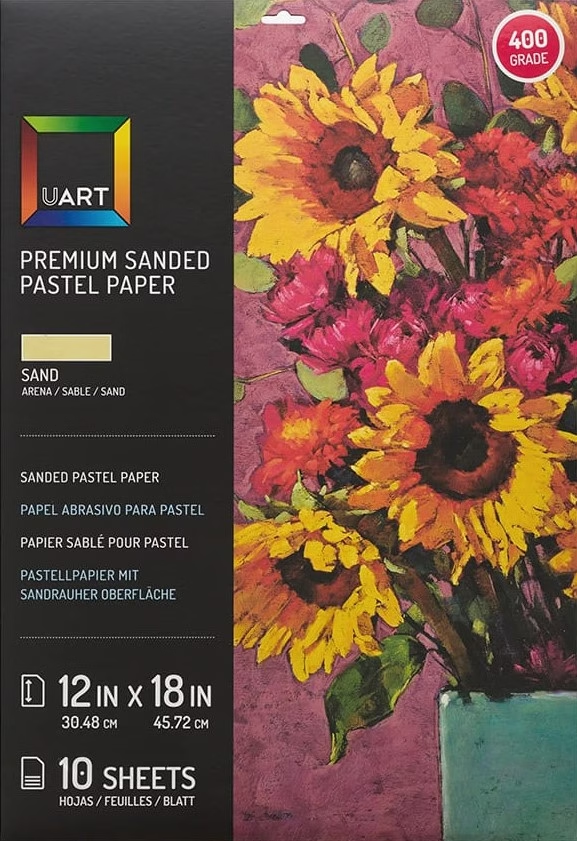
UART Sanded Paper (The Layering Champion)
Rating: ★★★★★ (5/5 for layering, 4/5 overall due to color limitations)

UART (United Art) is beloved by pastel artists who want maximum tooth and texture in their work. It’s a true sanded paper with various grit levels.
Specifications:
- Weight: Varies by grade
- Texture: Sanded surface available in 7 grades from 240 (coarse) to 800 (fine)
- Colors: Cream (off-white) and black only
- Formats: Individual sheets, pads, mounted boards (archival mounting)
Price: $4-7 per sheet, $45-75 for pads, $20-50 for mounted boards
Pros:
- Available in 7 different grit levels (customize tooth to your needs)
- Virtually unlimited layering (easily 10-20 layers)
- Pastels glide onto surface smoothly
- Popular grades (400-600) balance tooth and detail capability
- Makes blending very smooth and velvety
- No fixative needed
- Boards available (archival museum mounting)
- Professional artists swear by it
Cons:
- Only available in cream and black (major limitation)
- Wears down pastels faster than smooth papers
- Can be expensive (similar to Pastelmat)
- Slightly more texture shows in finished work
- Comes in rolls (needs flattening) or mounted boards
Best for: Heavily layered professional work, artists who don’t mind limited color options, plein air painting, textured effects, artists transitioning from Pastelmat who want more tooth
Grade selection guide:
- 240-320 (coarse): Very toothy, wears pastels quickly, best for large bold work
- 400 (popular choice): Good balance, holds many layers, moderate pastel wear
- 500 (sweet spot for many artists): Fine enough for detail, coarse enough for layers
- 600 (most popular): Excellent for detailed work, still holds many layers
- 800 (fine): Very fine tooth, best for extremely detailed work, less pastel wear
Why artists love UART: The sanded surface creates a different working experience — pastels glide on smoothly and blend beautifully. Many artists describe it as having a “buttery” feel. The velvety finish in completed work has a distinct quality.
The color limitation: UART only comes in cream/beige and black. This means you must cover more of the surface with pastel (unlike colored papers where the paper color contributes). For some artists, this is fine; others find it limiting.
Sennelier La Carte (Luxury Velvet)
Rating: ★★★★★ (5/5 for softness, 4/5 for practicality)

Sennelier La Carte represents the luxury end of pastel papers. It’s exceptionally soft and beautiful to work on, though it requires special care.
Specifications:
- Weight: 360 GSM (card weight)
- Texture: Extremely soft vegetable fiber coating (hint of velvet)
- Colors: Wide range available
- Formats: Individual sheets (50×65 cm), pads
Price: $6-10 per sheet, $65-85 for pads (premium pricing)
Pros:
- Incredibly soft, pleasant working surface
- Beautiful velvet-like quality
- Excellent layering (comparable to Pastelmat)
- Particularly nice for soft, gentle portraits
- Professional quality results
- Prestigious brand with excellent reputation
Cons:
- Very expensive (most expensive regular option)
- Not moisture resistant (must keep completely dry)
- Cannot use wet media
- Delicate surface requires careful handling
- Some colors may have lightfastness issues (check specifications)
- Limited availability in some regions
Best for: Portrait work (especially gentle, soft portraits), special commissioned pieces, artists who prioritize working experience, finished work where budget isn’t a constraint
When to choose La Carte: If you’ve mastered other papers and want the absolute finest working experience, or if you’re doing an important portrait commission where the soft, gentle quality perfectly suits your subject. The premium price is justified for special pieces.
Care requirements: La Carte must be kept completely dry. A single drop of water can damage the surface coating. Store carefully and handle gently. This is not a paper for outdoor or experimental work.
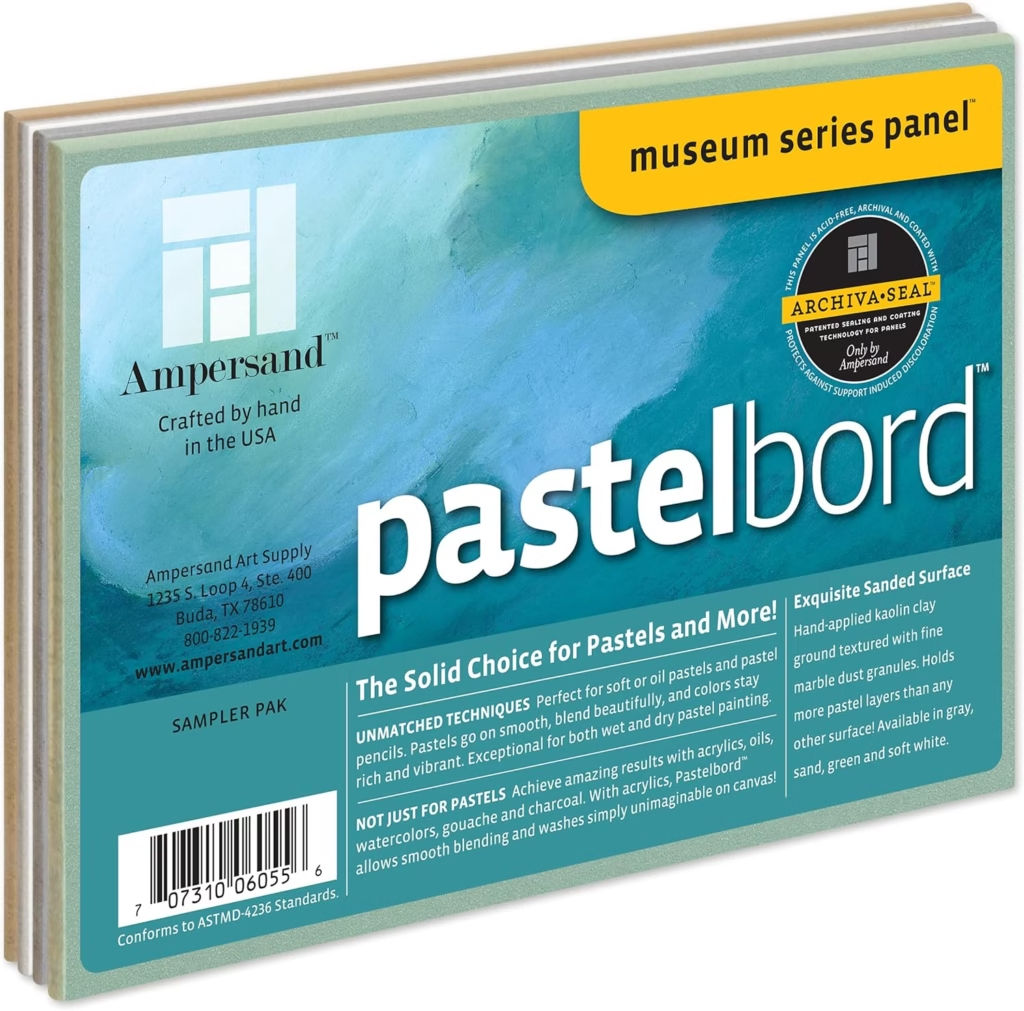
Ampersand Pastelbord (The Rigid Option)
Rating: ★★★★★ (5/5 for durability, 4/5 for versatility)

Pastelbord isn’t paper — it’s a rigid panel with a specially textured surface. This makes it unique among pastel surfaces.
Specifications:
- Weight: N/A (rigid 1/8″ hardboard panel)
- Texture: Clay surface with fine marble dust granules (medium-coarse tooth)
- Colors: White and gray (limited colors in some regions)
- Formats: Rigid panels from 8×10″ to 18×24″ (various sizes)
Price: $15-40 depending on size (panels)
Pros:
- Rigid support means no mounting needed before framing
- Very durable (can transport without damage)
- Holds many layers (10+ easily)
- Can handle wet and dry media
- No warping or buckling
- Professional presentation quality
- Excellent for larger work
- All-in-one support (doubles as drawing surface and backing board)
Cons:
- Cannot be cut or resized (committed to panel size)
- Heavier than paper (shipping and transport)
- More expensive than paper per square inch
- Limited color options (mostly gray and white)
- Storage takes more space (rigid panels)
Best for: Finished professional work, plein air painting (durability), artists who work large, exhibition pieces, work going directly to framing, artists who dislike mounting paper
Why choose Pastelbord: If you’ve ever struggled with mounting pastel paper to boards for framing, Pastelbord eliminates that step. You work directly on a rigid, archival surface that’s ready to frame. For plein air artists, the durability is invaluable.
Framing advantage: Pastelbord panels can go directly into frames with no mounting, no taping, no stretching. This saves time and money on framing costs. The rigid support also means artwork arrives to clients or galleries in perfect condition.
Outdoor painting: Many plein air pastel artists choose Pastelbord for outdoor work because it’s virtually indestructible compared to paper. Wind, bumps, and field conditions don’t damage it.
Professional Budget Recommendations
Emerging Professional ($100-150):
- 15-20 sheets Pastelmat for commissioned work
- Mi-Teintes Touch for practice and personal work
- 5 sheets UART or Colourfix for experimentation
Working Professional ($200-300):
- 30-40 sheets Pastelmat (primary surface)
- 10-15 sheets UART or Colourfix for variety
- Pastelbord panels for specific projects
- Mi-Teintes Touch for sketches and studies
Established Professional ($300-500+):
- Bulk purchase Pastelmat (50+ sheets) for commission work
- UART, Colourfix, La Carte for specific projects
- Pastelbord panels for gallery work
- Complete range of surfaces for different effects
Strategic principle: At the professional level, paper is a business expense that directly affects work quality and client satisfaction. Investing in premium surfaces pays for itself through better results, fewer failed pieces, and professional presentation.
Best Paper for Oil Pastels (Special Considerations)
Oil pastels have fundamentally different requirements than soft pastels due to their oil-based binder. Using the wrong paper leads to poor adhesion, difficulty layering, and frustrating results.
Why Oil Pastels Need Different Paper
Oil pastels are distinct from soft (chalk) pastels in important ways that affect paper selection:
Oil-based vs. chalk-based:
- Soft pastels are pure pigment with minimal binder (chalk-like, powdery)
- Oil pastels contain pigment suspended in oil and wax (creamy, waxy)
What this means for paper:
- Oil pastels don’t need extreme tooth (they stick via oil, not mechanical grip)
- Paper must be heavyweight to handle oil content without buckling
- Moderate texture helps but too much tooth wastes expensive oil pastels
- Absorbency matters more than with soft pastels
Minimum requirements:
- Weight: Minimum 80 lb (approximately 140 GSM) — heavier is better
- Texture: Some tooth helpful but not critical (moderate texture ideal)
- Durability: Must withstand pressure (oil pastels applied with more force)
Canson Mixed Media Paper (Best for Oil Pastels)
Rating: ★★★★★ (5/5 for oil pastels)

Mixed media paper is the sweet spot for oil pastel work — heavyweight enough to handle the medium, textured enough to grip, and affordable.
Specifications:
- Weight: 96 lb (approximately 140 GSM) — some varieties up to 138 lb
- Texture: Slight tooth, moderate texture
- Colors: Usually white or natural white
- Formats: Pads from 5.5×8.5″ to 18×24″, spiral and tape-bound
Price: $12-25 for pads (very affordable)
Pros:
- Perfect weight for oil pastels
- Moderate texture holds oil pastels well
- Very affordable (under $1 per sheet in pads)
- Widely available
- Perforated edges for easy removal
- Can handle layering (3-5 layers typically)
- Acid-free, archival quality
- Also works with other media (watercolor, acrylic, markers)
Cons:
- Limited to pad sizes (buying individual sheets harder)
- White only (no colored paper options in mixed media)
- Not as robust as boards for very heavy application
Best for: Oil pastel drawings and paintings, beginners through intermediate artists, regular practice and finished work, artists on a budget
Why mixed media paper works: The paper is designed to handle multiple media types, meaning it can handle the oil content without degrading. The weight prevents buckling, and the slight texture gives just enough grip without wearing down expensive oil pastels too quickly.
Application tips:
- Layer gradually (oil pastels build up quickly on this paper)
- Use lighter pressure than on boards (paper has limits)
- Blend with tools rather than excessive finger pressure
- Consider this your “daily driver” for oil pastel work
Ampersand Pastelbord (Professional Oil Pastel Surface)
Rating: ★★★★★ (5/5 for serious oil pastel work)

While Pastelbord works beautifully with soft pastels, many professional oil pastel artists consider it the ultimate surface for oil pastels specifically.
Specifications:
- Rigid 1/8″ hardboard panel
- Clay surface with marble dust texture
- Various sizes available
- Works with oil and soft pastels equally well
Price: $15-40 per panel (size dependent)
Pros:
- Perfect texture for oil pastels (not too rough, excellent grip)
- Rigid support handles heavy pressure
- Many layers possible
- Extremely durable
- Professional presentation
- Can use solvents and tools without damage
- No buckling or warping
- Ready to frame
Cons:
- More expensive than paper per square inch
- Cannot resize or cut
- Heavier (transport considerations)
- Limited color options
Best for: Professional oil pastel work, large pieces, heavily worked paintings, exhibition work, artists who work with significant pressure
Why oil pastel artists love Pastelbord: The hard surface allows you to apply significant pressure (important for oil pastels) without worrying about damaging the support. The texture is ideal — enough grip without wearing down pastels too fast. Many oil pastel artists use Pastelbord exclusively for finished work.
Other Suitable Options for Oil Pastels
Watercolor Paper (Cold-Pressed or Rough):
- Weight: 140 lb minimum (300 GSM)
- Pros: Can handle oil content, nice texture, widely available
- Cons: Expensive for practice work
- Best for: Mixed media combining watercolor and oil pastels
Heavy Drawing Paper:
- Weight: 100 lb minimum
- Pros: Affordable, available everywhere
- Cons: Smooth texture less than ideal
- Best for: Sketches and studies only
Canvas Boards:
- Rigid canvas mounted on board
- Pros: Very durable, interesting texture
- Cons: Canvas weave can be visible, may need priming
- Best for: Painterly, expressive oil pastel work
Papers to Avoid with Oil Pastels
Ingres and Thin Pastel Papers:
- Too lightweight (100-130 GSM)
- Will buckle or saturate with oil
- Cannot handle pressure needed for oil pastels
Highly Textured Sanded Papers:
- UART, Colourfix work but wear down oil pastels extremely fast
- Expensive to use with oil pastels
- Only use if you specifically want the effect and don’t mind the cost
Velour Paper:
- The fuzzy texture doesn’t work well with waxy oil pastels
- Difficult to layer oil pastels on velvet surface
- Better options available
Regular Drawing Paper:
- Too thin (typically 60-70 GSM)
- Smooth surface doesn’t grip oil pastels
- Will tear or buckle with oil content
Oil Pastel Paper Budget Recommendations
Beginner ($15-25):
- One Canson Mixed Media pad in your preferred size
- This is all you need to get started
Intermediate ($40-60):
- Canson Mixed Media pad for regular work
- 2-3 Pastelbord panels (8×10″ or 11×14″) for finished pieces
- Watercolor paper (140 lb) for experimentation
Professional ($100+):
- Multiple Pastelbord panels in various sizes
- Mixed media paper for studies
- Canvas boards for larger work
- Heavy watercolor paper for mixed media
Strategic principle: Oil pastel artists can work successfully with just mixed media paper for years. Invest in Pastelbord when you’re ready for professional-quality finished pieces or when paper isn’t meeting your needs.
Specialty Papers: Velour, Watercolor, and Alternative Surfaces
Once you’ve mastered standard pastel papers, specialty surfaces offer unique effects and expand your creative possibilities. These aren’t essential for most artists but provide distinctive characteristics worth exploring.
Velour Paper (Not for Everyone)
Rating: ★★★☆☆ (3.5/5 — specialist appeal)
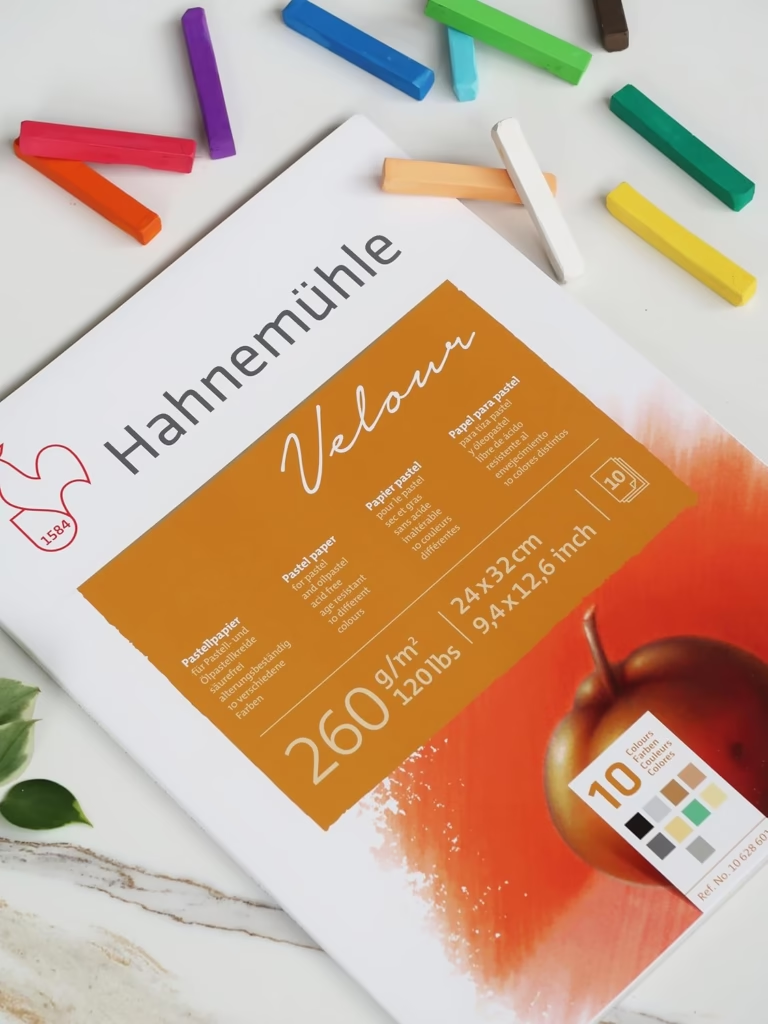
Velour paper is unlike any other pastel surface. It has a fuzzy, velvety texture similar to fabric that creates uniquely soft, atmospheric effects.
Specifications:
- Weight: 250 GSM (heavyweight card)
- Texture: Flocked velvety surface (feels like soft fabric)
- Colors: Limited range (typically neutrals and earth tones)
- Formats: Individual sheets
Price: $5-8 per sheet (premium pricing)
Pros:
- Creates uniquely soft, dreamy, atmospheric effects
- Automatically softens all marks (creates gentle appearance)
- Excellent for short-haired animals (horses, dogs, seals)
- Pastel doesn’t smear (locked into fuzzy texture)
- Beautiful for certain portrait styles
- Distinctive look unlike any other paper
Cons:
- Expensive
- Very difficult to create sharp edges or fine details
- Hard to erase (nearly impossible)
- Difficult to add whiskers or fine hair
- Transfer lines show indentations (difficult to avoid marks)
- Requires significant technique adjustment
- Not suitable for detailed, precise work
- Limited layering compared to sanded papers (5-7 layers)
Best for: Short-haired animal portraits, soft atmospheric portraits, dreamy landscape effects, artists who want automatically soft appearance
Challenges to expect:
- Everything becomes soft and fuzzy (this is both feature and limitation)
- Fine details like whiskers nearly impossible
- White details can be challenging (light colors don’t show well on fuzzy texture)
- Transfer methods problematic (grid or freehand drawing better)
When to try velour: After you’re comfortable with standard papers and specifically want the soft, dreamy effect. Don’t start with velour — it’s too limiting while learning. But if you’re painting a horse portrait or want that distinctive velvety finish, it’s perfect.
Professional perspective: Some wildlife artists use velour exclusively for certain animals (particularly horses) because the fuzzy texture mimics short hair beautifully. Portrait artists sometimes use it for soft, gentle portrait styles. But most artists use it occasionally for specific effects rather than as their primary surface.
Application tips:
- Use light touch (fuzzy surface grabs pigment easily)
- Work in layers (building up slowly)
- Embrace the softness rather than fighting it
- Use sharp pastel pencils for any details
- Consider velour for backgrounds while using other papers for detailed subjects
Watercolor Paper for Pastels
Rating: ★★★★☆ (4/5 for mixed media, 3/5 for pastels alone)

Watercolor paper can work beautifully with pastels, especially for mixed-media approaches or artists who want to pre-tone their surfaces.
When Watercolor Paper Works:
Cold-Pressed (Medium Texture):
- Has good tooth for pastels
- 140 lb minimum weight recommended (300 GSM)
- Can handle moderate layering (3-5 layers)
- Excellent for mixed media (watercolor underpainting + pastel)
Rough Texture:
- Heavy tooth grips pastels well
- 140-300 lb weight (300-640 GSM)
- Pronounced texture visible in work
- Good for textured, expressive pastel work
What to Avoid:
Hot-Pressed (Smooth):
- Too smooth for pastels (minimal tooth)
- Pastels slide around and don’t adhere
- Only works if treated with pastel ground primer
Benefits of Watercolor Paper:
- Can pre-tone with watercolor or acrylics (create custom colors)
- Extremely durable (high-quality cotton paper)
- Archival quality
- Available in large sizes
- Water-resistant (won’t be damaged by humidity)
- Many texture options
Limitations:
- Expensive (premium watercolor paper costs $3-8 per sheet)
- Texture very pronounced (may not suit detailed work)
- Not specifically optimized for pastels (dedicated pastel papers perform better)
Best for: Mixed media artists, artists who want to create custom-colored surfaces, watercolor painters adding pastel details, large-scale work
How to use effectively:
- Pre-tone paper with watercolor wash in desired color
- Let dry completely
- Apply pastels over dried watercolor
- Watercolor “tooth” holds pastels well
Recommended brands for pastels:
- Arches (140 lb cold-pressed or rough)
- Fabriano Artistico (300 GSM cold-pressed)
- Saunders Waterford (190-425 GSM)
Sandpaper and Hardware Store Options
Rating: ★★☆☆☆ (2/5 — practice/experimentation only)
Regular sandpaper from hardware stores technically works with pastels but has significant limitations.
What Works:
- Fine-grit sandpaper (220-400 grit)
- Provides very aggressive tooth
- Holds many layers
- Extremely cheap
Problems:
- Not archival (will deteriorate over time)
- May contain acids (yellowing and damage)
- Grit may be inconsistent
- Wears down pastels extremely fast
- Not worth using for finished work
When to use sandpaper:
- Pure experimentation
- Testing techniques
- When you want ultra-aggressive tooth
- Practice on extremely cheap surface
Better alternatives: Spend slightly more for UART or Colourfix, which provide sanded surfaces with archival quality, consistent grit, and professional results.
Adding Texture to Any Surface: Pastel Ground Primers
Rating: ★★★★☆ (4/5 for customization)
Pastel ground primers let you create pastel-friendly surfaces on virtually any substrate.
Products:
- Golden Pastel Ground (most popular)
- Art Spectrum Colourfix Primer
- Similar primers from various manufacturers
How it works:
- Mix with water to desired consistency
- Apply to surface with brush, roller, or sponge
- Creates textured, toothy surface similar to sanded paper
- Can tint to any color you want
What you can coat:
- Canvas
- Wood panels
- Hardboard/masonite
- Watercolor paper (to add more tooth)
- Cardboard (practice surfaces)
- Previously painted surfaces
Benefits:
- Create custom colors not available in commercial papers
- Work on any size (not limited to paper dimensions)
- Use rigid supports (wood panels, etc.)
- Cost-effective for very large work
- Completely customizable texture (thin coats = smooth, thick = textured)
Limitations:
- Requires preparation time (apply, dry 24 hours)
- Need to buy primer, substrate, and mixing supplies
- Results vary based on application technique
- More complex than buying ready-made paper
Best for: Artists working very large, those wanting custom colors, canvas painters adding pastel capability, artists on budget making practice surfaces
How to use:
- Choose substrate (canvas, wood panel, etc.)
- Mix primer according to directions
- Apply evenly with brush or roller
- Let dry completely (24 hours minimum)
- Apply second coat if more tooth desired
- Use like commercial pastel paper
Choosing Paper Color: Why It Matters for Pastels
Unlike many media where artists work on white surfaces, pastel artists commonly choose colored or toned papers. This isn’t just aesthetic preference — paper color significantly affects your workflow and final results.
Why Pastel Artists Use Colored Paper
Pastels are semi-transparent when applied lightly, meaning the paper color shows through and becomes part of the artwork. Working on colored paper provides several advantages:
Mid-tone foundation: Starting with a mid-tone gray or earth color means you’re working from the middle value rather than pure white. You add both lights (highlights) and darks (shadows), which is more intuitive and faster than building up from white.
Reduced layering: White paper requires many layers to establish mid-tones. Colored paper provides instant mid-tone, reducing the pastel needed.
Color harmony: Paper color unifies the artwork, creating automatic color harmony. A warm beige paper warms the entire piece; cool gray creates cooler atmosphere.
Visible paper as element: Allowing paper to show through intentionally adds color and texture to the composition. This is part of the pastel aesthetic.
Atmospheric effects: Paper color can create specific moods — blue-gray for cool atmospheric landscapes, warm ochre for sunny scenes, dark colors for dramatic work.
Best Colors for Different Subjects
Portraits:
- Warm grays and beiges: Most versatile — work with all skin tones
- Tan or sand: Mimics lighter skin tones, requires less pastel for Caucasian portraits
- Medium browns: Good for darker skin tones
- Avoid: White (requires too many layers), very dark colors (difficult for beginners), bright colors (distract from subject)
Why: Portrait paper should complement but not compete with skin tones. Neutral tones let you adjust for any ethnicity.
Landscapes:
- Blue-gray: Perfect for atmospheric landscapes, misty scenes, water scenes
- Warm gray: Versatile, works for various landscape types
- Earth tones (tan, ochre): Excellent for sunlit landscapes, desert scenes
- Mid-green: Can work for heavily vegetated scenes (use carefully)
Why: Landscape paper color often reflects dominant element (sky, earth). Blue-gray unifies sky and distance; earth tones work for foreground and soil.
Wildlife and Animals:
- Mid-gray: Most versatile — works for any animal color
- Brown/tan: Good for brown or tan animals (deer, lions, etc.)
- Warm gray: Excellent neutral that warms or cools easily
- Match animal color: If painting a brown bear, brown paper can be helpful
Why: Wildlife paper should either be neutral (works with any fur color) or deliberately match the animal’s base color to reduce layering.
Florals:
- Very flexible — almost anything works
- Contrasting colors: Blue paper for orange flowers, gray for colorful blooms
- Harmonizing colors: Soft green for florals with greenery, warm tones for warm flowers
- Light colors: Often work well for botanicals
Why: Florals are flexible because flowers provide their own strong colors. Choose paper to either contrast (flowers pop) or harmonize (unified composition).
Abstract and Experimental:
- Bold colors encouraged: Bright reds, blues, blacks, vibrant tones
- Dark papers: Create dramatic effects
- Unusual colors: Purple, teal, etc. for unique effects
Why: Experimental work can break all rules. Bold paper colors become active elements in composition.
When to Choose White or Light Paper
Despite colored paper’s popularity, white and light papers have their place:
Best uses for white/light paper:
- High-key subjects (very light, bright scenes)
- Florals with white or very light petals
- Botanical illustrations
- When you want maximum color purity (no paper tone influence)
- Very bright, sunny scenes
Challenges with white paper:
- Requires more layers to establish mid-tones
- Can create stark contrast (pastels look darker on white)
- More pastel needed (covering white takes more pigment)
- Harder for beginners (no mid-tone to start from)
When it works well: If your subject is predominantly light and bright, white paper makes sense. For everything else, colored paper is typically easier.
Dark Paper Considerations
Dark papers (dark gray, black, brown, dark blue) create dramatic effects but require different techniques:
Benefits:
- Dramatic, moody atmosphere
- Excellent for night scenes
- Good for dark subjects
- Creates strong contrast with light pastels
- Less pastel needed if subject is dark
Challenges:
- Requires working “light to dark” (opposite of white paper)
- Light pastels need many layers to show on dark paper
- Harder for beginners (less forgiving)
- Can be difficult to establish light values
- Requires planning (highlights must be preserved from start)
Best for: Experienced artists, night scenes, dramatic portraits, dark animals (black horses, panthers), moody atmospheric work
Paper Color Selection Strategy
For beginners: Start with mid-tone grays (light to medium gray). These are most forgiving, work with any subject, and teach you how colored paper functions.
For intermediate artists: Experiment with earth tones (tan, beige, ochre) and cool grays. Match paper to subject type (portraits vs. landscapes).
For advanced artists: Use the full range including dark papers and unusual colors. Choose paper color as deliberately as you choose pastel colors — it’s part of your palette.
The neutral strategy: Keep stock of light gray, medium gray, warm beige, and cool blue-gray. These four colors cover 90% of subjects effectively.
Testing Paper Color
Before committing to large sheets, test your subject on small pieces:
- Get sample pack or individual sheets in different colors
- Do quick color study of subject on 3-4 different papers
- Observe which paper makes colors “pop” best
- Notice which paper requires least layers
- Choose paper where you get the effect you want most efficiently
Color harmony test: Apply a few key colors from your subject to different papers. Which paper makes them look best? That’s your answer.
Paper Format Options: Sheets, Pads, or Boards?
Paper format affects your workflow, cost per artwork, storage, and convenience. Understanding the pros and cons of each format helps you choose strategically.
Pads (Best for Beginners)
Pastel paper pads contain multiple sheets (typically 12-24) bound together, often with crystal paper or glassine sheets between each page to protect work.
Advantages:
- Convenient and portable (everything contained)
- Protected storage (crystal paper between sheets prevents smudging)
- Usually include assorted colors (variety to test)
- No need for separate storage (sheets stay organized)
- Good for travel and plein air work
- Often perforated or tear-off edges
- Spiral-bound options lay flat while working
Disadvantages:
- Limited to pad sizes (typically 9×12″, 12×16″, 18×24″ maximum)
- More expensive per sheet than buying individually
- Locked into color selection (can’t choose individual colors)
- Must buy full pad even if you only want few sheets
- Spiral binding can be awkward for some artists
Best for:
- Beginners (convenience and variety)
- Practice and sketching work
- Travel and plein air painting
- Students
- Artists who work within standard sizes
- Organized storage without additional supplies
Cost comparison example:
- Canson Mi-Teintes pad (12 sheets, 9×12″): ~$18 = $1.50 per sheet
- Individual Mi-Teintes sheets (19×25″): ~$2 each (much larger, better value per square inch)
When to choose pads: If you’re starting out, want convenience, or work within standard sizes. The built-in protection and organization justify slightly higher per-sheet cost.
Individual Sheets (Best Value for Regular Use)
Individual sheets are sold separately, allowing you to buy exact quantities and colors needed.
Advantages:
- Choose exact colors you want (no unwanted colors)
- Buy exact quantity needed
- Cheaper per sheet for regular users
- Available in larger sizes (often 19×25″ or 50x70cm)
- Can cut to custom sizes
- Best value per square inch
- Stock up on favorite colors
Disadvantages:
- Requires proper storage system (flat files, portfolios, or tubes)
- No built-in protection (need crystal paper/glassine separately)
- Must handle carefully to avoid damage
- Minimum purchase quantities sometimes required
- Shipping costs can add up for small orders
Best for:
- Intermediate to professional artists
- Artists working larger than pad sizes
- Anyone using significant quantities of paper
- Artists who know their preferred colors
- Custom size requirements
- Budget-conscious artists (better value long-term)
Storage solutions:
- Flat files (ideal but expensive: $200-800)
- Large portfolios ($30-100, portable)
- Under-bed storage boxes ($20-40, accessible)
- Rolled in tubes (not ideal for pastel paper, may create curl)
Cost comparison: Buying 12 individual sheets of Pastelmat (19×25″) costs ~$48-72 vs. a Pastelmat pad (12 sheets, 9×12″) at ~$45-55. The individual sheets provide 4x the surface area at similar total cost.
When to choose individual sheets: Once you know your favorite papers and colors, individual sheets provide better value and flexibility. Make the switch from pads when you’re using paper regularly.
Boards (Premium Option)
Boards are paper mounted on rigid backing (like Pastelmat boards) or rigid panels with pastel-friendly surfaces (like Pastelbord).
Types:
- Paper boards: Premium pastel paper mounted on rigid backing (Pastelmat boards, mounted UART)
- Rigid panels: Purpose-built panels with pastel surface (Ampersand Pastelbord)
Advantages:
- Rigid support built-in (no mounting needed before framing)
- Extremely durable (won’t buckle, crease, or bend)
- Professional presentation quality
- Can work without drawing board underneath
- Transport finished work safely
- Ready for framing (no additional backing needed)
- Stands upright on easel without support
Disadvantages:
- More expensive per square inch
- Heavier (shipping and transport costs)
- Cannot resize or cut (committed to size)
- Requires more storage space (rigid rectangles)
- Limited size options compared to paper sheets
Price comparison:
- Pastelmat board (30x40cm): ~$15-20
- Equivalent Pastelmat paper (individual sheet): ~$6-8
- Premium for rigidity: ~$7-12 per board
Best for:
- Professional finished work
- Commissions and sales
- Exhibition pieces
- Gallery presentations
- Plein air painting (durability)
- Artists who dislike mounting paper
- Large works requiring rigid support
When rigidity matters:
- Transporting finished work to exhibitions or clients
- Working with heavy layering (paper might buckle)
- Plein air conditions (wind, bumps, field hazards)
- Direct-to-frame presentation
- Larger sizes where paper would be unwieldy
Cost-benefit analysis: For practice and studies, boards are unnecessarily expensive. For finished professional work going to clients or galleries, the extra cost is justified by presentation quality and durability.
Format Decision Tree
Choose PADS if you:
- Are beginning with pastels
- Want convenience and portability
- Work within standard sizes (9×12″ to 18×24″)
- Value built-in protection and organization
- Don’t mind slightly higher per-sheet cost
Choose INDIVIDUAL SHEETS if you:
- Use paper regularly (more than 1-2 times monthly)
- Work larger than pad sizes
- Want best value per square inch
- Know your preferred colors
- Have storage solution available
- Use significant paper quantities
Choose BOARDS if you:
- Create professional finished work
- Need maximum durability
- Plan to frame immediately
- Work plein air frequently
- Dislike mounting paper
- Want rigid support while working
- Budget allows premium pricing
Hybrid approach (recommended for serious artists):
- Pads or cheap paper for practice and sketches
- Individual sheets for finished work
- Boards for special commissions, exhibitions, or largest pieces
This three-tier approach balances cost-effectiveness with quality where it matters.
Fixative: When You Need It (and When to Skip It)
Fixative is one of the most debated topics among pastel artists. Used correctly, it stabilizes your work; used incorrectly, it can darken colors and reduce vibrancy. Understanding when to use fixative — and when to avoid it — is essential.
What is Fixative and How Does It Work
Fixative is a spray adhesive (similar to hairspray) that creates a thin coating over pastel pigment, helping secure it to the paper surface.
Types of fixative:
Workable Fixative:
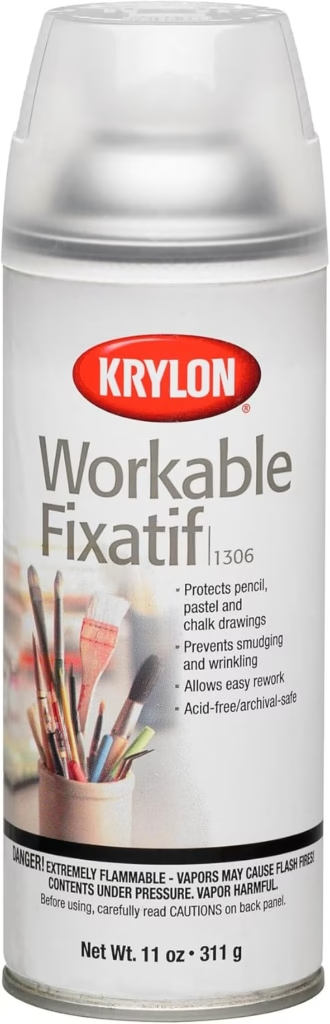
- Allows additional pastel layers after application
- Used between layers during creation process
- Can build up through multiple applications
- Maintains some tooth after drying
Final Fixative:
- Intended as final protective coat
- Seals surface more completely
- Harder to add more pastel after application
- Provides maximum stabilization
How it works: Fine droplets of adhesive settle over pastel particles, creating a web that holds pigment in place. The adhesive is designed to be invisible when dry, though results vary.
Chemical composition: Most fixatives use synthetic resins (acrylic or alcohol-based) dissolved in solvent. When sprayed, solvent evaporates leaving invisible resin coating.
Papers That Don’t Need Fixative
Modern pastel papers with high tooth often don’t require fixative because their surface mechanically holds pigment securely.
Clairefontaine Pastelmat:
- Velvet surface grips pigment without chemical help
- Fixative actually reduces color vibrancy unnecessarily
- Can damage the surface (reported spotting/staining)
- Professional recommendation: Never use fixative on Pastelmat
Art Spectrum Colourfix:
- Coated sanded surface holds pigment mechanically
- Designed to work without fixative
- Surface grip alone provides stability
- Fixative unnecessary and may darken colors
UART Sanded Paper:
- Sanded tooth locks pastel into surface
- No fixative needed for stability
- Work can be framed as-is
- Fixative would only darken colors without benefit
Ampersand Pastelbord:
- Marble dust surface provides excellent grip
- Designed for no-fixative workflow
- Fixative unnecessary unless artist prefers the look
General principle: If paper has “high tooth” or “sanded surface” in description, fixative is typically unnecessary. The mechanical grip is sufficient.
Papers That Benefit from Fixative
Papers with lighter tooth or less aggressive texture benefit from fixative stabilization, especially with heavy layering.
Ingres Paper:
- Light tooth fills quickly
- Fixative between layers helps stabilize and adds tooth
- Apply after each layer if heavily layering
- Essential for finished work on Ingres
Canson Mi-Teintes:
- Moderate tooth benefits from stabilization
- Use fixative between layers if applying 3+ layers
- Final fixative coat recommended for archival stability
- Helps with smudging issues
Thin Pastel Papers (100-130 GSM):
- Lightweight papers benefit from stabilization
- Fixative adds some structure
- Essential if framing without glazing
- Helps prevent smudging during handling
When layering heavily on any paper:
- Even high-tooth papers may benefit from fixative between early layers
- Allows building beyond paper’s natural capacity
- Tests should be done first (some papers react poorly)
Fixative Best Practices
If you decide to use fixative, proper technique matters significantly:
Application technique:
Distance: Hold can 12-18 inches from surface (30-45 cm)
- Too close: Oversaturation, spotting, pooling
- Too far: Fixative dries before reaching surface (ineffective)
Spray pattern: Use sweeping horizontal passes
- Start spray off the paper edge
- Pass across paper
- Release spray off opposite edge
- Slightly overlap passes
- Multiple light coats better than one heavy coat
Environment:
- Work in well-ventilated area (fixative fumes are toxic)
- Outdoors ideal (avoid wind)
- Exhaust fan if working indoors
- Wear mask if sensitive to fumes
- Paper should be vertical or at angle (prevents pooling)
Timing:
- Between layers: Fix one layer before adding next
- Final coat: After artwork completely finished
- Drying time: 15-30 minutes between coats, 24 hours before framing
Amount:
- Light, even coats (2-3 thin coats better than 1 heavy coat)
- Should barely see spray landing
- If you see wet spots, you’ve applied too much
Potential Issues with Fixative
Understanding problems helps you avoid them:
Color darkening:
- Most common issue (colors typically darken 10-20%)
- Caused by fixative filling white spaces between pigment particles
- Whites and light colors most affected
- Can dramatically change artwork appearance
- Test on scrap first
Spotting:
- Uneven application creates spots or blotches
- Caused by: too close application, too much fixative, humid conditions
- Particularly problematic on Pastelmat and velour
- Difficult or impossible to fix
Loss of vibrancy:
- Fixative coating can dull color intensity
- Pastels’ light-scattering quality reduced
- Velvety pastel surface becomes more unified/flat
- Trade-off for stability
Surface changes:
- Some papers (Pastelmat) can develop sheen or gloss
- Texture may become less visible
- Surface feel changes (becomes slightly sealed)
Overworking becomes harder:
- Final fixative makes adding more pastel difficult
- Surface becomes slick
- May need to add tooth back with workable fixative
The Fixative Debate
Professional pastel artists have strong, diverging opinions on fixative:
Pro-fixative camp argues:
- Necessary for archival stability
- Prevents smudging and dust loss over time
- Allows transport without damage
- Required for papers like Ingres
- Traditional practice (used for centuries)
Anti-fixative camp argues:
- Modern high-tooth papers make it unnecessary
- Color darkening unacceptable (defeats purpose of pastels’ vibrancy)
- Proper framing (under glass with gap) provides protection
- Historical fixative use was due to inferior papers
- Risk of damage (spotting) not worth benefit
Middle ground (recommended):
- Use fixative only when paper requires it (thin papers, Ingres, heavy layering on moderate-tooth papers)
- Skip fixative on high-tooth papers (Pastelmat, UART, Colourfix)
- Always test on scrap before applying to finished work
- Use minimal amount (light coats)
- Choose framing protection over fixative when possible
Framing as Alternative to Fixative
Proper framing provides physical protection without fixative’s color changes:
Professional framing setup:
- Artwork under glass or acrylic glazing
- Spacer or double mat creates gap between artwork and glazing
- Gap allows pastel “dust” to fall without smudging artwork
- Conservation mounting holds paper flat
- Sealed backing prevents environmental damage
The gap is critical: Without a gap, pastel dust can transfer to glass and artwork will smudge when moved. Professional framers understand pastel requirements.
This approach:
- Preserves original color vibrancy (no darkening)
- Provides physical protection
- Allows artwork to “breathe”
- Meets conservation standards
- More expensive than fixative but better for the art
For storage and transport:
- Use crystal paper or glassine between sheets
- Store flat (never rolled)
- Use rigid backing during transport
- Handle by edges only
Bottom line: On modern high-tooth papers, proper framing eliminates the need for fixative. On lighter papers, fixative remains helpful or necessary.
Budget Guide: What Should You Spend on Pastel Paper?
Understanding typical price ranges helps you budget appropriately for your skill level and avoid both underspending (poor materials) and overspending (premium materials before you’re ready).
Beginner Budget: $15-30
At the beginner stage, your priority is learning techniques without financial pressure. Affordable paper lets you experiment freely.
Minimum viable setup ($15-20):
- One pad Canson Mi-Teintes (12 sheets, 9×12″): ~$15-18
- OR Strathmore 400 Series pad (12 sheets, 9×12″): ~$12-15
What this provides:
- 12 practice surfaces
- Opportunity to learn blending, layering, mark-making
- Several finished pieces possible
- Enough variety to determine if you enjoy pastels
Smart beginner setup ($25-35):
- Canson Mi-Teintes pad for practice: ~$15-18
- 3-5 individual sheets Mi-Teintes Touch for finished pieces: ~$10-15
- OR Sample paper pack: ~$25-30
What this provides:
- Abundant practice paper (no anxiety about waste)
- Better paper for 2-3 finished pieces
- Experience with multiple paper types (if sample pack chosen)
Ambitious beginner ($40-50):
- Canson Mi-Teintes pad for practice: ~$15-18
- Sample paper pack to test options: ~$25-30
- OR: Mi-Teintes pad + Canson XL Sand Grain pad for practice
Strategic approach: Buy cheap abundant paper for practice (Mi-Teintes or Strathmore), save better paper (Mi-Teintes Touch or 1-2 sheets of Pastelmat) for finished pieces once you’re confident.
What NOT to buy as beginner:
- $8 individual Pastelmat sheets (too expensive while learning)
- Large quantities of one paper (test first)
- Specialty papers like velour (too advanced)
- Rigid boards (unnecessary expense for practice)
Intermediate Budget: $30-75
At intermediate level, you’re creating finished work regularly and need higher-quality surfaces, but you’re not yet at professional pricing.
Regular practice setup ($30-50):
- Mi-Teintes pad for practice/sketches: ~$15-18
- 15-20 sheets Mi-Teintes Touch: ~$30-60 (finished work)
- OR: Mi-Teintes + Murano sheets + Ingres sheets for variety
What this provides:
- Abundant practice paper
- Quality surfaces for regular finished work
- Enough paper for 10-15 completed pieces
Serious intermediate ($60-90):
- Mi-Teintes Touch pad or 20+ sheets: ~$30-50
- 10 sheets Pastelmat (testing premium surface): ~$40-60
- OR: Mi-Teintes Touch + 5 sheets each UART and Colourfix
What this provides:
- Primary working surface (Mi-Teintes Touch)
- Introduction to professional papers
- Variety for different effects
- Approximately 20-25 finished pieces
Committed intermediate ($100-120):
- 30 sheets Mi-Teintes Touch: ~$60-80
- 15 sheets Pastelmat: ~$60-90
- Sample pack professional papers: ~$25-30
- Keep Canson XL or Mi-Teintes for practice
What this provides:
- Primary surface for regular work
- Premium paper for best pieces
- Testing of other professional options
- 30-40 finished pieces possible
Strategic approach: Have two tiers: good paper (Mi-Teintes Touch) for regular finished work, premium paper (Pastelmat, UART, Colourfix) for special pieces. Continue using cheap paper for practice and experimentation.
Professional Budget: $75-150+ per month
Professional artists treat paper as a business expense that directly affects client satisfaction and artwork quality.
Emerging professional ($100-150):
- 20-30 sheets Pastelmat: ~$80-150
- 10-15 sheets Mi-Teintes Touch: ~$25-45 (sketches/studies)
- 5-10 sheets UART or Colourfix: ~$30-60 (variety)
What this provides:
- Primary professional surface for commissioned work
- Quality paper for studies and planning
- Alternative surfaces for specific effects
- Approximately 25-40 finished professional pieces
Working professional ($200-350):
- 40-60 sheets Pastelmat (primary surface): ~$160-300
- 20 sheets UART or Colourfix (alternatives): ~$80-120
- 2-4 Pastelbord panels (special projects): ~$30-80
- Mi-Teintes Touch for studies: ~$30-50
What this provides:
- Sufficient inventory for regular commissioned work
- No paper anxiety (adequate stock)
- Multiple surface options for client preferences
- Quality study paper for planning
- 50-80 finished professional pieces
Established professional ($350-500+):
- Bulk Pastelmat (50-100 sheets): ~$200-400
- 30+ sheets premium alternatives (UART, Colourfix, La Carte): ~$150-250
- Multiple Pastelbord panels: ~$50-100
- Mi-Teintes Touch or Murano for studies: ~$30-50
What this provides:
- Never running out of primary surface
- Full range of surfaces for any client request
- Bulk pricing benefits
- Complete freedom in surface choice
- 80-120+ professional finished pieces
Strategic approach: Primary surface in bulk (usually Pastelmat), alternative surfaces available, cheap paper for studies and planning. Paper cost should be 5-15% of artwork sale price.
Cost Per Finished Artwork
Understanding paper cost per piece helps with pricing artwork:
Beginner papers:
- Mi-Teintes sheet (9×12″): ~$1.50 (from pad) or $2-3 (individual)
- Negligible cost — not factor in artwork pricing
Intermediate papers:
- Mi-Teintes Touch (9×12″): ~$2-3 per piece
- Murano/Ingres (similar size): ~$2-3 per piece
- Low cost — minor factor in pricing
Professional papers:
- Pastelmat (9×12″ portion from large sheet): ~$4-6
- UART/Colourfix (similar): ~$4-7
- Pastelbord (8×10″ panel): ~$15-20
- Moderate cost — include in pricing considerations
For commissioned work pricing: Paper cost should be 5-15% maximum of final sale price. If selling an 11×14″ portrait for $500, a $10 piece of Pastelmat represents 2% of revenue — entirely reasonable.
Money-Saving Strategies
Buy larger and cut: Large sheets (19×25″ or 50x70cm) cost less per square inch than pads. Cut to sizes needed.
Bulk purchases: Buy 20+ sheets at once for better per-sheet pricing. Many retailers offer quantity discounts.
Use scraps: Keep all paper scraps for testing colors, trying techniques, and small studies. Nothing wasted.
Sample packs first: Test expensive papers via sample packs before buying full sheets. Avoid expensive mistakes.
Two-tier system: Always maintain cheap practice paper + good finished-work paper. Never practice on expensive paper.
Off-brand options: Some lesser-known brands offer similar quality at lower prices. Research reviews before purchasing.
Sales and promotions: Art supply retailers have regular sales. Stock up during 20-30% off sales.
Student discounts: Many retailers offer student discounts (10-20% off). Use if eligible.
Where to Buy Pastel Paper: Trusted Retailers
Finding quality pastel paper at fair prices requires knowing reliable sources. Here’s where professional and serious amateur artists shop.
Online Art Supply Retailers
Jackson’s Art Supplies
- Website: jacksonsart.com
- Strengths: Excellent selection of pastel papers, great sample packs, international shipping, competitive pricing, detailed product information
- Special feature: Comprehensive pastel paper sample packs (8-12 different papers) perfect for testing
- Shipping: UK-based, ships internationally
- Best for: Sample packs, bulk purchases, international customers
Blick Art Materials (Dick Blick)
- Website: dickblick.com
- Strengths: Huge selection, competitive pricing, frequent sales, excellent customer service, education resources
- Special feature: Educator and student discounts available
- Shipping: US-based, ships to Canada
- Best for: US customers, bulk purchases, sales and promotions
Jerry’s Artarama
- Website: jerrysartarama.com
- Strengths: Competitive pricing, frequent coupons and sales (20-40% off), large selection
- Special feature: Generous coupon codes and promotions
- Shipping: US-based
- Best for: Budget-conscious US customers, sale shopping
Amazon
- Website: amazon.com
- Strengths: Fast shipping (Prime), convenient, returns easy, competitive pricing on common brands
- Weaknesses: Limited selection (mainly Canson, Strathmore), fewer specialty papers, pricing varies
- Best for: Quick replenishment of common papers, convenient delivery
CheapJoe’s Art Stuff
- Website: cheapjoes.com
- Strengths: Good pricing, frequent sales, wide selection
- Shipping: US-based
- Best for: US customers seeking deals
Manufacturer Direct
Some paper manufacturers sell directly to consumers:
Clairefontaine
- Available through their website in some regions
- Sometimes better pricing on bulk purchases
- Full color range available
Ampersand (Pastelbord)
- Direct purchase from ampersandart.com
- Professional quantity discounts
- Custom sizes sometimes available
Benefits: Guaranteed authentic products, full range of colors/sizes, sometimes better bulk pricing
Drawbacks: Shipping costs can be high, minimum orders sometimes required
Local Art Supply Stores
Benefits of local stores:
- See and feel paper before buying
- Immediate availability (no shipping wait)
- Individual sheets available (test without commitment)
- Support local business
- Personal advice from staff
- No shipping costs
Common chains with pastel paper:
- Michaels (limited selection, mainly Canson)
- Hobby Lobby (basic selection)
- Local independent art stores (often best selection)
What to look for: Ask if they sell individual sheets of premium papers. Some stores special-order for regular customers.
International Considerations
Availability varies significantly by region:
United States:
- Widest availability
- Most brands readily available
- Competitive pricing
- Many retailer options
Canada:
- Good availability through Above Ground Art Supplies
- Curry’s Art Store
- Some US retailers ship to Canada (check costs)
United Kingdom:
- Jackson’s Art Supplies (excellent)
- Cass Art
- Ken Bromley Art Supplies
- Good availability of European brands
Europe:
- Excellent availability of European brands (Clairefontaine, Sennelier, Hahnemuhle)
- Boesner (Germany) for continental Europe
- Local art stores often stock premium papers
Australia:
- Art Spectrum (Australian brand) widely available
- Oxford Art Supplies
- Eckersley’s
- International orders possible but expensive shipping
Asia:
- Availability varies by country
- Major cities have specialty art stores
- International shipping often necessary for premium papers
Buying Strategy
For beginners:
- Start with local store or Amazon (see paper in person if possible)
- Buy one pad of Canson Mi-Teintes
- If you continue, order sample pack from Jackson’s or Blick
For intermediate artists:
- Order sample pack to test premium papers
- Buy individual sheets online of your favorites
- Watch for sales (20-30% off common)
- Join retailer email lists for coupon codes
For professionals:
- Establish accounts with 2-3 major retailers
- Buy bulk quantities of primary surface (20-50 sheets)
- Monitor sales to stock up
- Consider direct manufacturer purchase for large quantities
Price Comparison Strategy
Prices vary significantly between retailers. For expensive papers:
- Check 3-4 retailers before purchasing
- Factor in shipping costs (sometimes higher prices include free shipping)
- Look for coupon codes (frequently 15-20% off)
- Buy during major sales (Black Friday, back-to-school, etc.)
- Consider bulk purchases for better per-sheet pricing
Example: Pastelmat sheets might range from $5-8 depending on retailer, sales, and shipping. On a 20-sheet purchase, this is $60-160 difference — worth comparing.
Common Questions About Pastel Paper
Can I use regular paper for pastel drawing?
Regular drawing or sketching paper lacks the tooth needed to hold pastel pigment effectively. While you can apply pastels to regular paper for quick experiments, you’ll experience constant smudging, inability to layer, and frustrating results. Pastel-specific paper has textured surfaces engineered to grip and hold pigment particles through multiple layers. The investment in proper paper transforms the pastel experience from frustrating to enjoyable. For absolute beginners testing whether they like pastels before investing, regular paper can work for initial exploration, but transition to proper pastel paper within your first few attempts.
What’s the difference between soft pastel paper and oil pastel paper?
Soft pastels require significant tooth (texture) to hold their chalk-like pigment through multiple layers. They work best on papers like Pastelmat, UART, or Canson Mi-Teintes with textured surfaces. Oil pastels, being oil and wax-based, need less tooth but require heavier paper weight (minimum 80 lb or 140 GSM) to handle the oil content without buckling. Mixed media paper or heavyweight drawing paper works well for oil pastels. While some papers work for both media, papers optimized for soft pastels (highly textured, lighter weight) differ from ideal oil pastel surfaces (heavier weight, moderate texture). Many pastel papers can handle both, but specialized surfaces exist for each medium.
Is expensive pastel paper worth it for beginners?
Not initially. Beginners learning basic techniques benefit more from abundant affordable paper like Canson Mi-Teintes ($15-20 for a 12-sheet pad) than expensive premium paper. Financial pressure from costly paper inhibits experimentation and learning. Once you’ve mastered basic techniques and want to create finished display pieces, investing in premium paper like Pastelmat becomes worthwhile — the superior layering and detail capability genuinely enhances results. The strategic approach uses cheap paper for practice (where mistakes are learning opportunities) and good paper for finished work. Start with a $15 Mi-Teintes pad; upgrade to $4-8 Pastelmat sheets when you’re ready to create portfolio pieces. The skill development matters more than paper quality initially.
How do I know what GSM I need?
GSM (grams per square meter) indicates paper weight and thickness. For soft pastels, 160 GSM is minimum for light work and sketches — papers like Canson Mi-Teintes at 160 GSM handle 2-3 layers adequately. For finished pieces with multiple layers, 300-360 GSM provides better durability and layering capability — papers like Pastelmat (360 GSM) or Colourfix (300 GSM) handle 10+ layers easily. Oil pastels need minimum 140 GSM due to oil content. Heavier paper (300+ GSM) feels more substantial, resists buckling, and handles vigorous techniques better. Beginners can start with 160 GSM; as you advance and layer more heavily, transition to 300+ GSM professional surfaces. Think of GSM like cardstock weight — higher numbers mean thicker, more durable paper.
Should I buy pads or individual sheets?
Beginners benefit from pads for convenience, built-in protection (crystal paper between sheets), and variety (assorted color packs). Pads cost slightly more per sheet but provide organization and portability. Intermediate to professional artists often prefer individual sheets for better value per square inch, ability to buy only needed colors and quantities, and access to larger sizes (19×25″ or 50x70cm). Individual sheets require storage solutions (flat files, portfolios, or boxes) but cost less overall. The hybrid approach works well: keep one pad for practice and convenience while buying individual sheets of premium paper for finished work. Make the transition from pads to sheets when you’re using paper regularly (multiple times per month) and want better cost efficiency.
Can you reuse or erase pastel paper?
Limited erasing is possible but pastel quickly fills the paper’s tooth, making complete removal difficult. Kneaded erasers work best for lifting pastel gently without damaging paper surface. Papers with deep tooth (Pastelmat, UART, Colourfix) allow more correction than papers with shallow tooth (Ingres, thin papers). However, heavy erasing damages paper surface and reduces remaining tooth, limiting future layering in that area. Professional approach: plan compositions carefully to minimize erasing needs, use light initial marks that don’t fill tooth, correct early mistakes rather than late ones. Some artists embrace the “can’t erase much” limitation as part of pastel’s character — it encourages decisive mark-making. You cannot “reuse” pastel paper in the sense of removing all pastel and starting over.
What is sanded paper and do I need it?
Sanded paper (like UART, Colourfix) has a gritty surface similar to very fine sandpaper that provides extremely high tooth. This aggressive texture can hold 10-20+ layers of pastel compared to 2-3 layers on regular pastel paper. Sanded paper creates smooth, velvety blending and allows extensive reworking. You don’t need sanded paper as a beginner — start with Canson Mi-Teintes or similar. As you advance and want to create highly detailed, heavily layered professional work, sanded paper becomes valuable. The trade-off: sanded paper wears down expensive pastels faster than smooth papers. It’s particularly popular for portrait work, wildlife art, and hyperrealistic pastel painting where extensive layering creates depth and richness. Test sanded paper once you’ve mastered layering on standard papers.
Why do pastel artists use colored paper instead of white?
Pastels are semi-transparent when applied lightly, meaning paper color shows through and becomes part of the artwork. Colored paper provides a mid-tone foundation, allowing artists to add both highlights (light colors) and shadows (dark colors) working from the middle value. This is faster and more intuitive than building up from white, which requires many layers to establish mid-tones. Colored paper also creates color harmony (the paper tone unifies the composition) and atmospheric effects (warm paper creates warm atmosphere, cool paper creates cool mood). Additionally, allowing colored paper to show through intentionally is part of pastel aesthetic — it adds texture and depth. White paper isn’t wrong, but colored paper typically makes the pastel process easier and more efficient.
Do I need to use fixative on pastel paper?
It depends on the paper. Modern high-tooth papers (Pastelmat, UART, Colourfix, Pastelbord) hold pigment mechanically without fixative — in fact, manufacturers recommend against using fixative on these surfaces. Papers with lighter tooth (Ingres, Canson Mi-Teintes with heavy layering) benefit from fixative stabilization between layers or as a final coat. The fixative debate is contentious: fixative darkens colors by 10-20% and can reduce vibrancy, but it prevents smudging and adds archival stability. Many professional artists avoid fixative entirely, relying on proper framing (under glass with a gap between artwork and glazing) for protection. Test fixative on scraps before applying to finished work. For high-tooth papers, skip fixative and use proper framing instead.
What’s the difference between Pastelmat and UART?
Both are premium professional surfaces but differ significantly in feel and characteristics. Pastelmat has a smooth, velvet-like surface that feels soft to touch and creates minimal texture in finished work. It’s excellent for fine detail and hyperrealistic effects. UART has a sanded, slightly gritty surface that provides even more aggressive tooth and creates a subtle grain texture in finished work. UART comes in 7 different grit levels (240-800) while Pastelmat comes in paper (360 GSM) and board (thicker) versions. Pastelmat offers 25+ colors; UART only cream and black. Both allow 10+ layers easily. Choose Pastelmat for smooth, detailed work with color variety; choose UART for maximum layering, textured effects, and when color limitation isn’t an issue. Many professionals use both depending on the project.
Is Canson Mi-Teintes good for beginners?
Yes, Canson Mi-Teintes is excellent for beginners and remains popular with professionals for certain applications. It’s affordable ($15-20 for a 12-sheet pad), widely available, and provides genuine pastel paper experience with sufficient tooth to learn techniques. The honeycomb texture on one side and fine grain on the reverse give two options to explore. Mi-Teintes handles 2-3 layers comfortably, allowing beginners to practice blending and layering without the expense of premium papers. The wide color selection helps beginners learn how paper color affects their work. Limitations appear when creating highly detailed, heavily layered professional work (use Mi-Teintes Touch, Pastelmat, or UART instead). For learning and practice, Mi-Teintes offers exceptional value and has been the beginner standard for decades.
What is velour paper and should I try it?
Velour paper has a fuzzy, velvety surface similar to fabric that creates uniquely soft, atmospheric effects in finished work. The high, fluffy texture automatically softens all marks, making sharp edges and fine details extremely difficult. Velour excels for specific subjects: short-haired animals (horses, dogs, seals) where the fuzzy texture mimics fur, soft atmospheric portraits, and dreamy landscapes. However, it’s expensive ($5-8 per sheet), difficult to erase, challenging to add whiskers or fine details to, and shows indentations easily. Velour isn’t suitable for beginners — it’s too limiting while learning. Try velour only after you’re comfortable with standard pastel papers and specifically want the soft, fuzzy effect for appropriate subjects. Most artists use velour occasionally for specific effects rather than as their primary surface.
Can I use Ampersand Pastelbord instead of paper?
Yes, Ampersand Pastelbord is an excellent alternative to paper, particularly for finished professional work. Pastelbord is a rigid hardboard panel with a clay and marble dust surface designed for pastels. Benefits include: no mounting needed before framing, extreme durability (won’t buckle or crease), holds 10+ layers easily, works with wet and dry media, and provides all-in-one support (surface and backing board combined). Drawbacks include higher cost than paper ($15-40 per panel vs. $4-8 per sheet), inability to resize (committed to panel size), and heavier weight for transport. Choose Pastelbord when you want rigid support, are creating finished work going directly to framing, work plein air (outdoor durability valuable), or dislike the mounting process. For practice and studies, paper remains more economical.
How many layers can different pastel papers hold?
Layering capability varies dramatically by paper type. Ingres and thin papers (100-130 GSM): 2-3 layers maximum before tooth fills completely. Canson Mi-Teintes (160 GSM): 2-3 layers comfortably, possibly 4 with careful technique. Daler Rowney Murano (160 GSM): 3-4 layers. Canson Mi-Teintes Touch (350 GSM): 5-7 layers easily. Pastelmat (360 GSM): 10+ layers, often described as “unlimited” by users. UART sanded paper: 10-20+ layers depending on grit (coarser = more layers). Art Spectrum Colourfix: essentially unlimited layering, extremely difficult to fill the tooth. Ampersand Pastelbord: 10-15+ layers. More layers allow greater depth, richer colors, more corrections, and more detailed work. Beginners typically use 2-4 layers; professional detailed work often uses 8-15 layers.
What paper works best for portraits?
Portrait paper choice depends on your style and detail level. For soft, gentle portraits with atmospheric quality: Sennelier La Carte or velour paper create beautiful soft effects. For detailed, realistic portraits with precise features: Pastelmat excels due to its smooth surface allowing fine detail with pastel pencils and numerous layers for subtle skin tones. For moderately detailed portraits at intermediate level: Canson Mi-Teintes Touch provides excellent balance of detail capability and affordability. For heavily textured, expressive portraits: UART or Colourfix sanded papers. Paper color matters significantly: warm grays, beiges, or tans work well for most skin tones, requiring less layering than white paper. Avoid papers with pronounced texture patterns (Mi-Teintes honeycomb, strong laid lines) for realistic portraits, as texture competes with skin rendering. Most professional portrait artists use Pastelmat or Mi-Teintes Touch.
Where can I buy sample packs to test different papers?
Jackson’s Art Supplies (jacksonsart.com) offers the most comprehensive pastel paper sample packs, typically containing 8-12 different papers in small formats (around 6×9″ or 8×10″). These packs usually include professional papers (Pastelmat, UART, Colourfix, Mi-Teintes Touch) alongside standard options, costing approximately $25-40. Blick Art Materials (dickblick.com) also offers sample packs. Some manufacturers (Clairefontaine) sell sample packs of their color ranges. Local art stores sometimes create custom sample packs. Sample packs represent excellent value — testing a $7 Pastelmat sheet on a small scale costs $2-3 in a sample pack versus buying full sheets of multiple papers ($40-60). Create the same simple subject (sphere, gradient study) on each paper in the sample pack to directly compare performance, helping you identify which papers suit your technique before investing in quantity.
Key Takeaways: Choosing Your Perfect Pastel Paper
Start affordable, upgrade strategically: Begin with Canson Mi-Teintes or Strathmore 400 ($15-20) to learn techniques without financial pressure. Upgrade to Mi-Teintes Touch ($2-4 per sheet) for finished intermediate work. Invest in premium surfaces (Pastelmat, UART, Colourfix at $4-8 per sheet) when creating professional pieces.
Understand tooth determines everything: More tooth means more layers possible, better pigment grip, and more working capability. Less tooth means easier blending but limited layers. Match tooth level to your technique — beginners need moderate tooth, professionals often want high tooth for extensive layering.
Match paper to your pastels: Soft pastels need significant tooth (Pastelmat, UART, Colourfix, Mi-Teintes). Oil pastels need heavyweight paper with moderate texture (mixed media paper, Pastelbord). Using the wrong paper for your medium creates frustration.
Budget smartly across skill levels: Beginners: $15-30 total. Intermediates: $30-75 for mixed practice and finished work paper. Professionals: $100-300+ monthly as business expense. Always maintain both practice paper and presentation paper.
Test before committing: Sample packs ($25-40) from Jackson’s Art or similar retailers let you test expensive papers inexpensively. Create the same subject on different papers to identify which suits your style.
Colored paper accelerates workflow: Mid-tone colored paper (grays, beiges, earth tones) provides instant mid-value, reducing layering needed. Choose paper color to complement your subject — warm grays for portraits, blue-gray for landscapes, match animal colors for wildlife.
Premium papers genuinely improve results: For finished work, Pastelmat, UART, and Colourfix justify their cost through superior layering (10+ layers vs. 2-3), better detail capability, and professional results. The difference is real, not just marketing.
Format matters for workflow: Beginners benefit from pads (convenience, protection). Regular users save money with individual sheets. Professionals use boards for finished work going to clients or galleries.
Fixative often unnecessary: Modern high-tooth papers (Pastelmat, UART, Colourfix) don’t need fixative — proper framing provides protection without color darkening. Use fixative only on lighter papers (Ingres, heavily layered Mi-Teintes) or when paper specifically benefits from stabilization.
Paper is a tool, not a barrier: Don’t let paper choice paralyze you. Even “wrong” paper teaches valuable lessons. Start with any proper pastel paper and adjust as you learn your preferences.
Next Steps
For absolute beginners:
- Purchase one Canson Mi-Teintes pad or Strathmore 400 pad ($12-20)
- Create 5-10 practice pieces exploring blending, layering, mark-making
- If you enjoy pastels, buy a sample paper pack or individual sheets of Mi-Teintes Touch
- Continue learning while testing which papers you prefer
For intermediate artists:
- If you haven’t already, try Mi-Teintes Touch for your next finished piece
- Purchase a sample pack including Pastelmat, UART, and Colourfix
- Test premium papers on small compositions to identify favorites
- Build inventory of your preferred papers for regular work
For advancing to professional level:
- Commit to a primary professional surface (most choose Pastelmat)
- Buy in quantity (20-50 sheets) for better pricing and consistent inventory
- Maintain alternative surfaces (UART, Colourfix) for variety
- Keep economical paper for studies and planning
- Factor paper cost into artwork pricing (target 5-15% of sale price)
Join the community: Online pastel groups, forums, and social media communities provide invaluable knowledge sharing. Artists regularly discuss paper preferences, share comparison images, and offer advice. Learning from others’ experiences accelerates your paper education.
Remember: The best pastel paper is the one that helps you create the art you envision. Technical specifications matter, but personal preference and working style matter more. Test, experiment, and find what works for you.
Match your paper to your sticks: see our guides to the best soft pastels and the best oil pastels. Beginners can start with our essential art supplies for beginners.