Your spare bedroom is smaller than most walk-in closets. Your “home office” is actually the kitchen table. And every time you try to create, you’re moving yesterday’s projects just to find a place to work.
Sound familiar?
Here’s the truth most artists won’t tell you: Vincent van Gogh created some of his most famous works in a cramped 10×12 foot room in Arles. Georgia O’Keeffe painted her early masterpieces in a converted chicken coop. Frida Kahlo’s studio? A tiny corner of her bedroom during her bedridden years.

The myth that you need a sprawling, Instagram-worthy studio to create meaningful art is just that—a myth.
In the next 15 minutes, you’ll discover how to transform any 100-square-foot space into a fully functional, inspiring art studio that actually enhances your creativity instead of cramping it. Whether you have $300 or $2,500 to spend, whether you’re renting or own your space, this guide will show you exactly how to make it happen.
Ready to stop making excuses and start making art?
The 100 Square Feet Reality Check: What You’re Actually Working With
Before we dive into pretty Pinterest boards and dream studio setups, let’s get brutally honest about your space constraints.
Measuring Your Space Like a Pro

First things first: grab a measuring tape and actually measure your space. Don’t guess—those estimates are usually wrong by 20-30%.
Here’s the “art studio footprint” formula I use with every client:
Usable Square Footage = Total Room Size – (Door Swing Areas + Walking Paths + Fixed Obstacles)
For example:
- 10×10 room = 100 sq ft total
- Subtract door swing area = 95 sq ft
- Subtract 2-foot walking path around perimeter = 71 sq ft
- Subtract built-in closet = 63 sq ft usable
Suddenly, your “100 square foot” studio is actually 63 square feet of workable space. This isn’t meant to discourage you—it’s meant to help you plan realistically.
Pro tip: Use a free floor plan app like MagicPlan or RoomScan to create an accurate layout. You’ll refer to this constantly during setup.
The Non-Negotiables vs. Nice-to-Haves
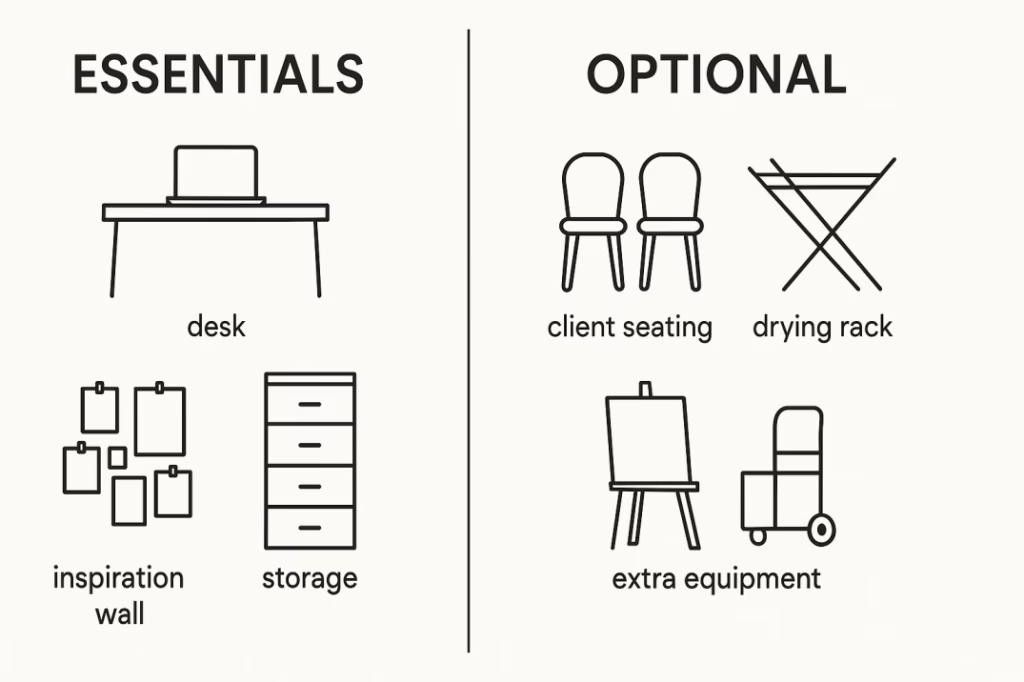
In 100 square feet, every inch matters. Here’s how I prioritize space allocation:
The Big Three (Non-Negotiables):
- Work Surface – 16-24 sq ft minimum
- Storage System – 10-15 sq ft floor space + vertical
- Inspiration/Reference Area – 8-12 sq ft wall space
The Wish List (Nice-to-Haves):
- Separate drying/curing area
- Client seating area
- Multiple work stations
- Large equipment storage
The secret to small studio success? Accept that you can’t have everything, but you can have everything you truly need.
The Three Pillars of Small Studio Success
After designing dozens of micro-studios, I’ve identified three principles that separate cramped disasters from creative havens.
Pillar #1: Vertical is Your Best Friend
The rookie mistake: Thinking horizontally in a small space.
The pro move: Building up, not out.
Here’s what going vertical looks like in practice:
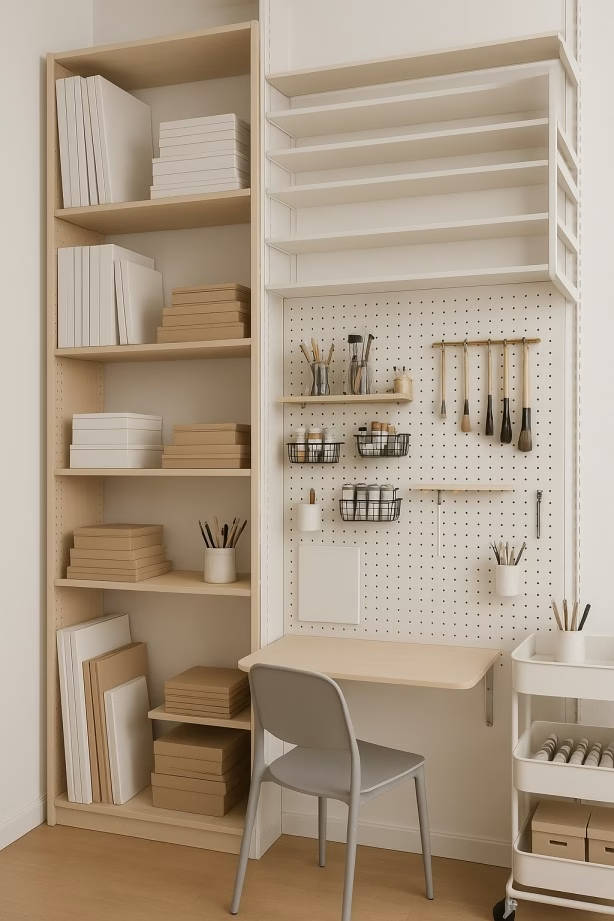
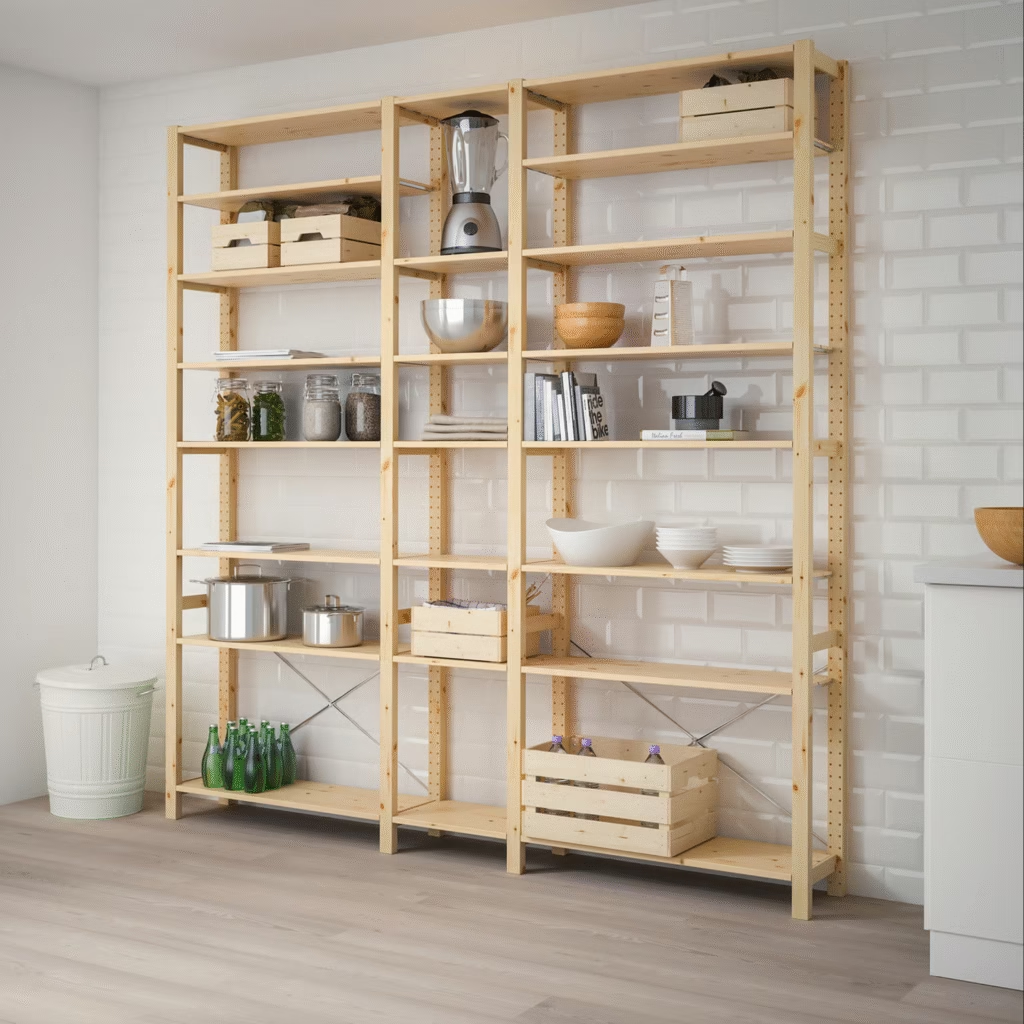
Floor-to-ceiling storage solutions transform dead wall space into organized supply storage. The IKEA ALGOT system ($89-150) is my go-to recommendation because it’s modular and rental-friendly.
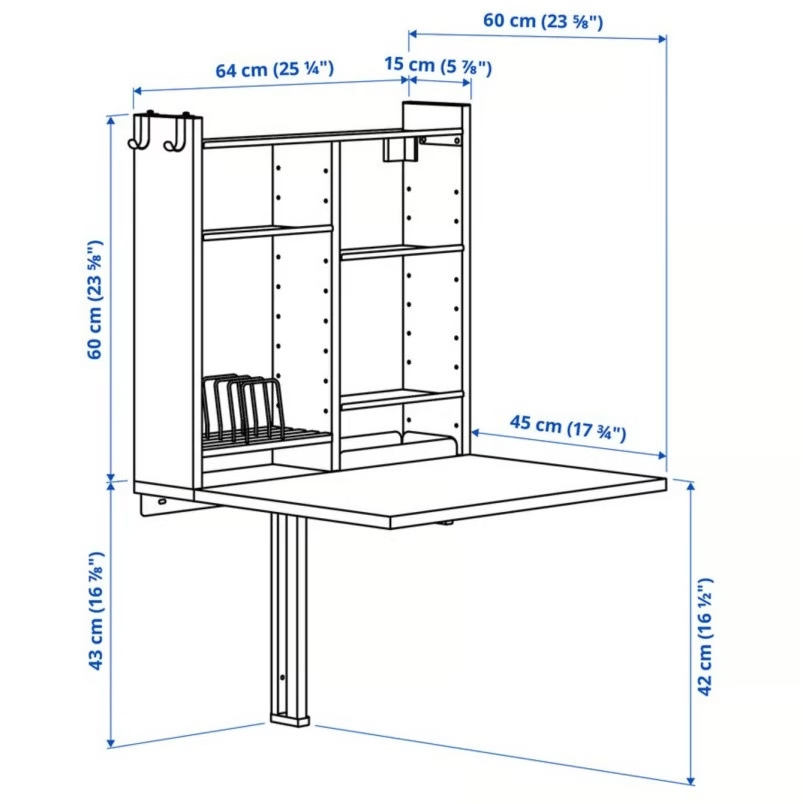
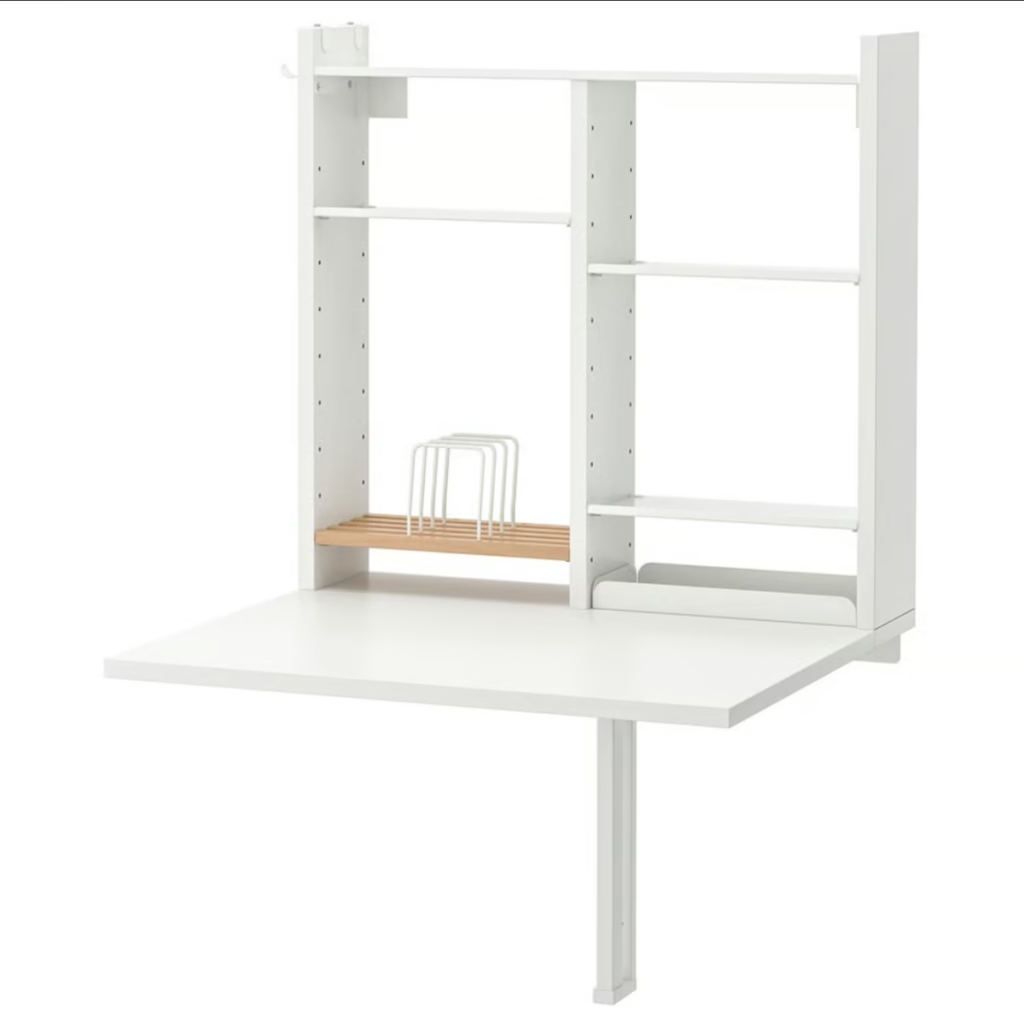
Wall-mounted work surfaces that fold down give you workspace when you need it and floor space when you don’t. The IKEA NORBERG wall-mounted drop-leaf table ($35) holds up to 33 lbs—perfect for drawing, small paintings, or laptop work.
Pegboard systems keep frequently used tools visible and accessible. A 4×4 foot pegboard section can hold $500+ worth of art supplies while taking up less than 2 square feet of floor space.
Product Spotlight: Best Vertical Storage Under $100
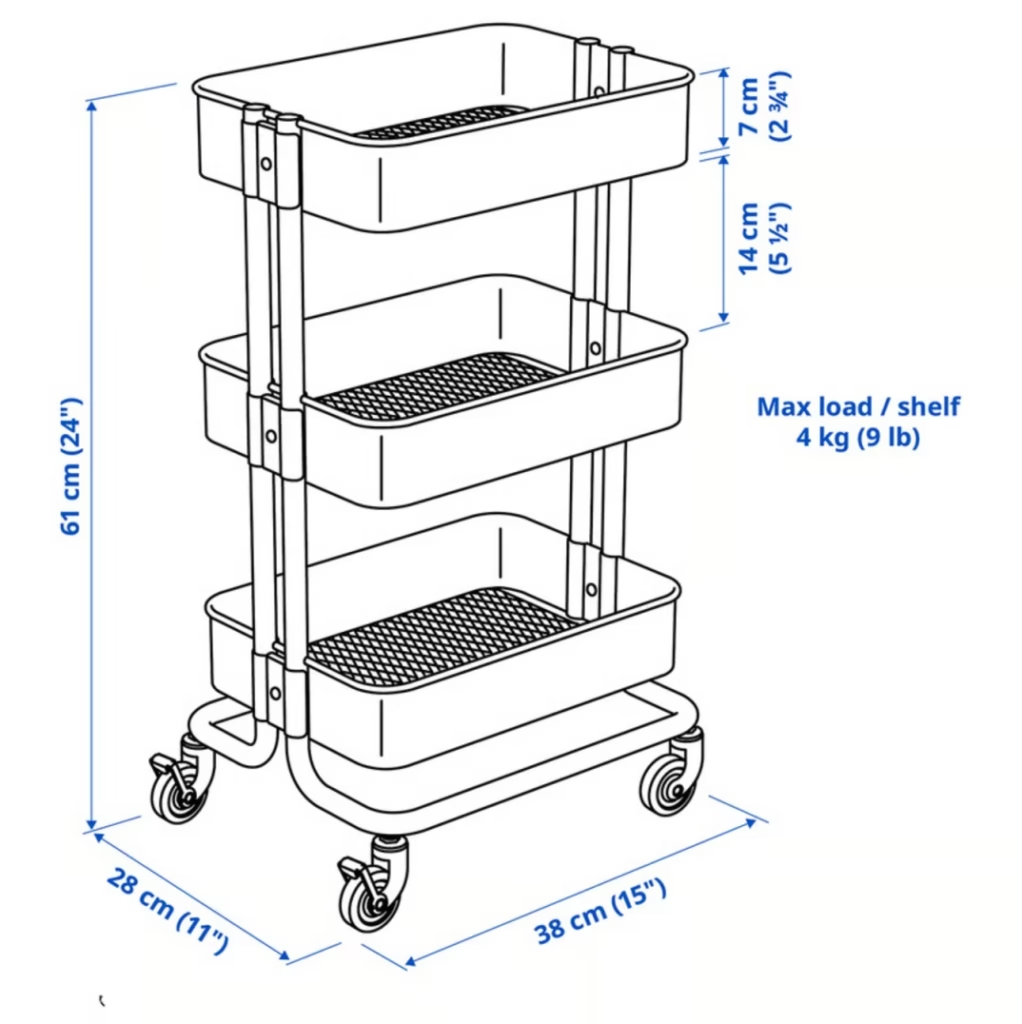
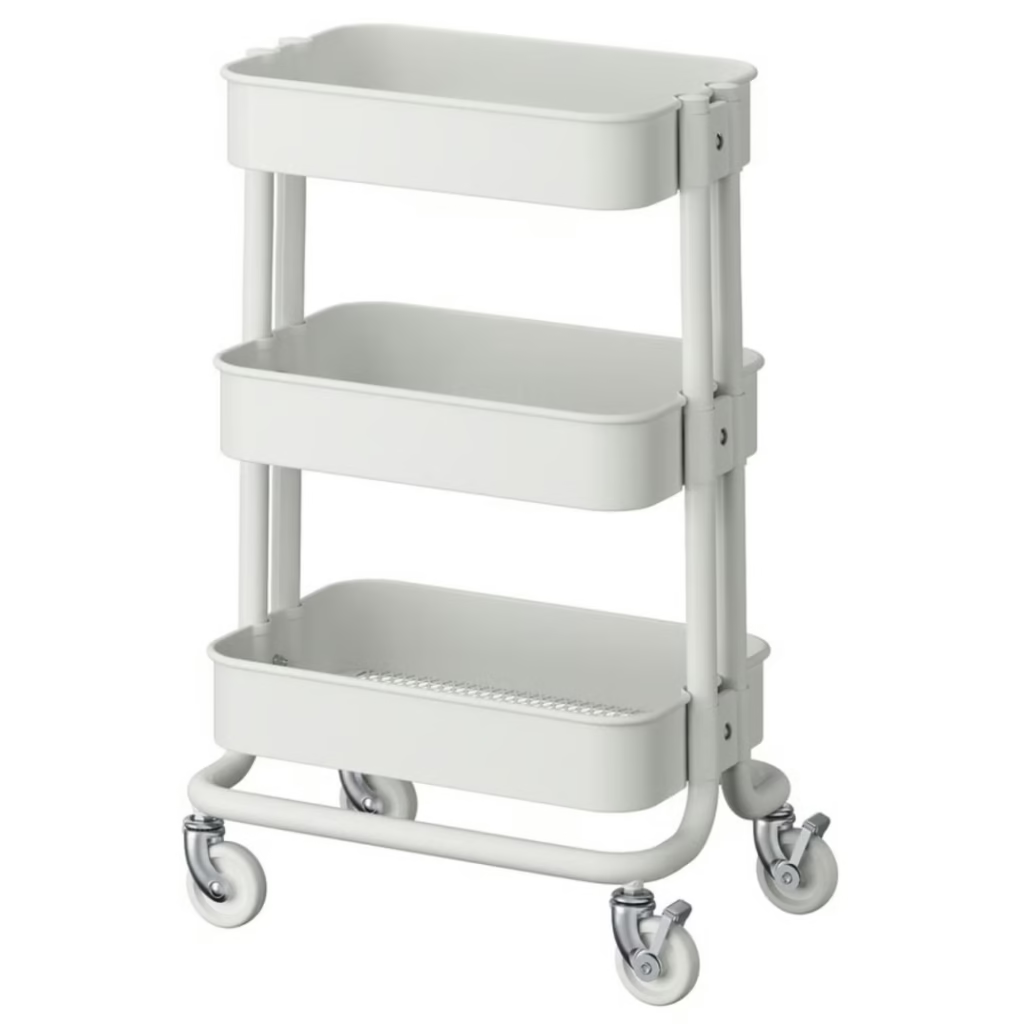
IKEA RÅSKOG rolling cart ($49) – 3 tiers, moves where you need it
Amazon pegboard starter kit ($67) – includes hooks, shelves, and cups

IKEA IVAR shelf unit ($80) – solid wood, customizable heights
Pillar #2: Multi-Functional Everything
In a small studio, furniture that serves only one purpose is a luxury you can’t afford.
Ottoman storage seats that become light boxes for photography or tracing. The SONGMICS Storage Ottoman ($45) supports 660 lbs as seating and holds 90 liters of supplies.

Desks that transform into easels by adding a simple wooden easel attachment. The IKEA LINNMON/ADILS desk combo ($35) becomes a professional easel setup with a $25 desktop easel.
Storage that doubles as room dividers creates zones in your studio without permanent walls. A tall bookshelf positioned perpendicular to the wall creates a “supply zone” behind your work area.
Pillar #3: Light It Right (Without Breaking the Bank)
Poor lighting kills creativity faster than lack of space. But you don’t need $2,000 in professional equipment to get pro-quality light.
Natural light maximization tricks:
- Position your work surface perpendicular to your window, not facing it (prevents glare and shadows)
- Hang a large mirror opposite your window to bounce light around the room
- Use light-colored walls and surfaces to amplify existing light
LED solutions for under $200:
Main work light: DEWALT 5000-lumen LED work light ($89)

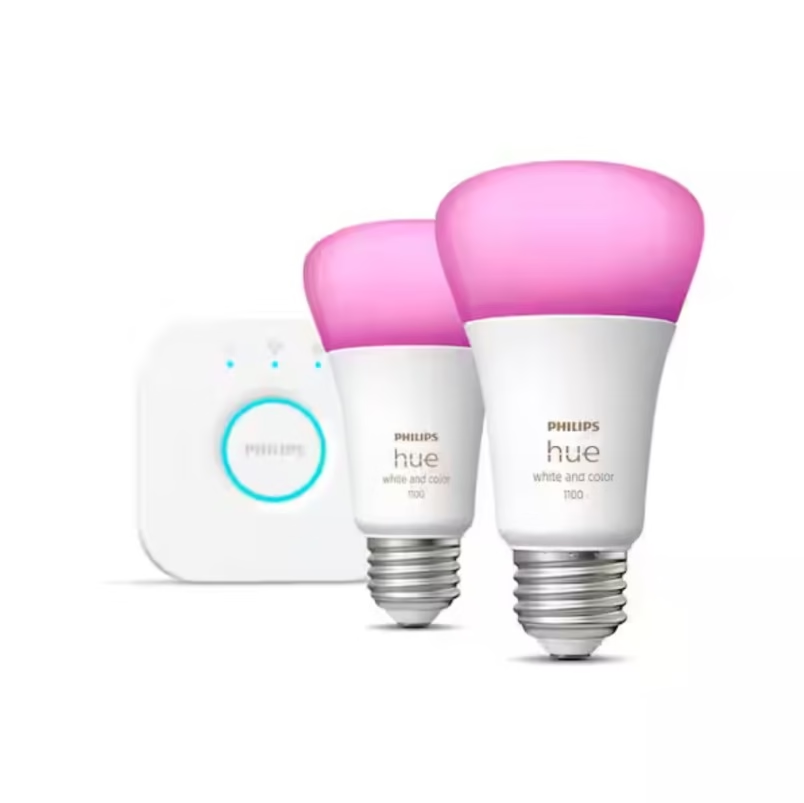
Ambient lighting: Philips Hue color-changing bulbs ($45 each, need 2-3)
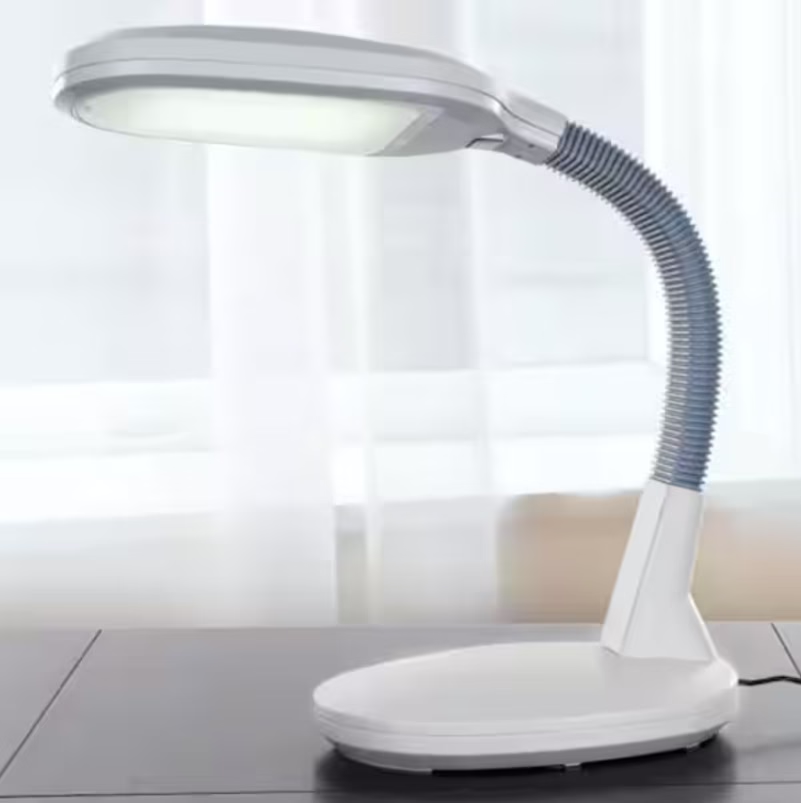
Task lighting: Adjustable desk lamp with daylight LEDs ($35)
Color temperature matters: 5000K-6500K (daylight) for detailed work, 3000K (warm white) for general ambiance. Avoid mixing color temperatures in the same space.
Three Complete Studio Setups by Budget
Let’s get specific. Here are three complete studio setups I’ve designed and tested, with exact product recommendations and prices.
The Minimalist Setup ($300-500)
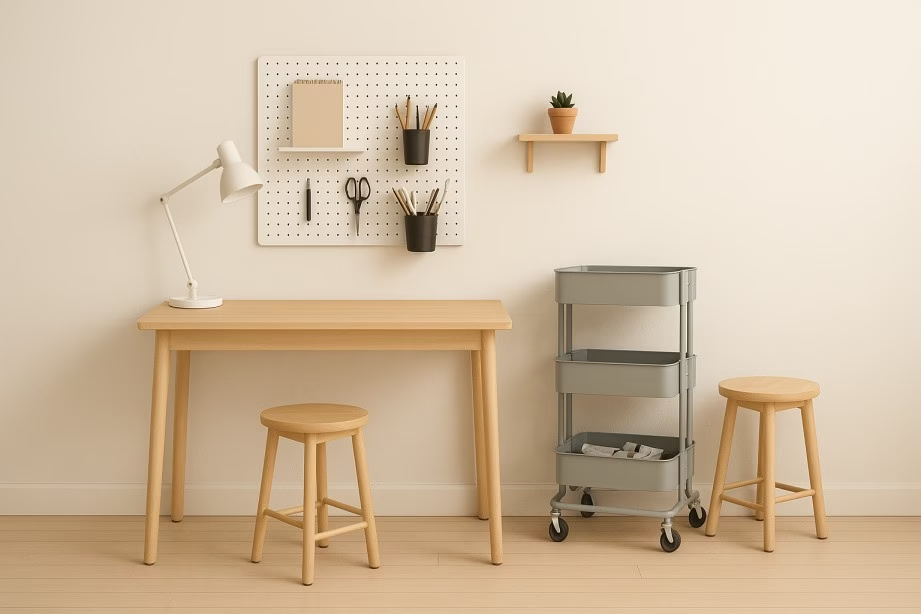
Perfect for: Students, occasional creators, or anyone testing the waters
Shopping List:
- IKEA LINNMON/ADILS desk (47×24″): $35
- IKEA RÅSKOG rolling cart: $49
- Pegboard starter kit (Amazon): $67
- IKEA FROSTA stools (2): $50
- Basic LED desk lamp: $35
- Storage bins (6-pack): $24
- Command strips and hooks: $20
- Total: $280
The IKEA Hack Secret: Transform the RÅSKOG cart into a mobile supply station by adding magnetic containers to hold small supplies. Cost: $15 in magnets and containers.
Layout Strategy: Position the desk against the longest wall, pegboard above it, RÅSKOG cart to the right for dominant-hand access. Use one FROSTA stool for seating, the other as a side table/supply holder.
What You Can Create: Drawing, watercolors, digital art, small mixed media projects, jewelry making, crafts
The Balanced Creator ($800-1200)

Perfect for: Serious hobbyists, emerging professionals, part-time artists
Shopping List:
- IKEA BEKANT desk (63×31″): $150
- IKEA ALGOT wall storage system: $180
- Professional pegboard system: $120
- Ergonomic task chair: $180
- DEWALT LED work light: $89
- Rolling storage cabinet: $150
- Cork board inspiration wall: $45
- Miscellaneous organization: $85
- Total: $999
The Game-Changer: The BEKANT desk gives you enough space for larger projects while the ALGOT system provides serious storage without eating floor space.
Layout Strategy: L-shaped configuration with the desk as the base, ALGOT system wrapping around two walls. Creates distinct zones for active work, storage, and inspiration.
What You Can Create: Large paintings (up to 24×36″), professional digital work, multi-step projects, small sculptures, pottery painting
The Dream Micro-Studio ($1500-2500)
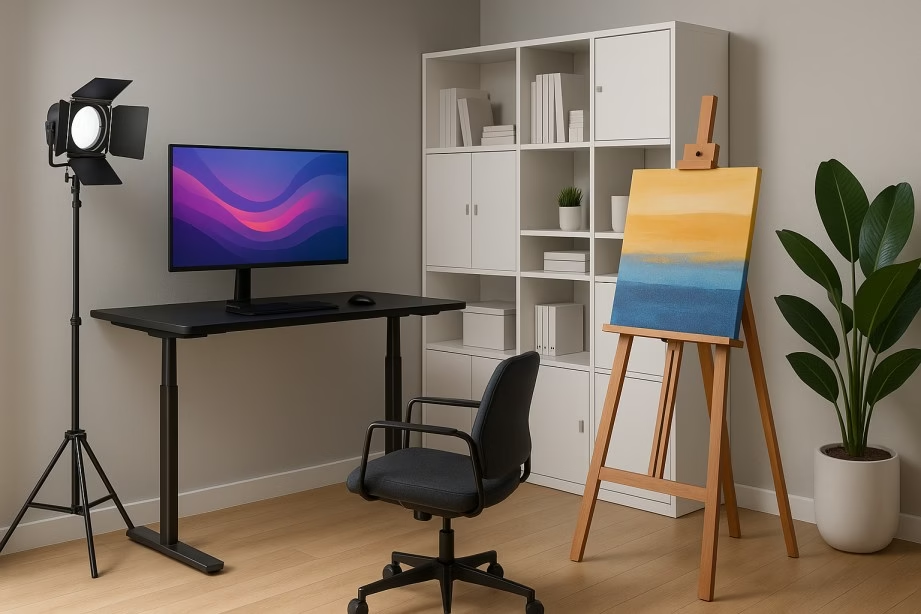
Perfect for: Professional artists, serious creators, those making income from art
Shopping List:
- Height-adjustable desk (Jarvis or similar): $450
- Professional modular storage system: $400
- Multiple-position easel: $180
- Herman Miller Sayl chair: $295
- Professional lighting kit: $300
- Climate control additions: $200
- High-end organization solutions: $275
- Professional pegboard with accessories: $180
- Inspiration and mood board system: $120
- Total: $2,400
The Professional Touch: Height-adjustable desk accommodates different projects and ergonomic needs. Professional lighting eliminates all creative constraints.
Layout Strategy: Flexible zones that can be reconfigured based on project needs. Everything on wheels or adjustable.
What You Can Create: Professional-quality work in any medium, client meeting space, photography setup, large-scale projects, mixed media installations
Organization Systems That Actually Work
Pretty organizers mean nothing if your system falls apart after two weeks. These methods have been tested by real artists in real small spaces.
The “Marie Kondo” Method for Art Supplies
The KonMari principle applied to art supplies: Every item should have a specific home, and everything should be visible.
Step 1: Categorization Strategy Group supplies by frequency of use, not by type:
- Daily Use: Pencils, erasers, main paints, brushes – eye level, arms reach
- Weekly Use: Specialty colors, rulers, blending tools – easy access, labeled containers
- Monthly Use: Experimental supplies, large tools – higher shelves, clear bins
- Seasonal: Holiday projects, infrequently used mediums – highest storage or closet
Step 2: Visibility Systems
- Clear containers for everything (no opaque boxes that become “mystery bins”)
- Labels on front and top of containers
- Shadow boards for tools (outline each tool on pegboard)
- Color-coded labels for different mediums
Step 3: Rotation Schedules for Seasonal Supplies Store only current season’s specialty supplies in main studio. Keep a “supply closet” box system for rotating seasonal items every 3 months.
Digital Organization for Physical Constraints
When physical space is limited, go digital for planning and tracking.
Inventory Apps for Supplies:
- Sortly (Free/$5/month): Photo-based inventory system
- Art Supplies Tracker ($2.99): Purpose-built for artists
- Airtable (Free): Custom database for advanced users
Project Planning Software:
- Notion (Free): All-in-one workspace for project planning, reference storage, and inventory
- Trello (Free): Kanban-style project management
- Pinterest (Free): Digital inspiration boards that don’t take wall space
Virtual Inspiration Boards: Replace physical mood boards with digital versions:
- Milanote ($9.99/month): Designed for creative projects
- PureRef (Free): Floating reference image viewer
- Eagle ($29.95): Image organizer for reference photos
Medium-Specific Micro-Studio Setups

Different art forms have different space requirements. Here’s how to optimize your 100 square feet for specific mediums.
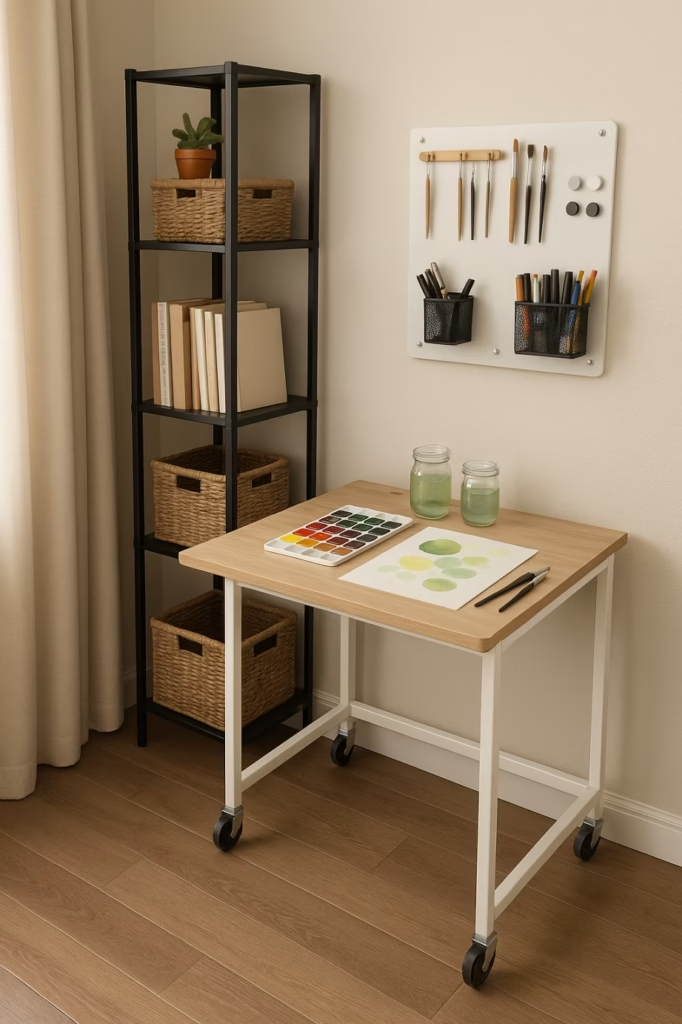
The Painter’s Corner
Challenge: Easels eat space, paints need organization, canvases need storage
Solutions:
- Easel alternatives: Wall-mounted easel arm ($45) folds flat when not in use
- Palette storage: Magnetic palette holder on pegboard, stays-wet palette for acrylics
- Canvas storage: Vertical slot system behind pegboard (DIY with wooden slats, $25)
- Brush care: Water containers that clamp to desk edge, brush holders that hang
Ventilation hack for small spaces: Window fan + activated carbon filter ($75 total) creates safe environment for oil painting
Floor protection: Vinyl floor cloth ($30) protects floors and defines work area
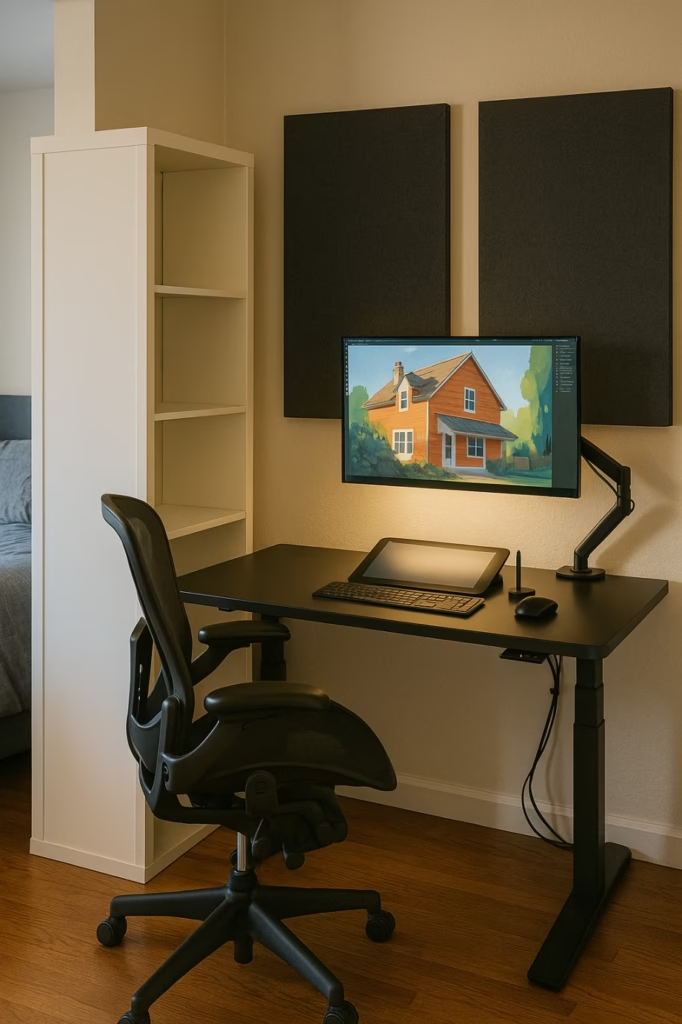
The Digital Artist’s Den
Challenge: Multiple monitors, cable management, ergonomic concerns in tight space
Solutions:
- Monitor setup: Single 32″ 4K monitor instead of dual monitors saves 40% desk space
- Cable management: Under-desk cable tray + adhesive cable clips
- Ergonomics: Monitor arm ($89) frees desk space and improves neck position
- Graphics tablet placement: Sliding keyboard tray repurposed for tablet ($45)
The heat problem: Digital equipment generates heat in small spaces. USB-powered desk fan ($25) provides targeted cooling.
Eye strain prevention: Bias lighting behind monitor ($20) reduces eye fatigue during long sessions.
The Mixed-Media Maker
Challenge: Multiple tool sets, safety concerns, quick material changes
Solutions:
- Tool organization: Rolling cart with removable bins for each medium
- Safety station: Designated corner with ventilation, safety equipment, disposal containers
- Quick-change systems: Modular work surface covers for different mediums
- Material storage: Vertical file system for papers, fabrics, flat materials
The cross-contamination solution: Color-coded cutting mats for different materials ($60 for set of 4).
Safety first: Fire extinguisher, first aid kit, proper ventilation fan are non-negotiables for mixed media work.
Before & After: Real Small Studio Transformations
Let me share three real transformations I’ve guided (with client permission and photos).
Case Study 1: Sarah’s NYC Apartment Closet → Watercolor Studio
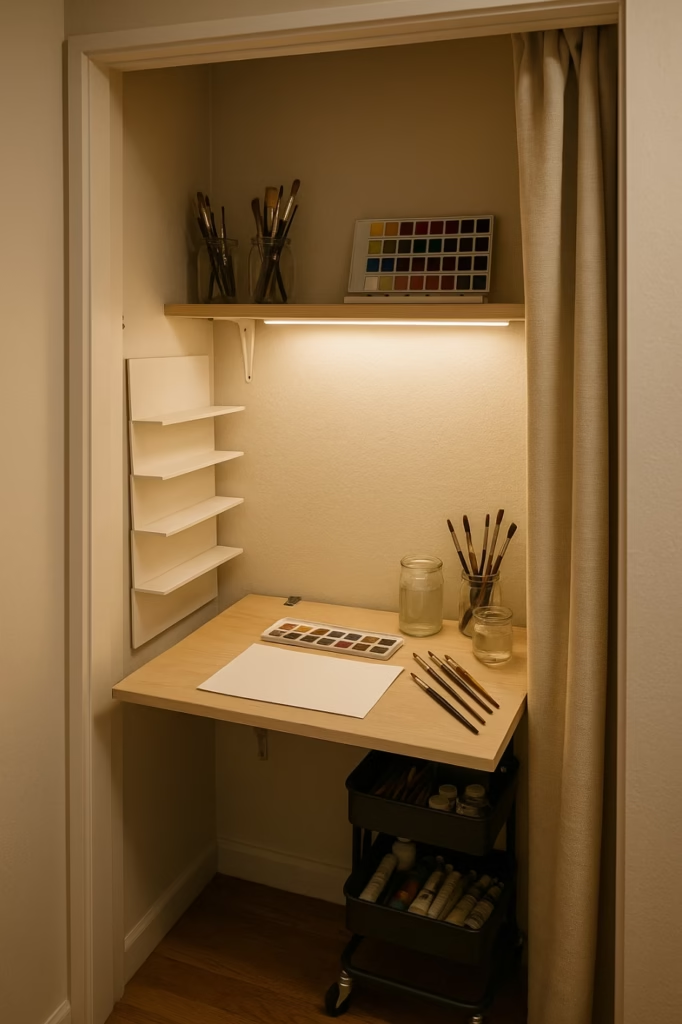
The Challenge: 6×8 foot closet, no windows, shared apartment
Before: Stuffed with random storage, poor lighting, no work surface
The Solution:
- Removed closet doors, added curtain for privacy ($25)
- Wall-mounted fold-down desk ($85)
- Battery-powered LED strip lights ($45)
- Vertical paper storage system ($60)
- Rolling cart that slides under desk ($49)
Total Investment: $264
The Results: Sarah now paints daily instead of monthly. Her watercolor skills improved dramatically with consistent practice space. She’s sold 12 pieces in 6 months.
Key Lesson: Natural light isn’t mandatory with good LED lighting.
Case Study 2: Mike’s Suburban Bedroom Corner → Digital Art Workspace
The Challenge: 8×10 corner of bedroom, needed to maintain bedroom function
Before: Cluttered corner with old computer desk, poor ergonomics
The Solution:
- Room divider bookshelf to create “studio zone” ($120)
- Adjustable-height desk ($200)
- Monitor arm and ergonomic setup ($150)
- Sound absorption panels disguised as art ($80)
- Organized cable management ($35)
Total Investment: $585
The Results: Mike’s freelance illustration income increased 300% after creating consistent work space. Better ergonomics eliminated back pain during long projects.
Key Lesson: Visual separation helps maintain work-life balance in shared spaces.
Case Study 3: Lisa’s Rental Apartment → Temporary/Moveable Setup
The Challenge: Strict rental restrictions, frequent moves, 100% removable solutions
Before: Kitchen table setup, supplies in boxes, inconsistent work environment
The Solution:
- Everything on wheels or easily moveable
- Command strips and damage-free hanging ($40)
- Modular shelving that disassembles ($160)
- Rolling desk that doubles as kitchen island ($180)
- Magnetic and removable organization ($75)
Total Investment: $455
The Results: Setup moves with Lisa to new apartments in 2 hours. Landlords never know there was a studio. Art practice remained consistent through 3 moves.
Key Lesson: Rental restrictions don’t have to limit creativity with the right approach.
Maintaining Creativity in Confined Spaces
Small spaces can actually enhance creativity—if you understand the psychology and design accordingly.
The Psychology of Small Spaces
Color psychology for cramped rooms:
- Light colors expand perceived space, but don’t go all-white (causes eye strain)
- Monochromatic color schemes create flow and perceived space
- One accent wall can add depth without overwhelming
Mirrors and visual expansion tricks:
- Large mirror doubles perceived space instantly
- Mirrored backsplash behind work area adds depth
- Avoid multiple small mirrors (creates chaos)
Inspiration walls that don’t overwhelm:
- Use 60% of available wall space maximum
- Group inspiration by project or theme
- Rotate inspiration monthly to prevent visual fatigue
Workflow Optimization
The “Mise en Place” Approach for Artists: Borrowed from professional kitchens, this means “everything in its place.”
Before starting any project:
- Clear entire work surface
- Gather all needed supplies
- Arrange supplies in order of use
- Remove everything not needed for current project
Session Preparation Routines:
- 5-minute setup routine for each medium
- Consistent placement of commonly used items
- End-of-session cleanup checklist
Quick Setup/Breakdown Systems:
- Project boxes for works-in-progress
- Supply caddies that move with you
- Standardized cleanup routine (never takes more than 10 minutes)
Common Mistakes (And How to Avoid Them)
Learn from others’ expensive mistakes.
The Overcrowding Trap
The mistake: Trying to fit everything you own into your studio space.
The reality check: You use 20% of your supplies 80% of the time.
The solution:
- Keep only active project supplies in studio
- Rotate supplies seasonally
- Store bulk supplies elsewhere
- If you haven’t used it in 6 months, it goes in storage
Ignoring Ergonomics
The mistake: Accepting poor posture and discomfort as “part of the artistic struggle.”
The health cost: Back pain, neck strain, carpal tunnel, eye strain.
The solution:
- Invest in proper seating (worth 20% of total budget)
- Position monitors at eye level
- Use adjustable surfaces when possible
- Take breaks every 45 minutes
Inadequate Ventilation Planning
The mistake: Assuming small spaces don’t need ventilation planning.
The danger: Toxic fumes concentrate quickly in small spaces.
The solution:
- Window fan for air exchange ($45)
- Activated carbon filter for chemical absorption ($30)
- Air purifier with VOC filter for oil paints, solvents ($150)
- Never compromise on safety for space savings
Future-Proofing Your Small Studio
Your needs will evolve. Plan for growth without starting over.
Modular Systems That Grow With You
Choose furniture and storage that:
- Disassembles and reconfigures easily
- Connects to additional units
- Serves multiple functions
- Moves to larger spaces seamlessly
Examples:
- IKEA ALGOT system (adds components infinitely)
- Modular desk systems that expand
- Rolling carts that stack and combine
Rental-Friendly Modifications
Damage-free solutions:
- Command strips (follow weight limits religiously)
- Tension rods for hanging storage
- Removable wallpaper for inspiration walls
- Freestanding room dividers
Document everything: Take photos before and after installation to prove no damage at move-out.
When to Invest vs. DIY
Invest in:
- Lighting (affects everything you create)
- Seating (affects your health)
- Primary work surface (affects work quality)
- Safety equipment (affects your life)
DIY is fine for:
- Organization solutions
- Decorative elements
- Storage containers
- Non-load-bearing modifications
Frequently Asked Questions
What’s the minimum space needed for an art studio? You can create a functional studio in as little as 25 square feet (5×5 area). The key is vertical organization and multi-functional furniture. I’ve helped artists create productive spaces in closets, corners, and even large cabinets.
How do I set up an art studio in a rental apartment? Focus on damage-free solutions: Command strips, tension rods, freestanding furniture, and removable storage systems. Everything should disassemble and move easily. Document your space before modifications and keep all original hardware.
What art supplies are essential for a small studio? Focus on versatile, multi-use supplies: pencils, basic acrylic paints, brushes that work for multiple mediums, sketchbooks, and erasers. Buy quality basics before quantity. A $200 set of good supplies beats $200 worth of cheap supplies every time.
How much should I budget for a small home studio? Budget 3 tiers: $300-500 for basics, $800-1200 for comfort and functionality, $1500-2500 for professional setup. Start with tier 1 and upgrade over time as you understand your specific needs.
Can I have multiple art mediums in 100 square feet? Absolutely, with smart organization. Use modular storage systems, quick-change work surfaces, and designated zones for each medium. The key is having efficient setup/breakdown routines for each medium.
How do I manage ventilation in a small art space? Install a window fan for air exchange, use an air purifier with VOC filters, and consider portable fume extractors for high-fume mediums. Never work with solvents or oil paints in unventilated spaces, regardless of size.
Your Small Studio Success Starts Now
Here’s what we’ve covered: Small spaces don’t limit creativity—they focus it. The three pillars (vertical thinking, multi-functional furniture, proper lighting) transform any 100-square-foot space into a productive studio. Whether you have $300 or $2,500, you can create a space that enhances rather than hinders your artistic practice.
The most important thing? Start with one corner. Pick your budget tier, get the essentials, and begin creating. Your studio will evolve as you do.
Your challenge: Choose one element from this guide and implement it this week. Set up your first work zone, install your first piece of vertical storage, or simply measure and plan your space properly.
The art world needs what you’re creating. Don’t let space constraints delay it any longer.
Ready to design your perfect small studio? Download my complete Small Studio Setup Kit below—it includes printable measurement guides, budget-specific shopping lists, floor plan templates, and organization labels to get you started immediately.
Remember: Van Gogh’s room was 10×12 feet. Yours can be smaller and still create something beautiful.